ADS-B
Veronte is compatible with:
Sagetech
uAvionix
ADS-B Transceiver ping 1090/1090i
ADS-B Transceiver ping 2020/2020i
ADS-B Receiver ping Rx
The configuration displayed below is for an ADS-B.
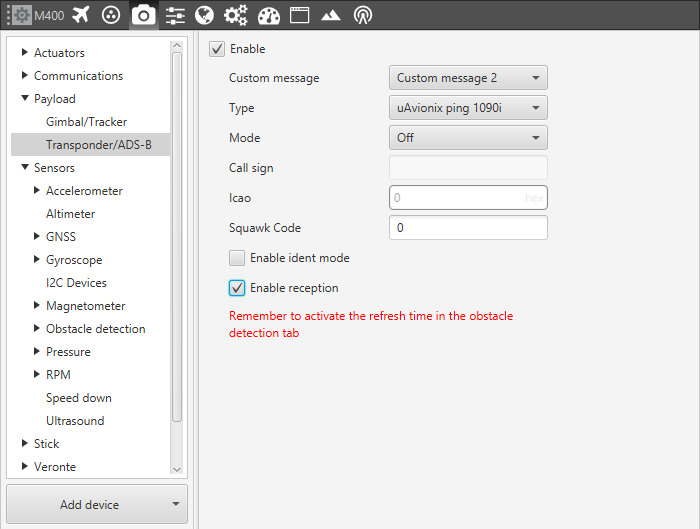
The first step to configure it is to go to Device – Payload – Transponder/ADS-B and check the enable button. Once there, select the Custom message to be used for the information exchange, since it will automatically be filled with the information that the ADS-B needs.
Choose the model already mentioned (uAvionix ping20S)
Switch to the desired Mode
OFF: Transponder switched off
STANDBY: Transponder will not respond to interrogation.
ON: Replies to interrogations with 4-digit squawk code.
ALT: Replies to interrogation with altitude information.
1090ES: ADS-B transmit is always enabled when a 6-digit ICAO code is entered.
Enable Ident Mode: UAV identification under ATC request (only available for ON and ALT modes)
Introduce the Squawk Code provided.
Enable reception.
There is an example configuration in the following picture from uAvionix ping 1090/1090i.

ADS-B Configuration Parameters
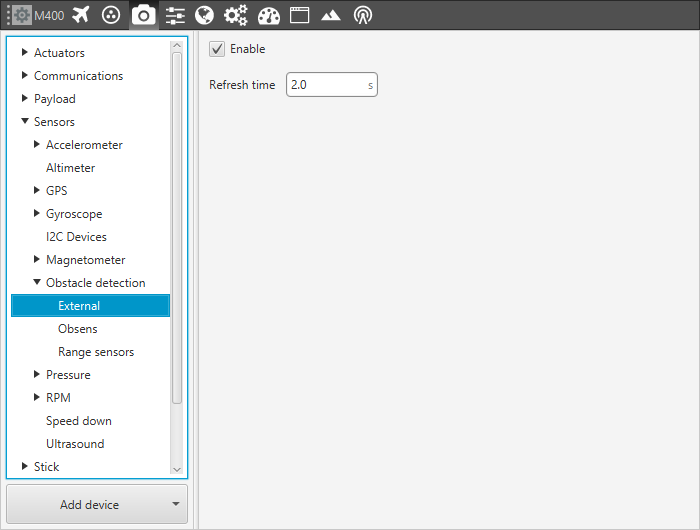
The last step you need to do is to enable the External Object Detection in Devices – Sensors – Obstacle Detection.

External Obstacle Detection Menu
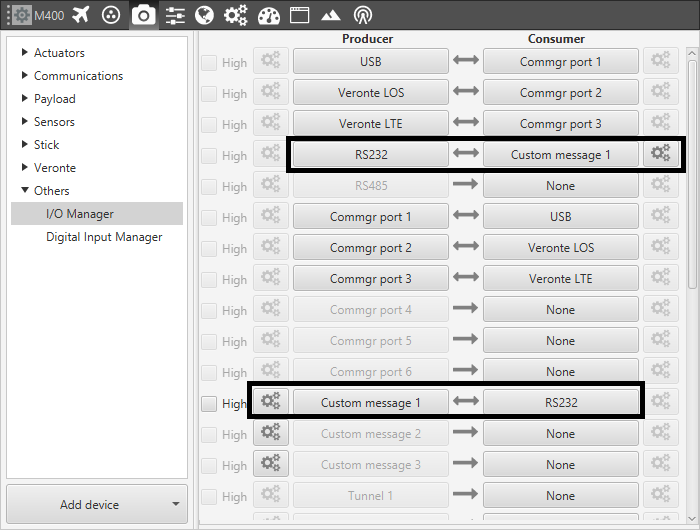
Once the transponder is configured, go to Devices – Others – I/O Manager. Create a bind-bidirectional communication RS232/RS485 (in the example, through RS232) and assign to it the Custom Message selected before.

Transponder Configuration - Serial Communication
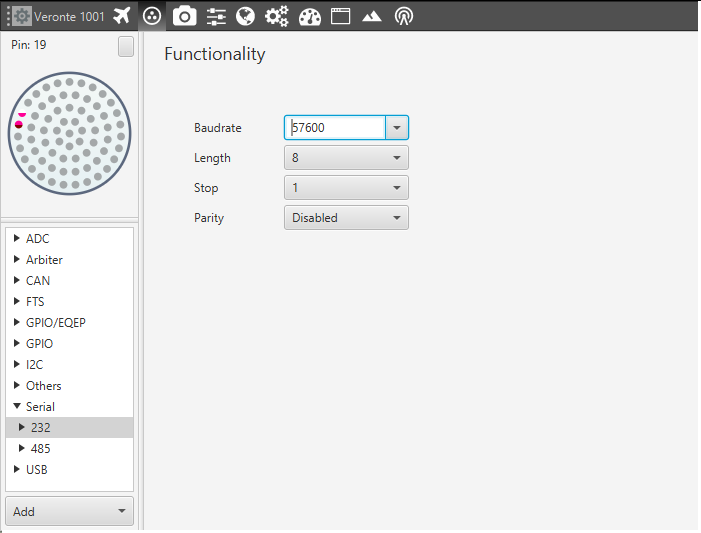
Note that either RS232 or RS485 must be configured with the corresponding Baudrate from the user transponder in Connections – Serial – 232/485.

Transponder Configuration - Serial Configuration
In order to see the information from the ADS-B, aside from having visual objects on the screen, the user can use a Widget (refer to Workspace – ADS-B Decoder)
