Events
An event is something that has to be accomplished to trigger the actions. All the events can be combined to create a custom event, using the boolean operations provided by the software (AND, OR, NOT).
Events options
The following table depicts the meaning of each one of the boolean operators.
Logics |
Description |
|---|---|
AND |
All events grouped on an AND should be accomplished simultaneously in order to activate the automation. |
OR |
One of the events in the group should be accomplished for activating the automation. |
NOT |
The event will be active meanwhile the event or event group is not accomplished. |
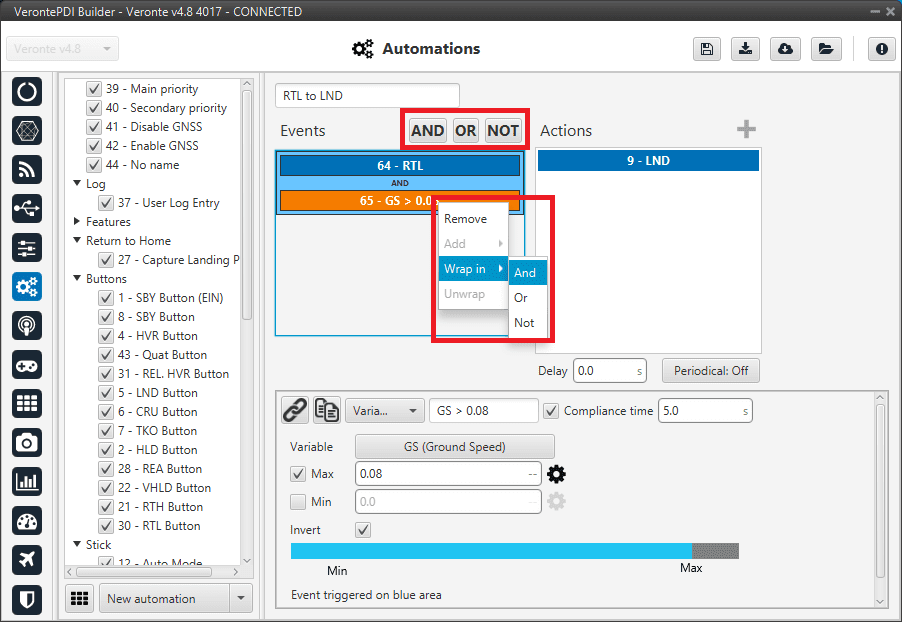
When there is only one event, clicking on the boolean command will create another event linked to the other one according to that operation. By right clicking on an event and selecting Wrap in allows the creation of an operation as if it was inside brackets, i.e it will be evaluated first. Let’s consider the following event group as an example.
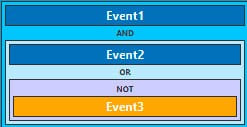
Events wrapped
The first operation that is evaluated is the NOT, then the OR between Event2 and the result of the NOT, and finally the AND between Event1 and the result of the OR.
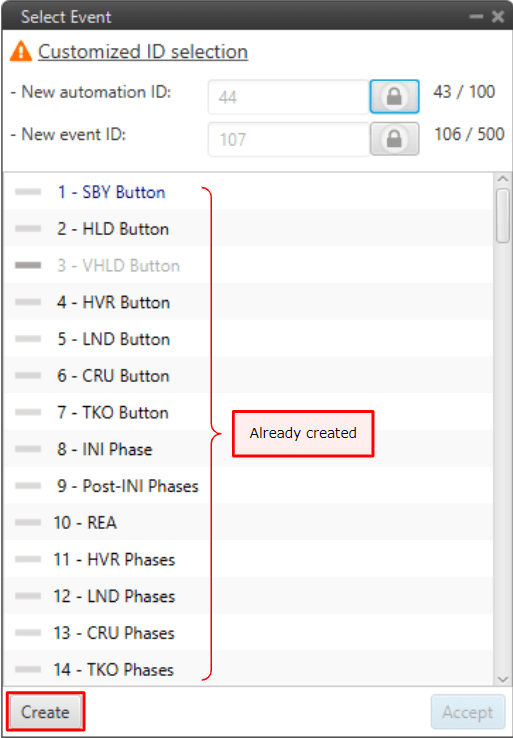
When createring a new event it is possible to choose from one of the previously created on the system or to create a new one.
New event
The user can also rename the event with the name of his choice.
New event - name
Below are present the different types of events that can be created.
Alarm
This kind of automation allows the user to add any bit of the system as an alarm. Depending on the mode in which it is configured, it will be activated in one way or another.
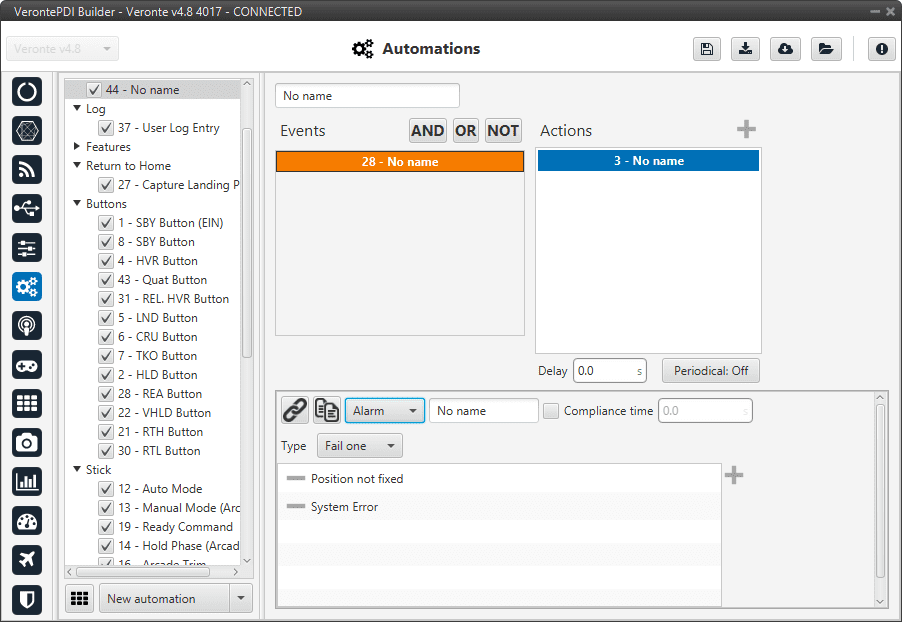
Alarm event
The two possible modes are the following:
Fail one: it is triggered when one of the bits is set to false.
All ok: it is triggered when all bits are set to true.
A common alarm event is the Position not fixed in fail one mode, which is triggered when there is not GPS signal in the autopilot.
Area
The event is triggered when the aircraft is inside or outside an area defined in the mission. For more information on mission creation, take a look at the Veronte Ops manual.
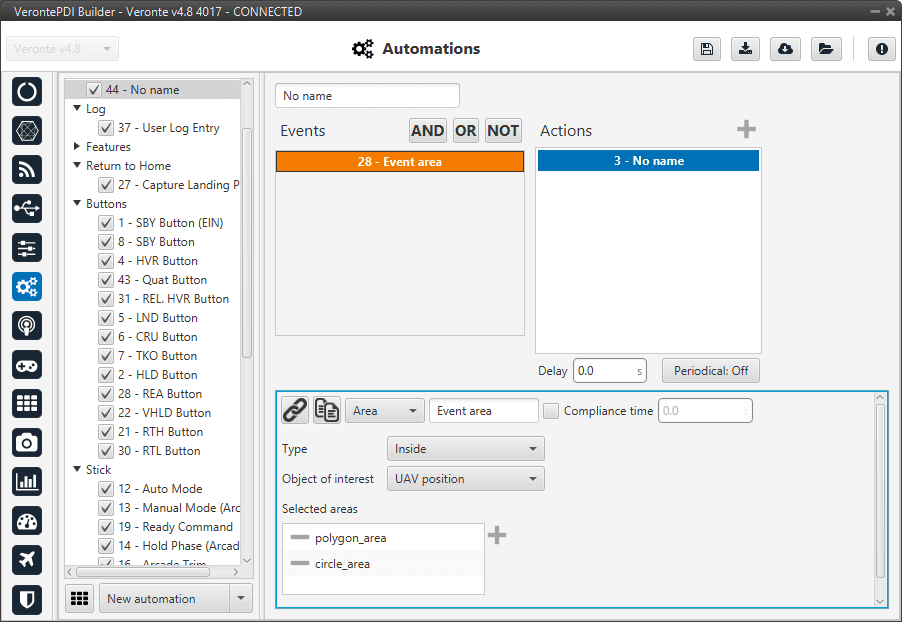
Area event
Type: Inside or Outside.
Object of interest: The user has to select which object is the one that should fulfill the event.
Selected areas: To select an area, first define the desired areas (polygons or circles) in the Operation elements section of the UI menu.
When the event has been labeled (“Event area” in this case) and saved, it is possible to link it to an area drawn on the map with the Operation panel (see more about this at the Veronte Ops manual) .
Button
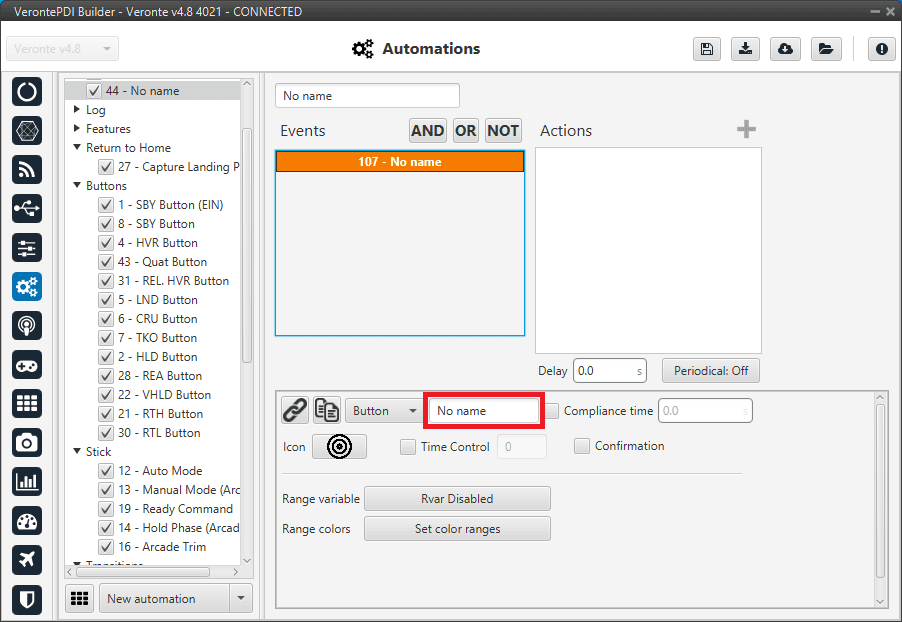
This option creates a button that will trigger the event when it is clicked.
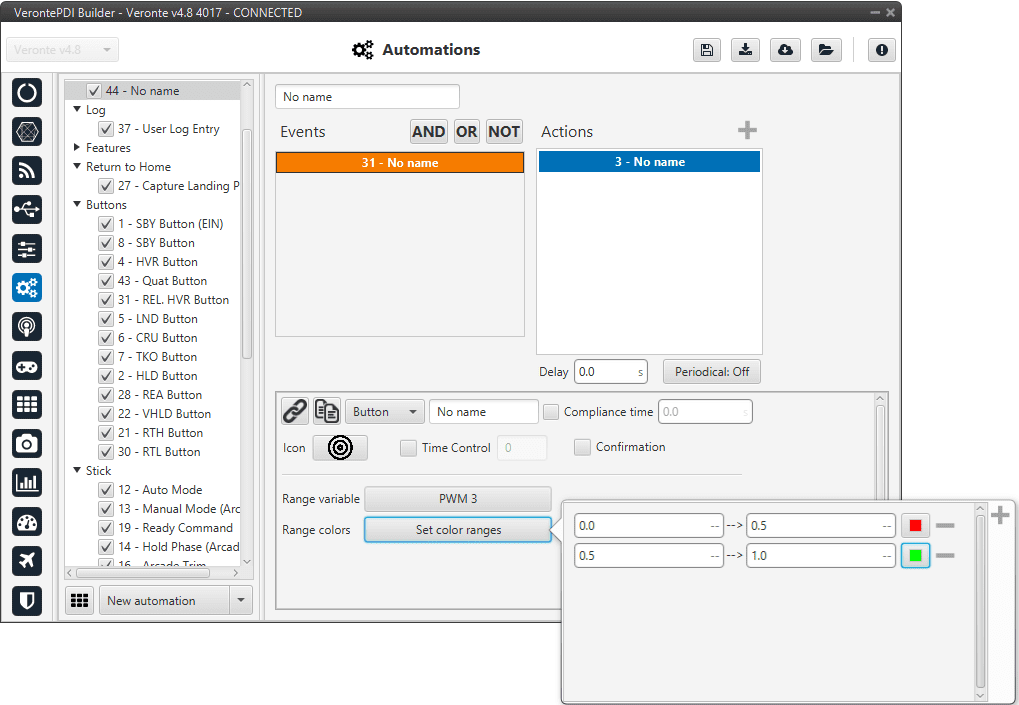
Button event
The following options are available:
Icon: The user can select the most appropriate icon for the event from a list of icons provided by the software.
Time Control: This option is used to trigger the action when the button is being pushed during the time specified in this option.
Confirmation: A pop-up window asking for confirmation will be display after pushing the button, so it is a safety measure.
Range variable and range colors options are used to make the button change its color according to the value of a variable. To do that, select a variable and then indicate as many points as desired, each one with its corresponding value and color.
Warning
For the buttons to be colored, it is necessary that the chosen variables have been added to the mandatory telemetry, adding it to the completmentary telemetry is not sufficient.
Note
If a button event triggers an action that consists of a change to a determined phase, the button will be the one of the Veronte Panel with the name of that phase on it.
To create the button for changing to a determinated phase, it is only needed to create the button with the same name as the phase.
If the button event is linked to a different action (servo movement, variable, etc.), it will appear at the top of the Veronte Panel, as an ‘action button’, with the icon selected by the user.
Mode
The event is triggered when the aircraft is in one of the modes selected.
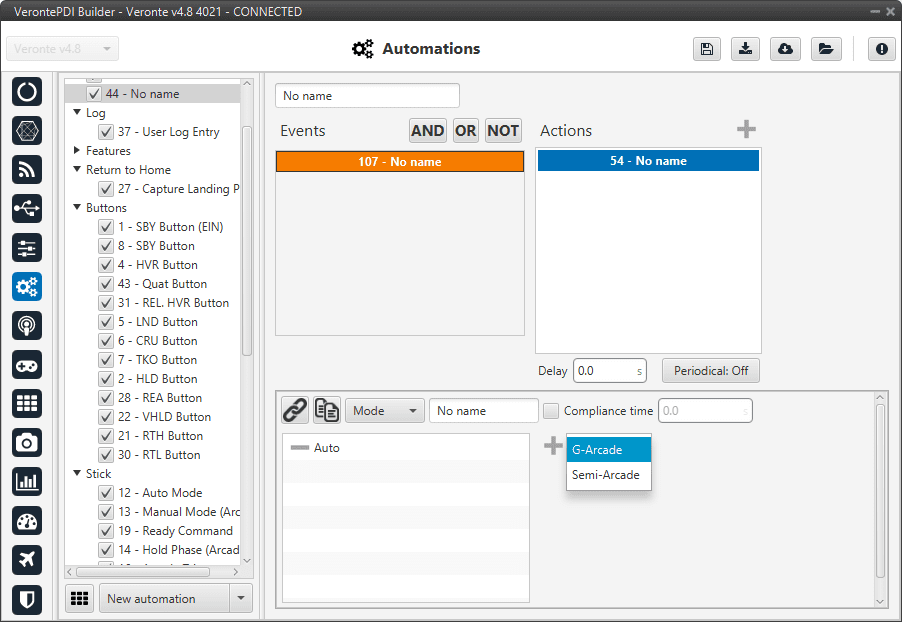
Mode event
These modes have been created previously. See section Modes, for more information about creating modes.
The compliance time option could be interesting in this type of event.
Phase
The event is triggered when the aircraft is in the phases selected by clicking on the “+” button, being in any of them will trigger the action.
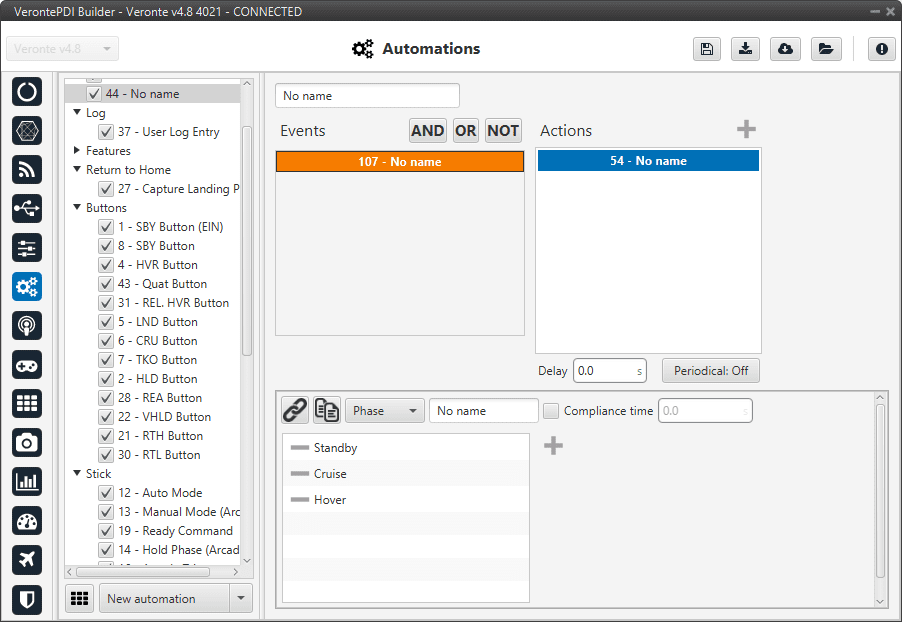
Phase event
These phases have been created previously. See section Phases, for more information about creating phases.
Route
This event is related with the patches and marks defined by the user in the Operation elements section of the UI menu and to those created in the mission (in Veronte Ops, see more about the creation of marks and patches in the Veronte Ops manual).

Route event
The following options are available:
Activation: The user can choose between two modes in this event.
Fly to waypoint: Triggers the action when the platform is flying towards that waypoint (patch).
Mark achieved: Triggers the action when the vehicle has reached the selected mark.
Selected marks/points: To select a mark/waypoint (patch), first define it in the Operation elements section of the UI menu.
Icon and color: It is possible to change the appearance of the waypoint, selecting an icon from the icon list and a color, so the user can identify easily the waypoint linked to that automation.
Timer
This event will check the status of the timer selected in the menu. That timer should have been configured previously on the action side of another automation (action type Periodical).
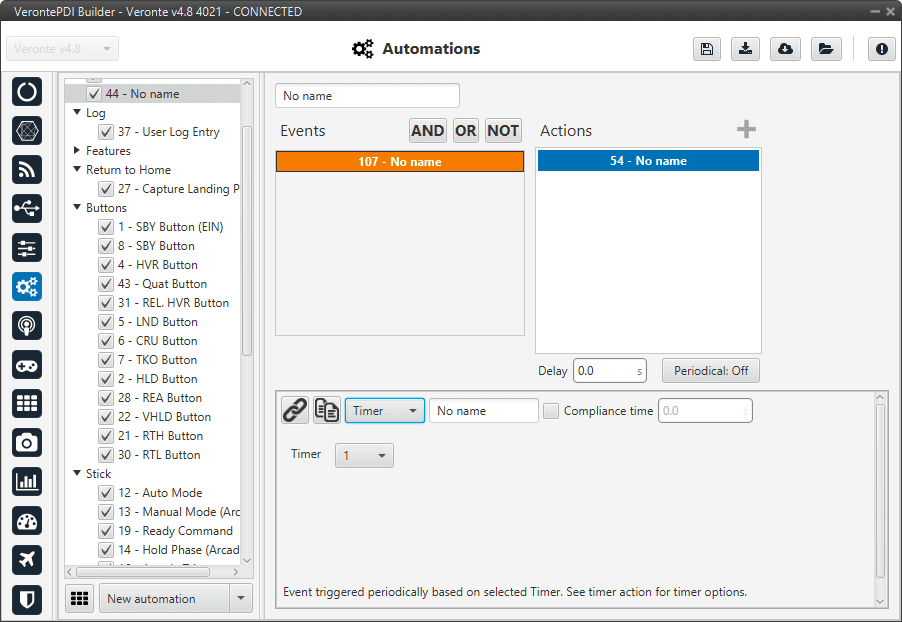
Timer event
In Timer is selected the number that identifies the timer (previously created with the periodical action) that is evaluated in this event.
For example, if it is desired to take a photo 10 seconds after the takeoff, two automations are required:
The first automation should have the event of Phase Take Off, with the correspondent Periodical action that will start a timer that lasts 10 seconds.
The second one should have a Timer event with the timer previously created and then an action to take a photo when the timer event is triggered.
Variable
This event is triggered when a variable selected is between a range established.
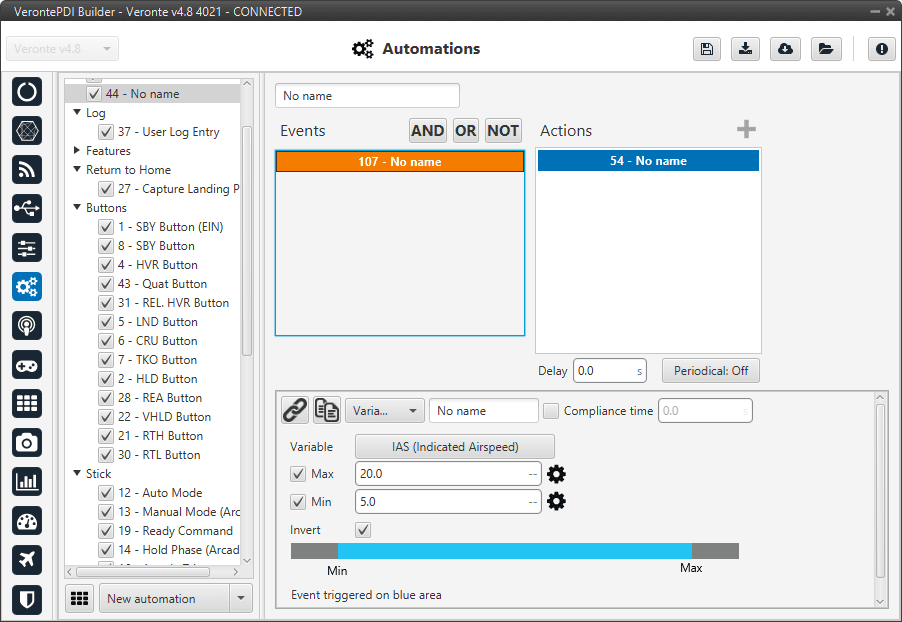
Variable event
Variable: The user can select the variable to be evaluated.
Max/Min: Maximum and minimum values of the threshold are established here. Custom threshold can be established by clicking on the
 icon.
icon.Invert range: This option will change the interval (the blue area will be gray, and the gray one will be blue).
As an example consider the event of the figure. With that parameters, the event is triggered when the IAS is between 5 and 20 meters per second. If the invert range option is unchecked, the event will be triggered when the IAS is lower that 5 m/s or greater than 20 m/s.