Servos and ESC
The user can configure any actuator compatible with the communication interfaces
PWM Servos
1. Connect the servo following the manufacturer documentation and follow the electrical chapter connect it to Veronte.
Warning
4x Redundant Veronte autopilot has different pinout specifications.
In the setup menu, go to Connections/PWM assign a given actuator to the PWM and set a frequency according to the manufacturer. In this example Actuator Output 1 is assigned to PWM1
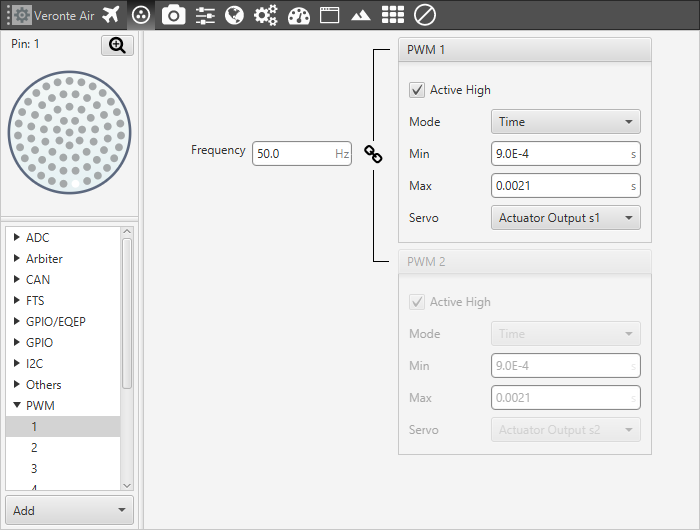
PWM servo - connections
Note
Check the actuators menu for further details.
Serial servos
Serial servos are configured different compared to PWM servos since the protocol of a serial device must be defined in custom messages chapter. In this case an Actuator Output variable must be sent through a serial interface as the protocol for the devices specifies.
Servo Volz DA26
In the setup menu go to Devices/Other/I/O Manager. In this example the routing is set to send RS custom message 1 to use RS485 bus. As it can be seen for the RS485 consumer and producer configuration.
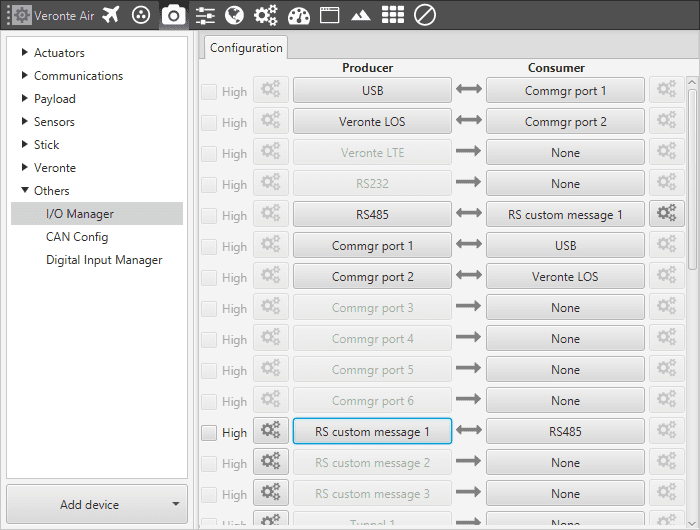
I/O manager configuration
Next step is to define the protocol specified by the manufacturer.
In this case a silent mode command (0x77).
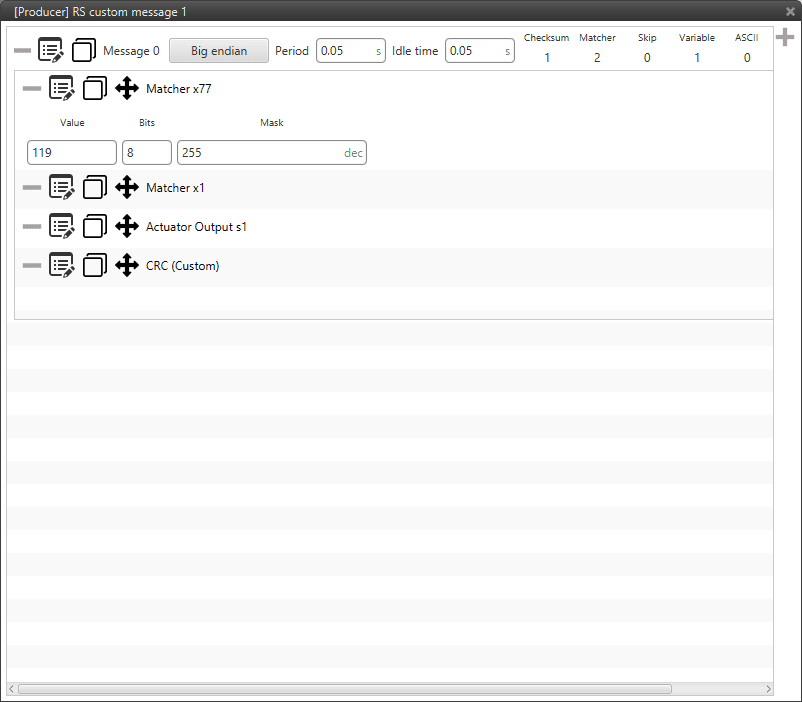
0x77 Silent mode command
Servo interface Id = 1.
Note
For Volz servos the Id will be different for each servo and/or interface.
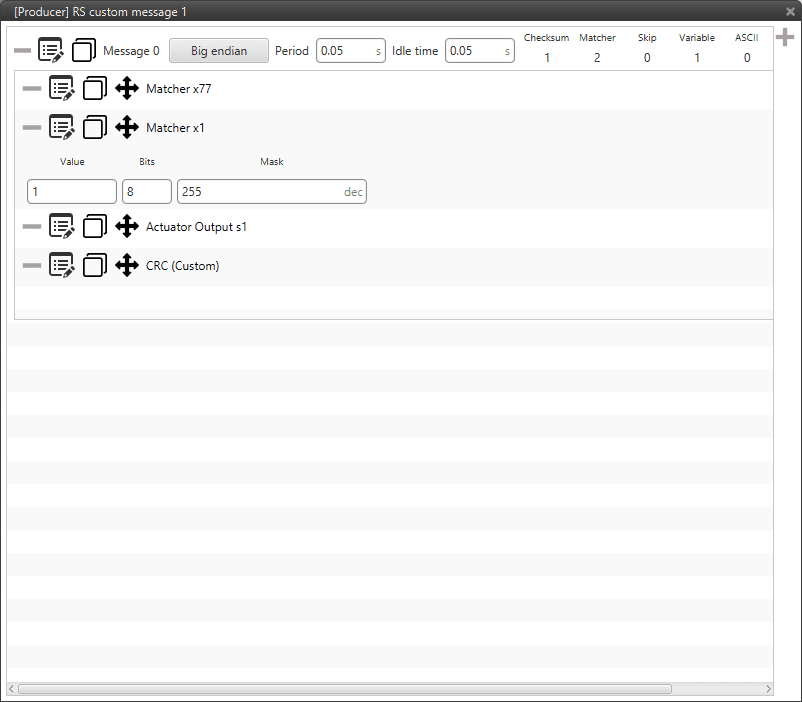
Servo Id
Actuator Output is the variable that carries the information that has to be applied to the servo. Therefore it must be included in the message.
Note
For other actuators/devices the Actuator Output variable will be needed but it will be sent according to the specific protocol.
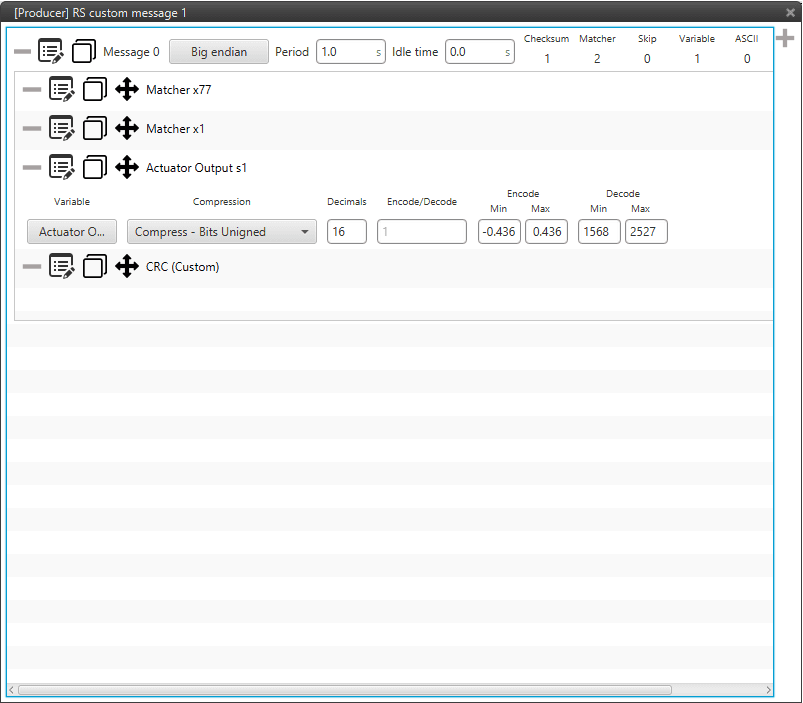
Actuator Output
Finally a Checksum is needed to complete the communication protocol.
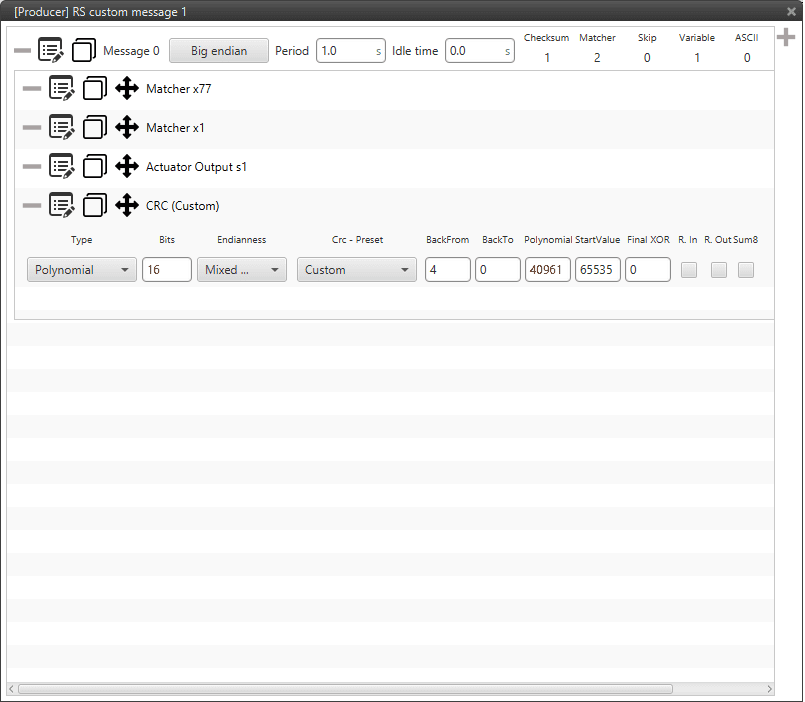
Checksum
Note
For more information about checksum take a look here.