Additional apps
Veronte Terrain Provider
Veronte Terrain Provider
Veronte Terrain Provider is an additional application that provides SRTM terrain data to Veronte Ops.
Thanks to this, Veronte Ops allows the user to visualize terrain heights on the created route. This makes it possible to foresee possible collisions of the aircraft with the terrain along the route.
Download
Once the Veronte Autopilot 1x has been purchased, a GitHub release should be created for the customer with the application.
To access to the release and download the software, read the Releases section of the Joint Collaboration Framework user manual.
Installation
To install Veronte Terrain Provider on Windows just execute “VeronteTerrainProvider.exe” and follow the indications of the setup wizard.
Warning
If users have any problems with the installation, please disable the antivirus and the Windows firewall. Disabling the antivirus depends on the antivirus software.
To disable the firewall, go to “Control Panel” \(\rightarrow\) “System and Security” \(\rightarrow\) “Windows Defender Firewall” and then, click on “Turn windows Defender Firewall on or off”.
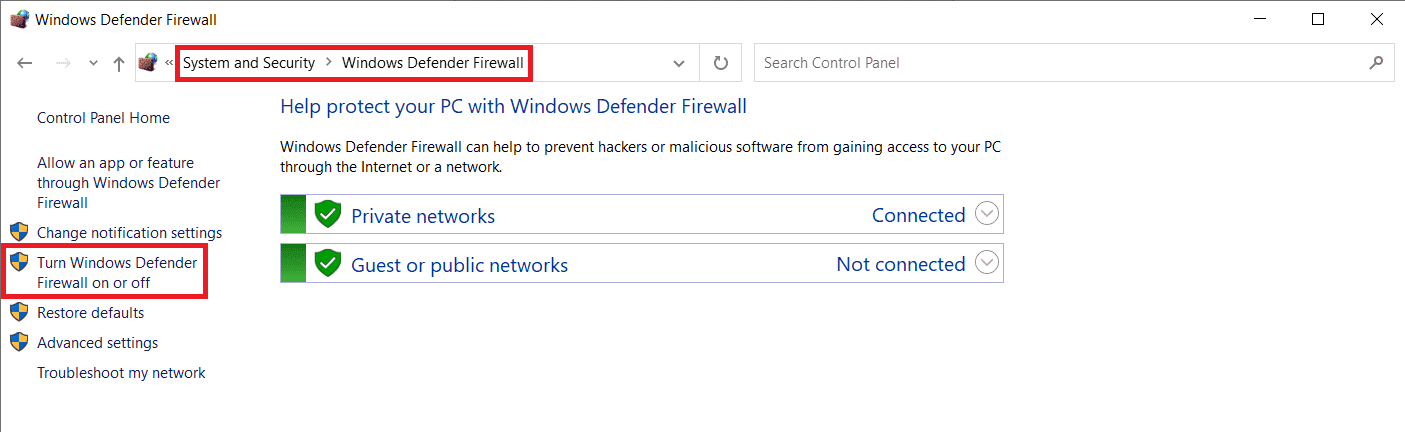
Windows Defender Firewall
Configuration
It is possible to import external hgt files, which contain terrain information, and use them for mission preparations. These files follow the SRTM (Shuttle Radar Topography Mission) standard, with 3 arc-seconds (approximately 90 meters) of resolution. To import one of them, simply copy it into the directory:
C:\Users\ user \AppData\Roaming\VeronteTerrainProvider\terrainprovider
Each hgt contains terrain information about one area of the world. The following image shows how these areas are distibuted, so each cell corresponds to one hgt:
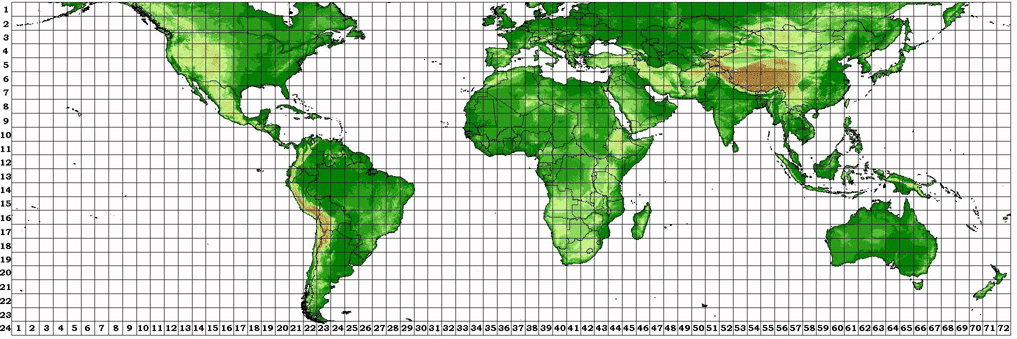
Terrain information distribution
Operation
Once installed, users just need to run it. When it runs, it will always remain open in the background, which users can check in the PC’s Windows taskbar.
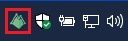
Veronte Terrain Provider in task bar
It is only necessary to run it the first time it is used, then it should always remain open so that when the computer is switched on, it starts up as well.
Note
If users close it, i.e. remove it from the taskbar, just run it again to start it.
Web Converter
Web Converter
Web Converter is a tool able to receive video in RTSP and serve it in webRTC and/or receive udp messages and send them via websocket.
Veronte Ops needs this application to visualize video and to work with udp content after it has been converted to websocket.
Therefore, it must be used when working with gimbals to visualize their video and click on them to send the tracking command to an object.
Download
Once Veronte Autopilot 1x has been purchased, a GitHub release should be created for the customer with the application.
To access to the release and download the software, read the Releases section of the Joint Collaboration Framework user manual.
Installation
To install Web Converter on Windows just execute “WebConverter.msi” and follow the indications of the setup wizard.
Warning
If users have any problems with the installation, please disable the antivirus and the Windows firewall. Disabling the antivirus depends on the antivirus software.
To disable the firewall, go to “Control Panel” \(\rightarrow\) “System and Security” \(\rightarrow\) “Windows Defender Firewall” and then, click on “Turn windows Defender Firewall on or off”.
Windows Defender Firewall
Configuration
Once the Web Converter software is downloaded and installed, configure it.
The configuration of this application is simply a config.json file with parameters for video display and command that need to be modified:
{
  "server": {
    "http_port": ":8083",
    "ice_servers": ["stun:stun.l.google.com:19302"]
  },
  "streams": {
    "veronte_Gimbal_Camera": {
      "on_demand": false,
      "url": "rtsp://192.168.8.94/net0"
    }
  },
  "udp_config": {
    "ip": "192.168.8.94",
    "port": 14003,
    "websocket_url": "localhost",
    "websocket_port": "1997"
  }
}
serverUsers can modified the localhost port (http_port).The generated URL will look like this:
http://localhost"http_port"
streamsParameters to modify to view the video recording of the desired camera in Veronte Ops"camera name": Is to identify the gimbal camera. By default veronte_Gimbal_Camera is set.As the user can enter as many cameras to display the video as desired, each gimbal camera is configured here:
url: URL of the gimbal video. This is just an example, the URL (rtsp) depends on the user’s gimbal.
udp_configTo command from Veronte Ops to the gimbal. Set the following parameters:ip: IP address configured as the udp connection of the camera.
port: Port configured as the udp connection of the camera.
websocket_url: Websocket URL to which users want to send the converted udp messages.
websocket_port: Websocket port to which users want to send the converted udp messages.
Note
Even if users only want to view the video recording in Veronte Ops, they can leave the default configuration parameters of upd_config, as they do not affect the video configuration.
However, they can also remove these lines from the configuration if they wish.
Operation
Once the Web Converter application has been configured according to the user’s needs, follow the steps below to work with:
Just run the application and always keep it open.
Copy the link generated by the tool into the corresponding Veronte Ops configuration:
For video recording, copy the URL generated into the Iframe widget.
For example, with the default http_port, the URL generated will be:
http://localhost:8083.For command, the user must copy the websocket_url and websocket_port previously configured into the URL and Port fields, respectively, of the WebSocket connection configuration of the Gimbal panel.