Operation 3
This operation implements some of the functionalities offered by the combination of the Automations with the Mark option of the Mission Toolbar.
To explain this tool, an operation composed of two missions with closed circuits is created.
In the first mission, which is the same as the one created for Operation 1, the Mark A is defined. Then, when the aircraft achieves this mark an automation will send the aircraft to move to the second mission. In this second mission, the Mark B will be defined from which the aircraft will start the Approach phase.
Missions
As mentioned above, two closed circuits are defined:
The first circuit with the figure of
8.The second circuit, at the same altitude as the first one, with the figure of
Racetrack.
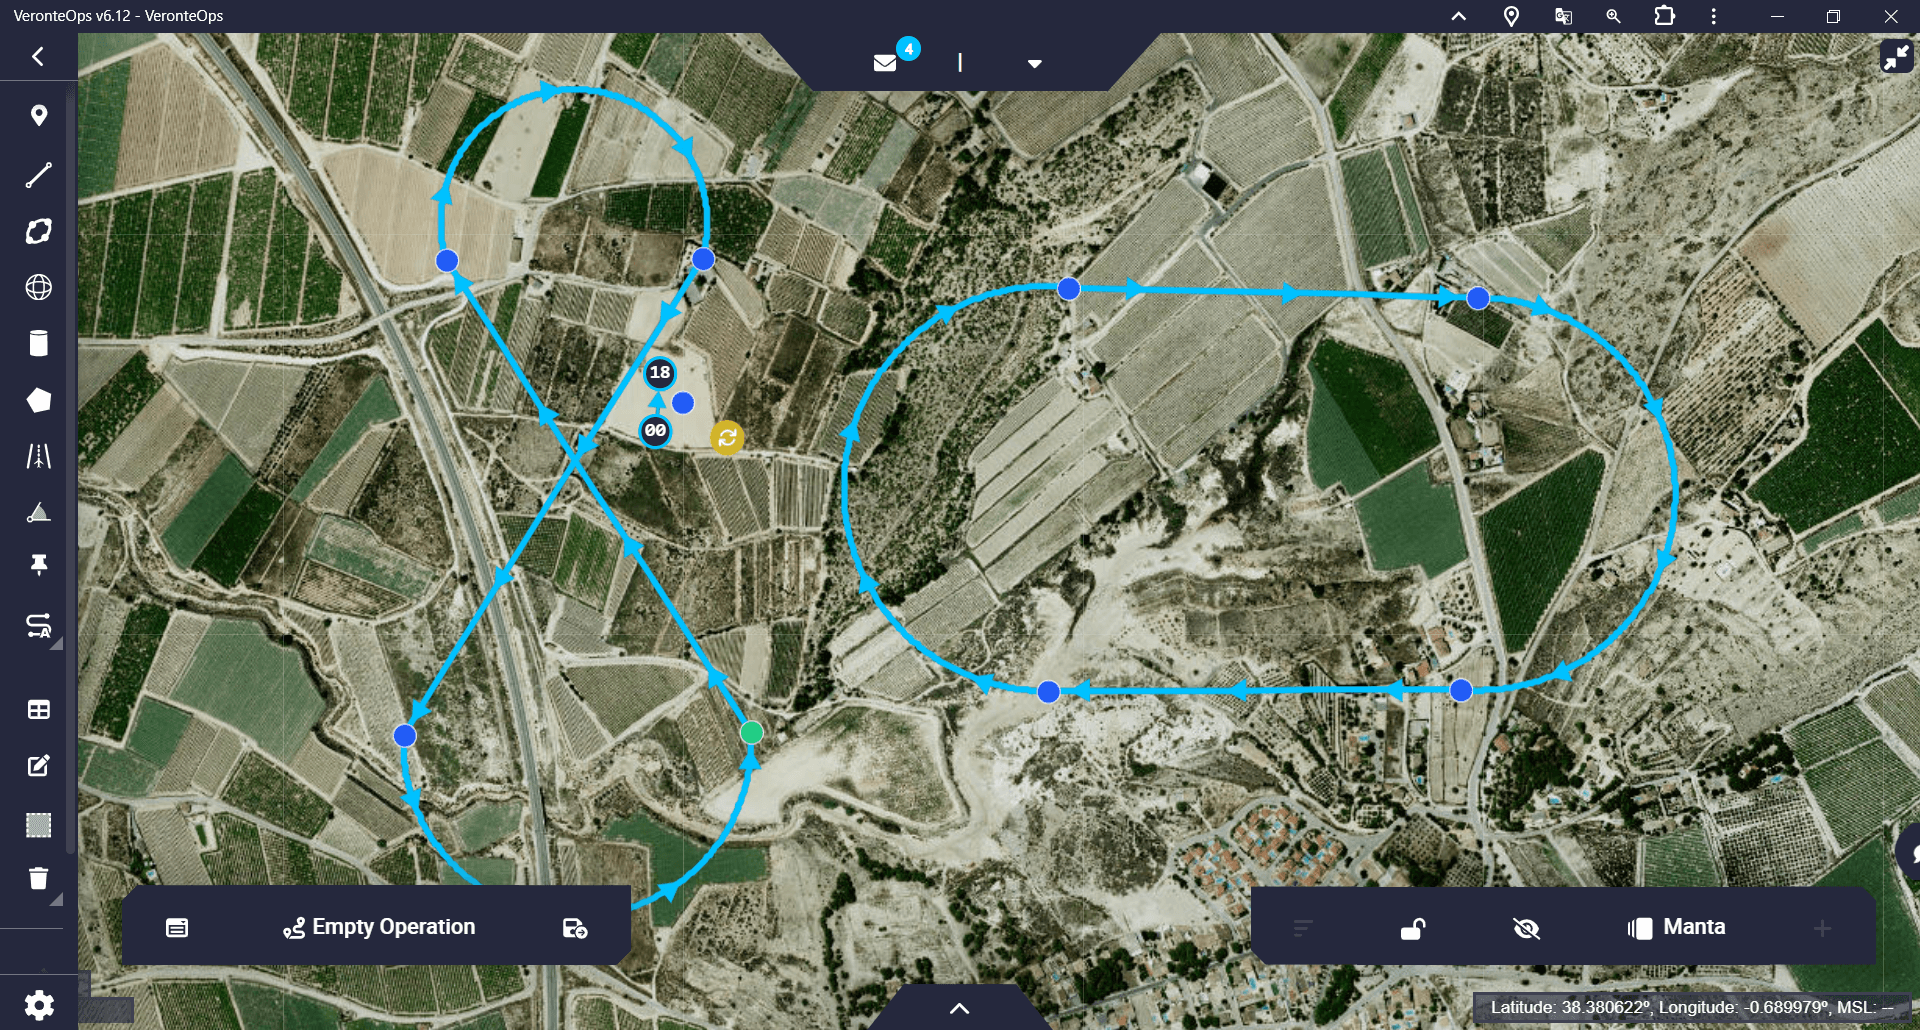
Operation 3 - Missions
Mark A
The operation starts with the route of the first mission, therefore, a point of this circuit is defined as the Start Route. At one point on this route the Mark A is defined.
Follow the steps below to define the mark and the automation associated with it:
First it is required to define the mark in the 1x PDI Builder configuration.
In the 1x PDI Builder app \(\rightarrow\) go to UI menu \(\rightarrow\) Operation elements panel \(\rightarrow\) Marks tab.
Define the mark by setting a custom name.
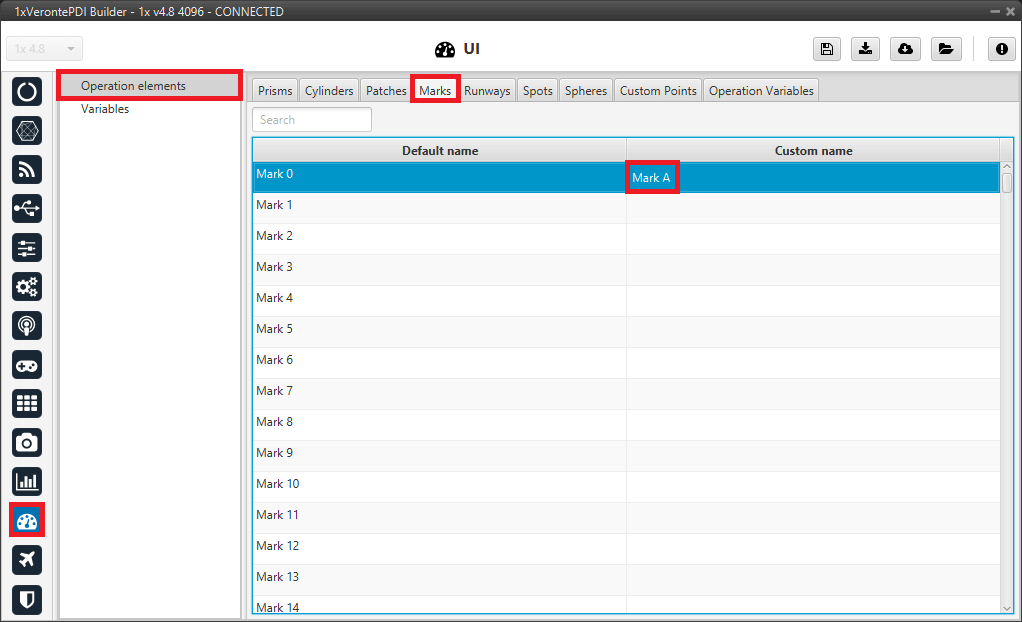
Operation 3 - Mark A definition
It is also necessary to define the patch where the autopilot will guide the aircraft when it reaches Mark A.
In the 1x PDI Builder app \(\rightarrow\) go to UI menu \(\rightarrow\) Operation elements panel \(\rightarrow\) Patches tab.
Define the patch by setting a custom name.
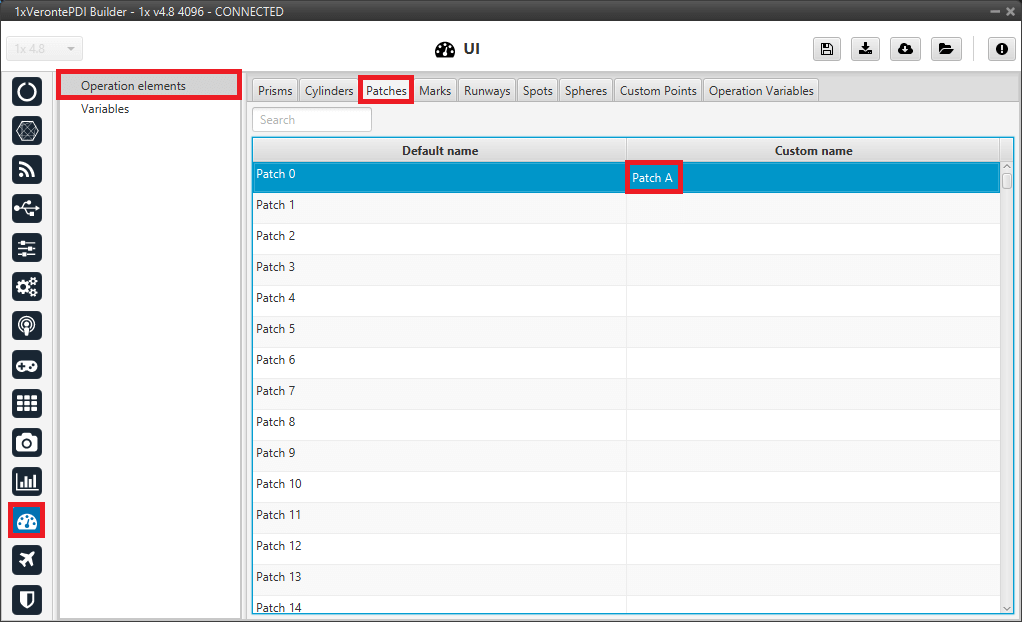
Operation 3 - Patch A definition
In the 1x PDI Builder app \(\rightarrow\) go to Automations menu \(\rightarrow\) New automation.
An automation will be created so that, once this mark is achieved, the aircraft will go to the desired point:
To configure this event, select the Route type and choose the mark achieved option.
For more information, visit the Route - Events section of the 1x PDI Builder user manual.
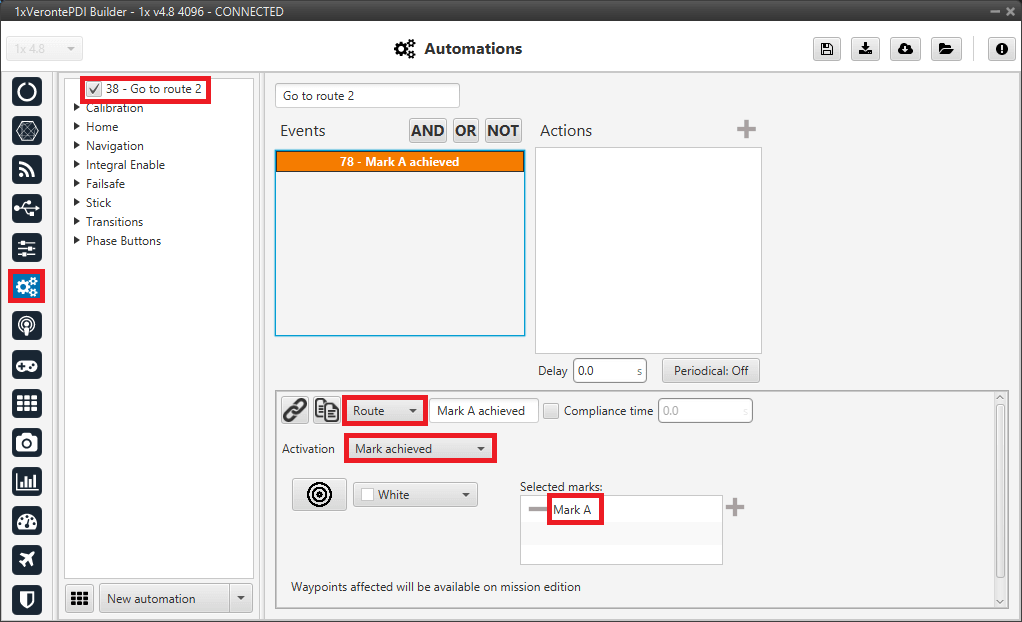
Operation 3 - Mark A event
To define the action triggered by the event, set up a Go to action. This action guides the aircraft to the selected patch. For more information, visit the Go to - Actions section of the 1x PDI Builder user manual.

Operation 3 - Mark A action
Save the configuration so that the changes made will appear in Veronte Ops.
Create the mark in Veronte Ops. For this:
In Veronte Ops \(\rightarrow\) go to Mission Toolbar \(\rightarrow\) Mark.
Click on the desired patch to place a mark on the route.
Then, with the Edit Mission option
 of the Mission Toolbar, users can more precisely place the mark.
Operation 3 - Mark A creation
Go to Operation Panel \(\rightarrow\) Customize \(\rightarrow\) Marks.
Link the mark defined in the 1x PDI Builder configuration with the just created mark.

Operation 3 - Set Mark A
Go to Operation Panel \(\rightarrow\) Customize \(\rightarrow\) Patches.
Link the patch defined in the 1x PDI Builder configuration to the desired patch where the autopilot will guide the aircraft. In this case, a patch from the second mission.

Operation 3 - Set Patch A
Mark B
Follow the steps below to define the Mark B:
In the 1x PDI Builder app \(\rightarrow\) go to UI menu \(\rightarrow\) Operation elements panel \(\rightarrow\) Marks tab.
Define the mark by setting a custom name.
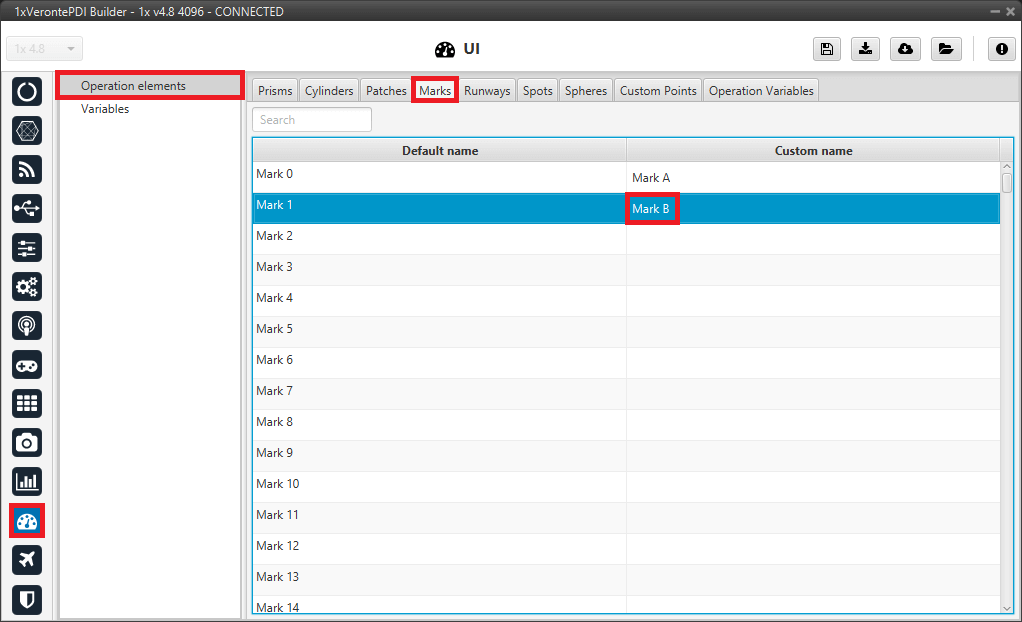
Operation 3 - Mark B definition
In the 1x PDI Builder app \(\rightarrow\) go to Automations menu \(\rightarrow\) New automation.
An automation will be created so that, once this mark is achieved, the aircraft begins its approach phase.
To configure this event, select the Route type and choose the mark achieved option.
For more information, visit the Route - Events section of the 1x PDI Builder user manual.
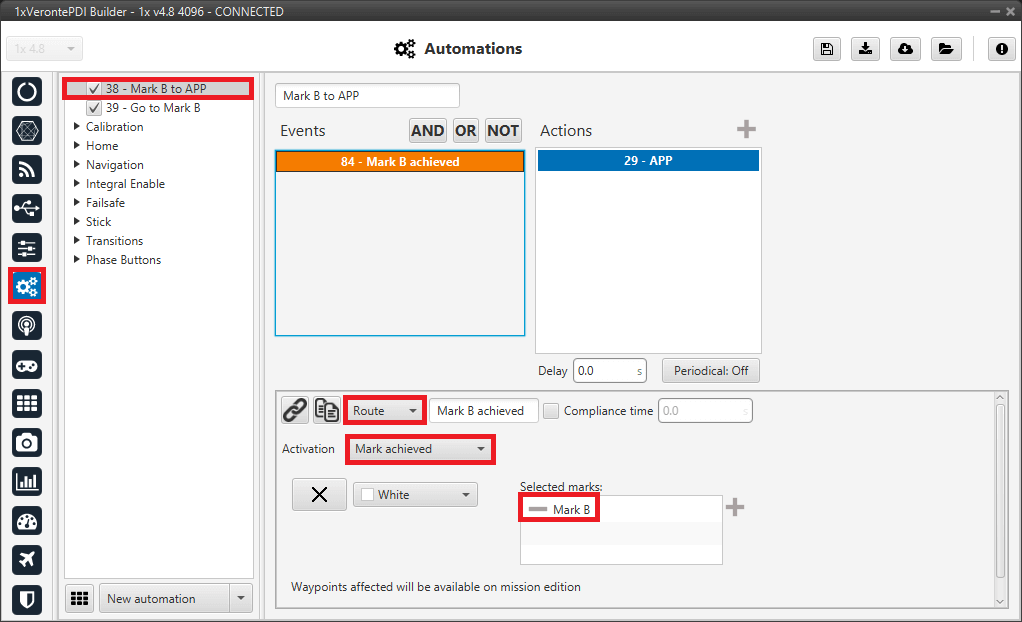
Operation 3 - Mark B event
To define the action triggered by the event, configure a Phase action and select the phase to change, in this case to the Approach phase.
For more information, visit the Phase - Actions section of the 1x PDI Builder user manual.
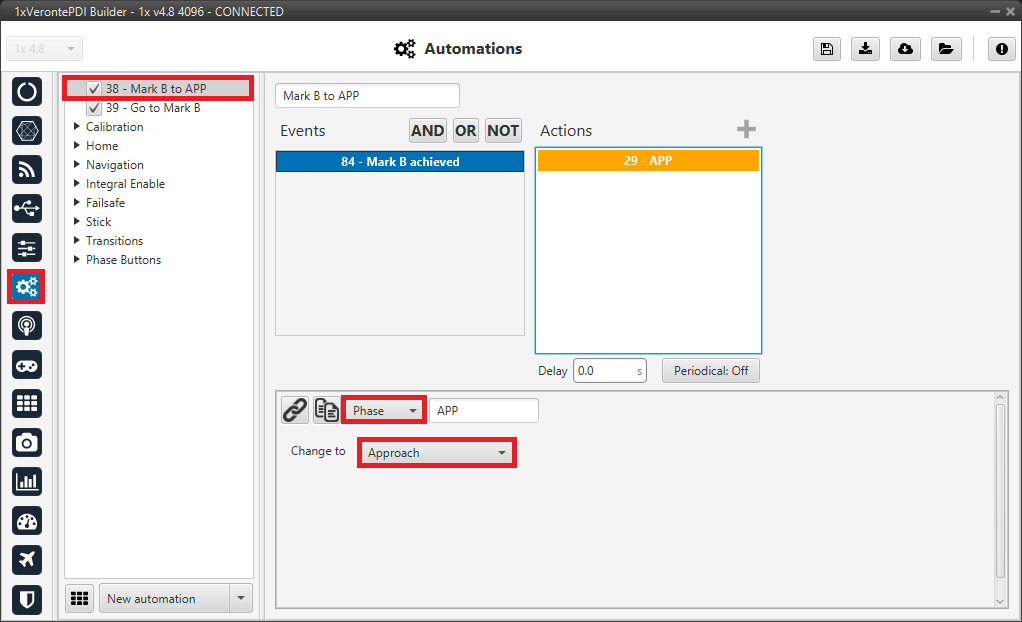
Operation 3 - Mark B action
Save the configuration so that the changes made will appear in Veronte Ops.
Create the mark in Veronte Ops. For this:
In Veronte Ops \(\rightarrow\) go to Mission Toolbar \(\rightarrow\) Mark.
Click on the desired patch to place a mark on the route.
Then, with the Edit Mission option
of the Mission Toolbar, users can more precisely place the mark.
Operation 3 - Mark B creation
Go to Operation Panel \(\rightarrow\) Customize \(\rightarrow\) Marks.
Link the mark defined in the 1x PDI Builder configuration with the just created mark.
Operation 3 - Set Mark B