X-Plane 11
Configuration
X-Plane 11 communications settings shall be configured to link with Veronte systems.
Important
For low-performance computers, it may be needed to reduce the graphics quality on the simulator, as described below.
Follow the next steps to configure X-Plane 11 to perform simulations through VSA.
Aircraft Model Installation
X-Plane 11 simulator is compatible with a wide variety of platforms: airplane, helicopter, multicopter, surface vehicle, etc. In order to create the platform model, Plane Maker tool provided by X-Plane 11 must be used. Once the aircraft model has been created, it can be integrated on the X-Plane 11 simulator by following the next sub steps:
1.1: Copy the model folder to the “Aircraft” folder within the X-Plane 11 installation directory.
1.2: Copy the content in the “Airfoils” folder, available in the aircraft model folder, to the “Airfoils” directory within the X-Plane 11 installation directory.
Custom airport
X-Plane flight starts from an airport; a custom airport must be defined for simulating in case of not having available airports. In addition, it is possible to create a new airport. In order to do that, the user should follow the X-Plane tutorial presented in the next link. Once the airport has been created, copy the model folder to the X-Plane 11 installation directory.
X-Plane Settings
To receive data in X-Plane from Veronte VSA, only one parameter needs to be edited on Settings \(\Rightarrow\) Network \(\Rightarrow\) UDP PORTS. Here, the “Port we receive on (legacy)” entered must match the one configured in Veronte VSA as “Send port”.
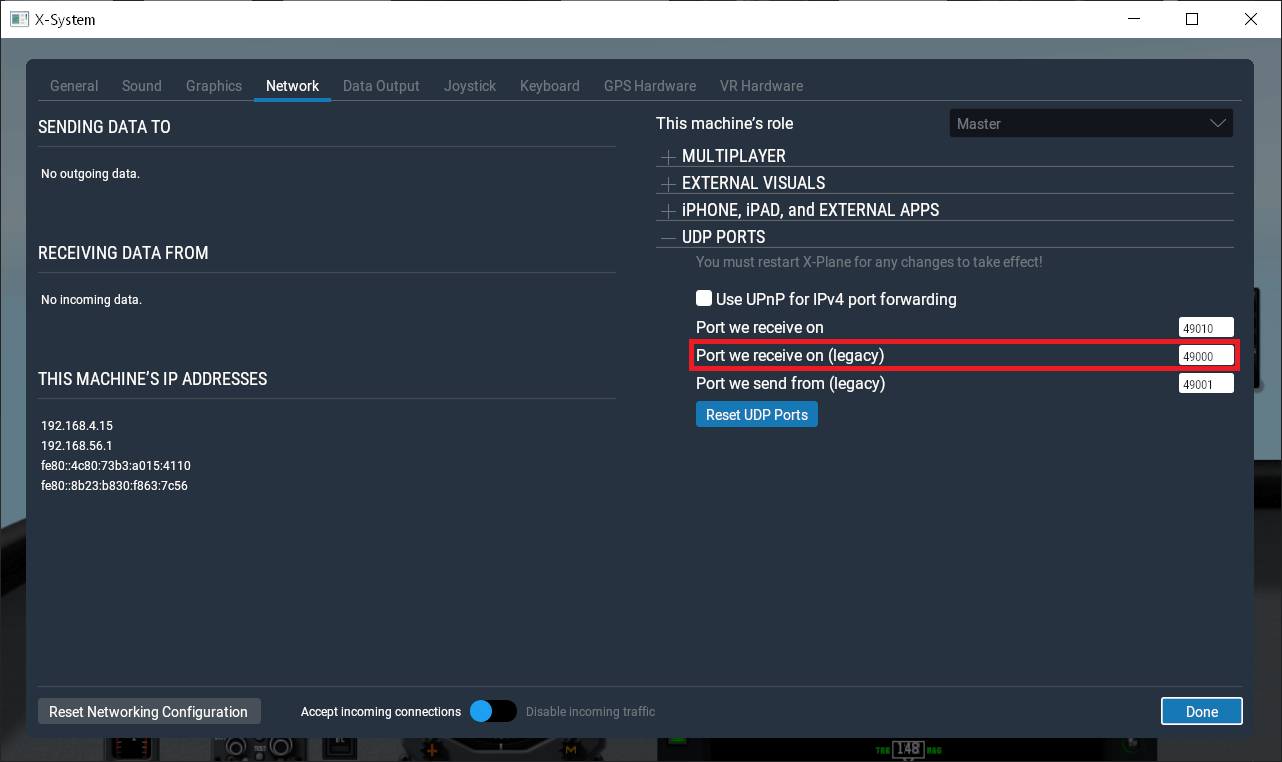
X-Plane 11 - Port configuration
Visualization
To visualize the autopilot (real or simulated) in X-Plane 11 software follow the steps below.
X-Plane 11 Setup
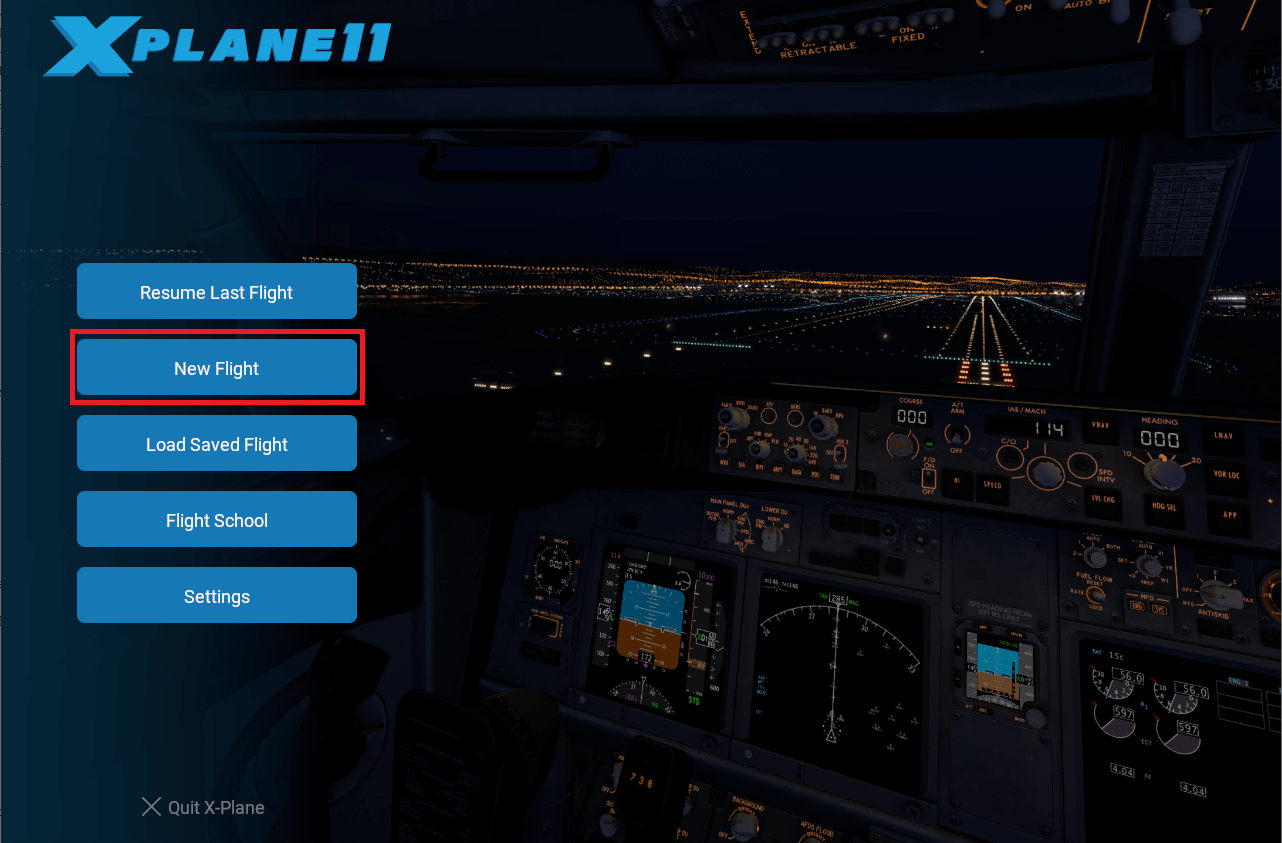
Open X-Plane 11. In this Main menu, click on New Flight to start a simulation:
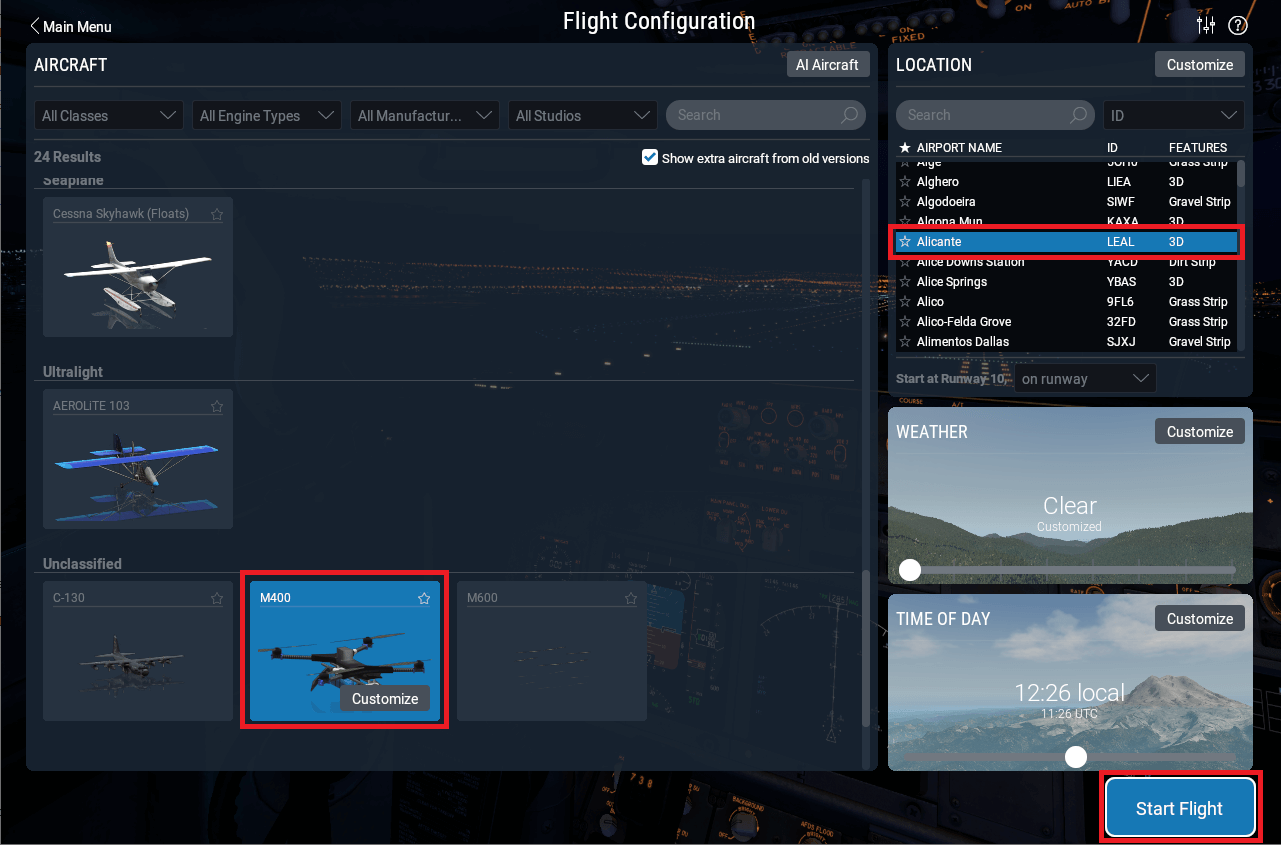
Select which aircraft to use, the starting airport and weather conditions to simulate. Then, click on Start Flight to start the simulation:

X-Plane 11 Setup
Start VSA
Once X-Plane is configured and running, click on
 of VSA to enable the sending of commands.
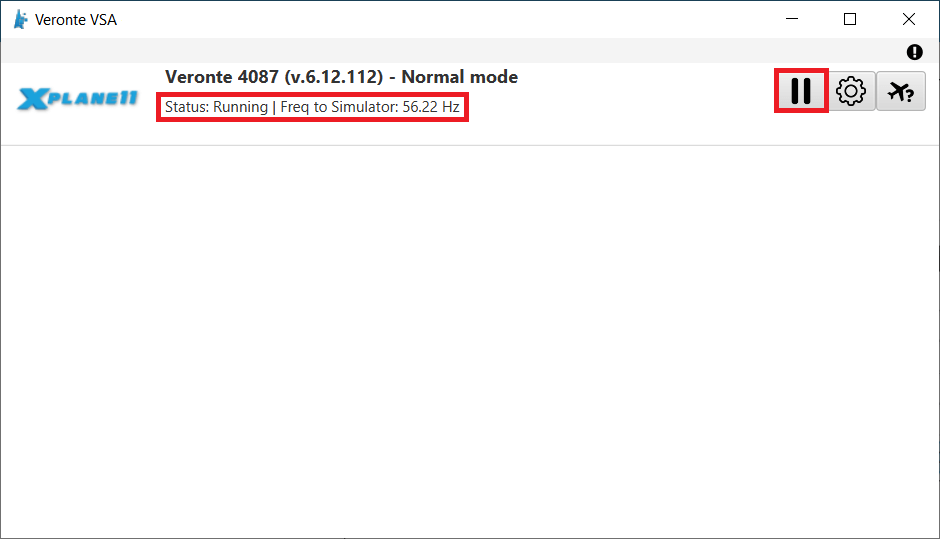
VSA - Run visualization
Check receiving data
Go to Settings \(\Rightarrow\) Network tab. Check that the receiving data from is correct:
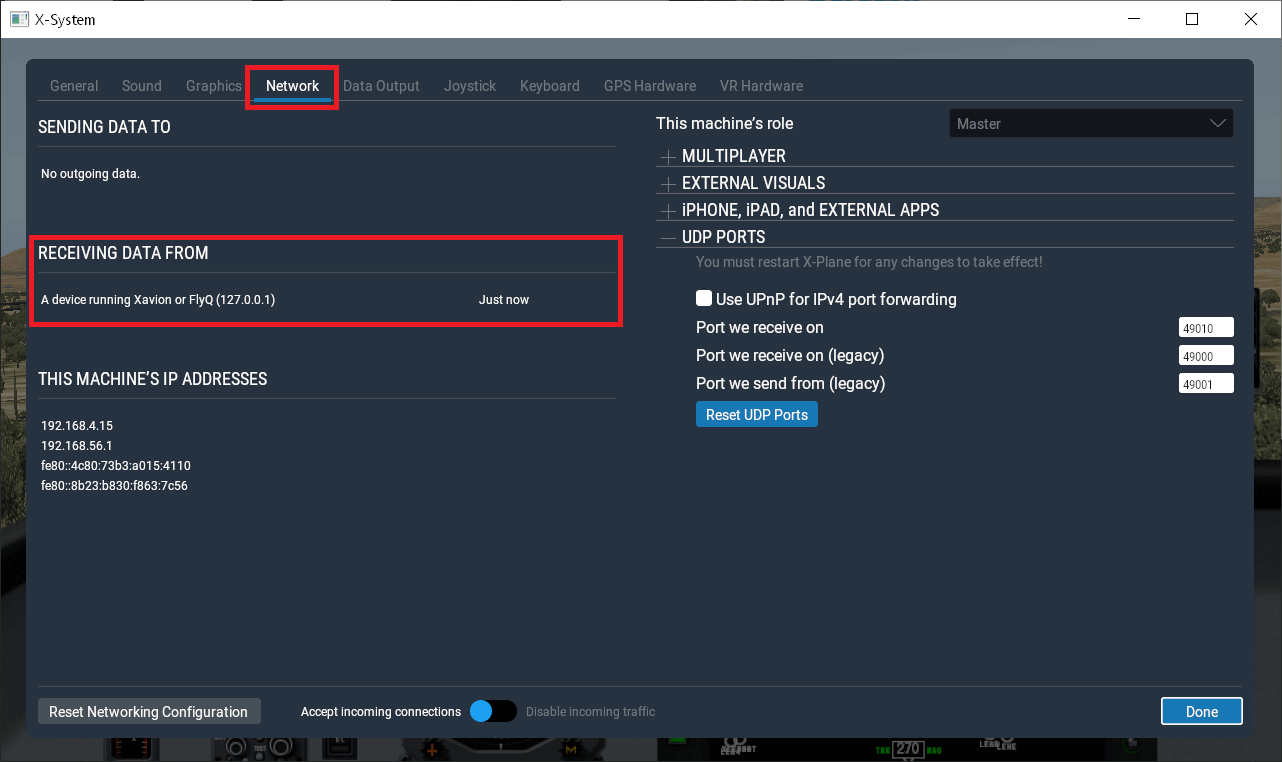
Check receiving data
Once the hardware has been connected and the software has been configured, operation can start and the system can be operated as a real flight.
The UAV should be visible on Veronte Ops in the selected airport, with a colored icon as follows:
Note
For more information, read the Veronte Ops user manual.