Update process
Since the most frequently updated device is Veronte Autopilot 1x, this user manual uses this device as an example. However, all other devices require the same procedure.
Within the same firmware version
Danger
To update a device within firmware versions 8, the connection must be via Ethernet, or it can also be via RS232 (users can use an RS232-to-USB adapter to connect it to the PC).
Since this user manual will use Autopilot 1x as an example, to configure it via RS232:
-
Connect the device with Veronte Link 8 via Ethernet or RS232. For more information on this app, refer to the Veronte Link user manual.
-
Next, open 1x PDI Builder, select the connected device and open the PDI online.
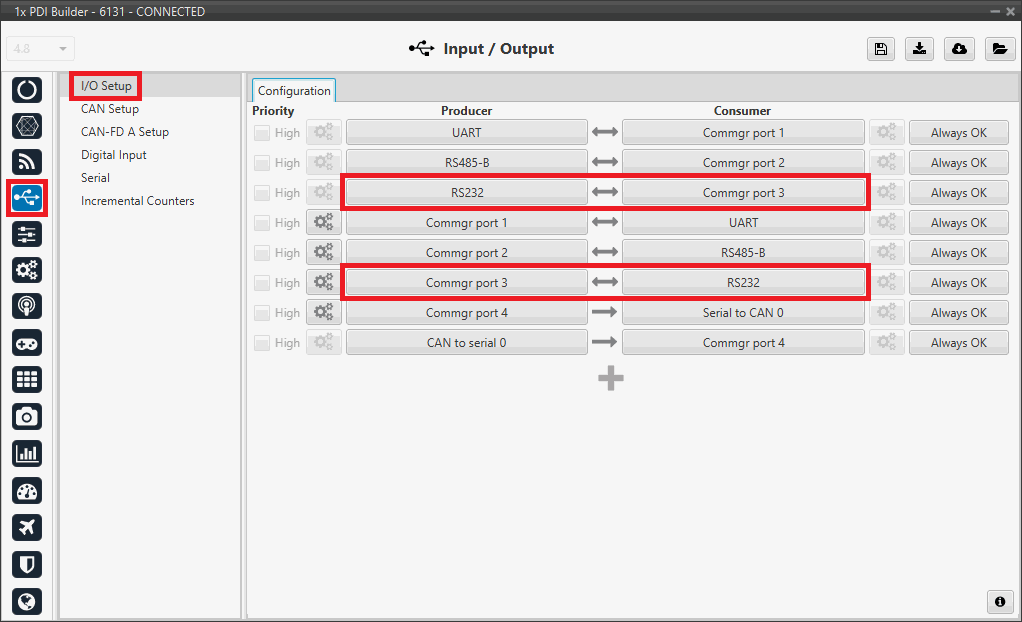
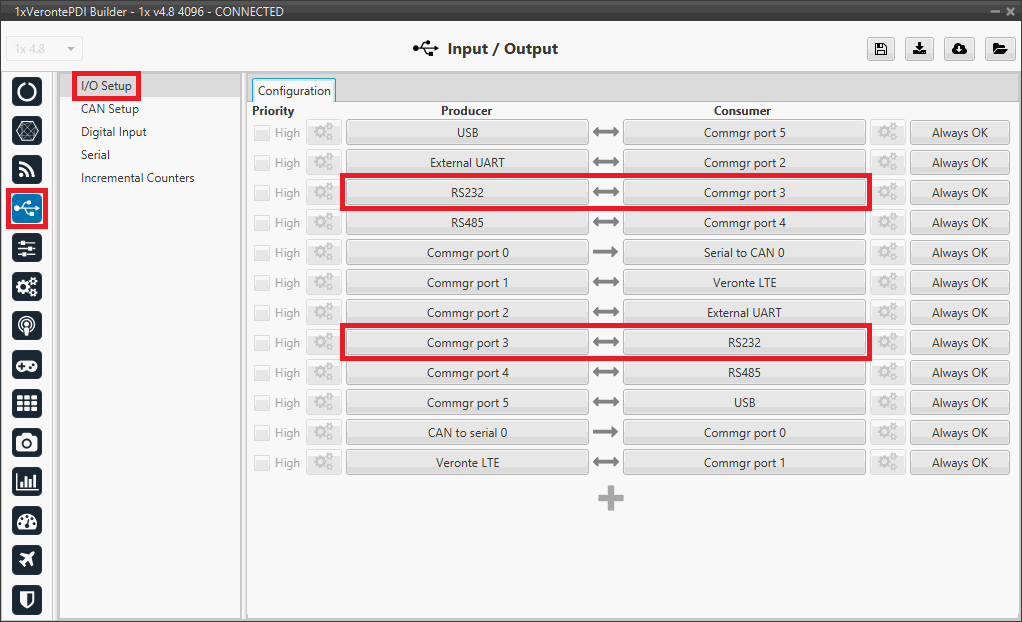
- Go to Input/Output menu I/O Setup panel. Set up a bidirectional connection between RS232 port and a COM Manager port, in this case Commgr port 3 is used.
-
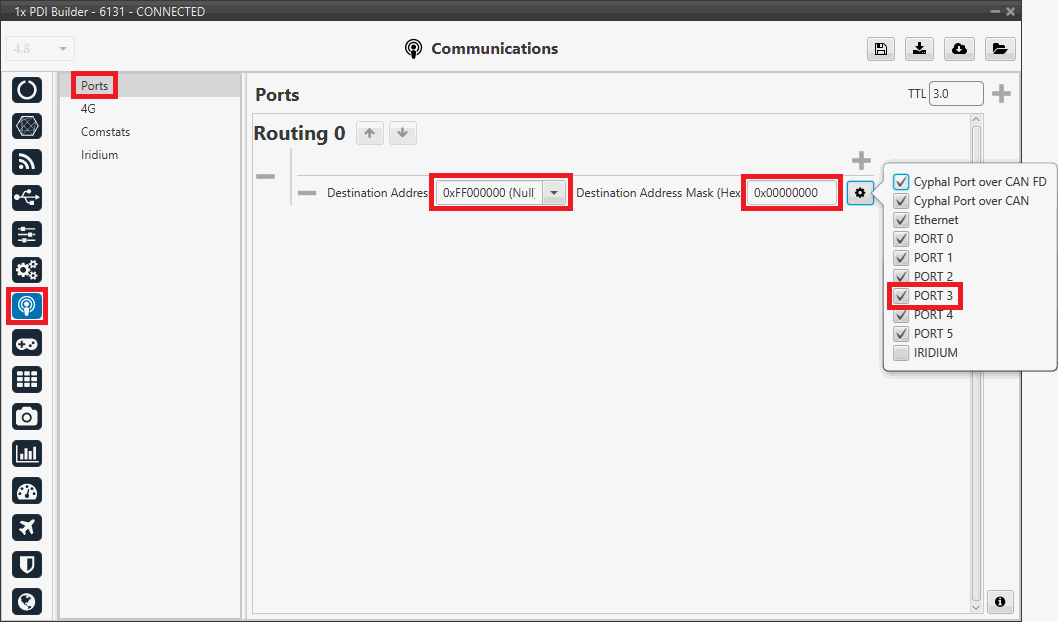
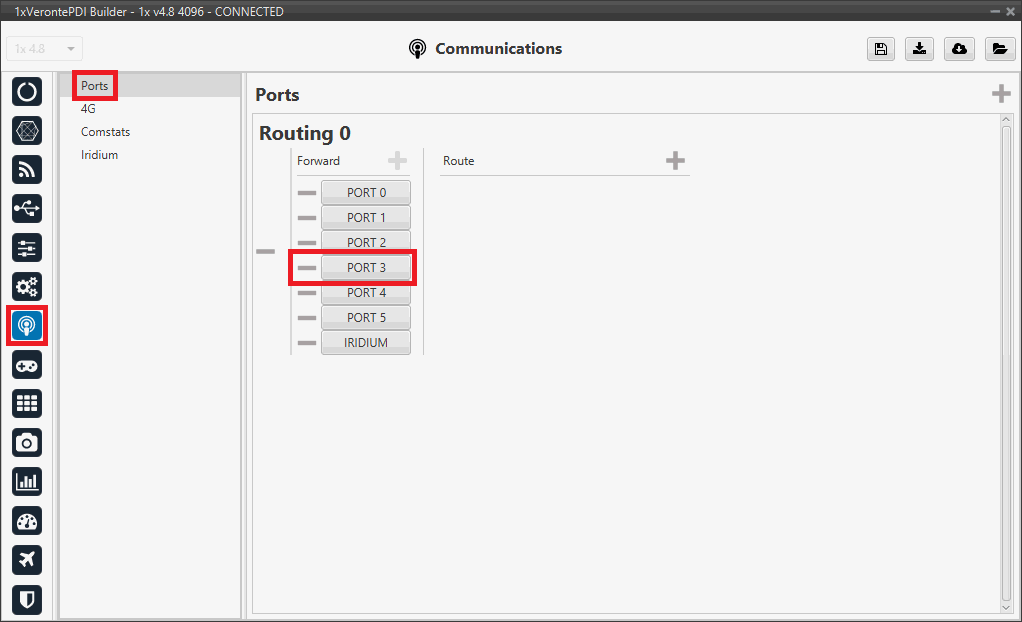
Go to Communications menu Ports panel.
Make sure that the COM Manager port configured in the previous step is enabled, in this case PORT 3.
- Save the configuration by clicking on the
 icon.
icon.
Follow the steps below to carry out the update process of a Veronte Autopilot 1x:
-
Connect the device (to be updated) to a computer with Veronte Link via Ethernet or via RS232.
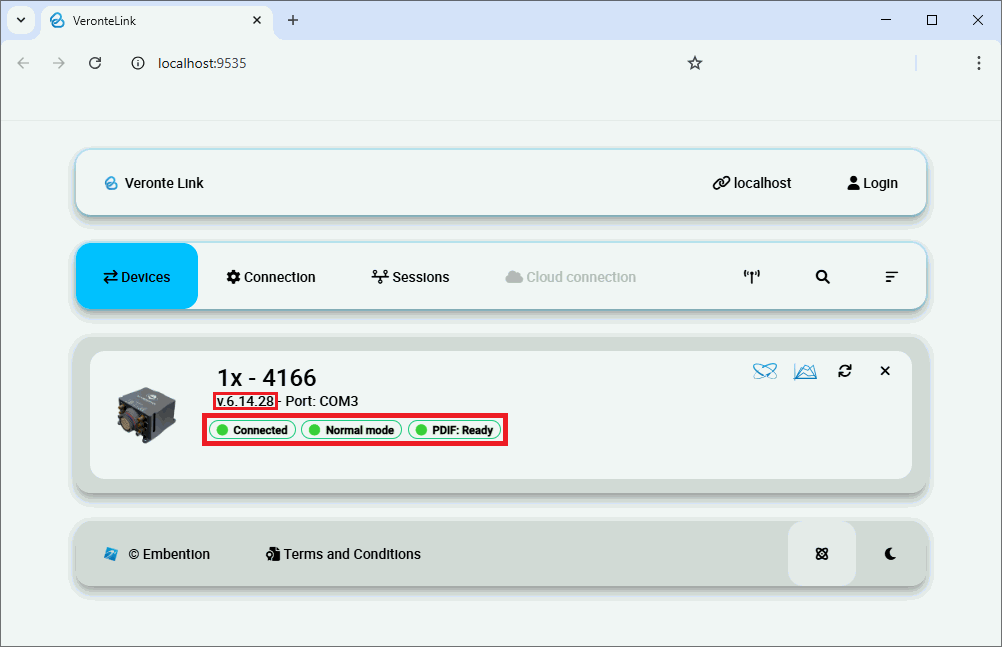
Then, open Veronte Updater and select the connected device in the marked area:
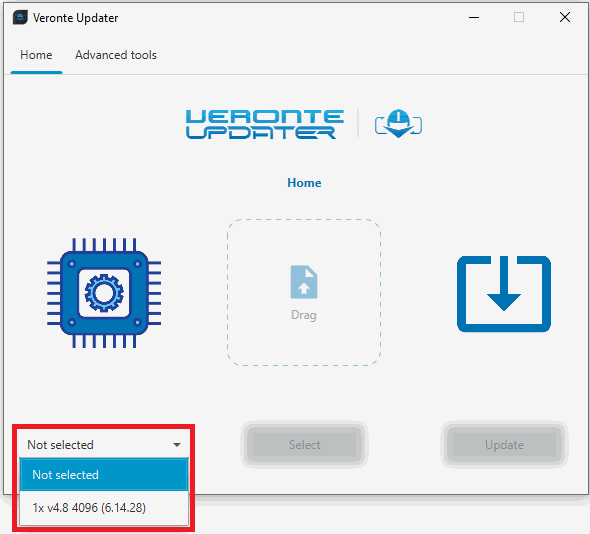
Selecting connected device -
Load the .update file.
There are three ways to do this:
- Dragging the file to the Drag area.
-
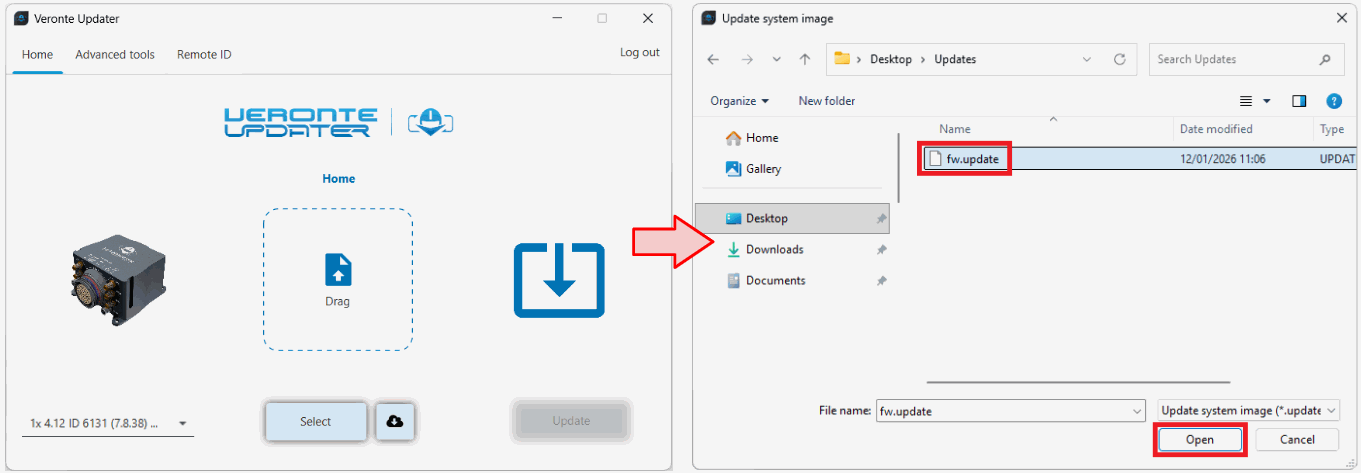
Using the Select button that will open the following browser to select the fw.update file stored in the user's local storage:
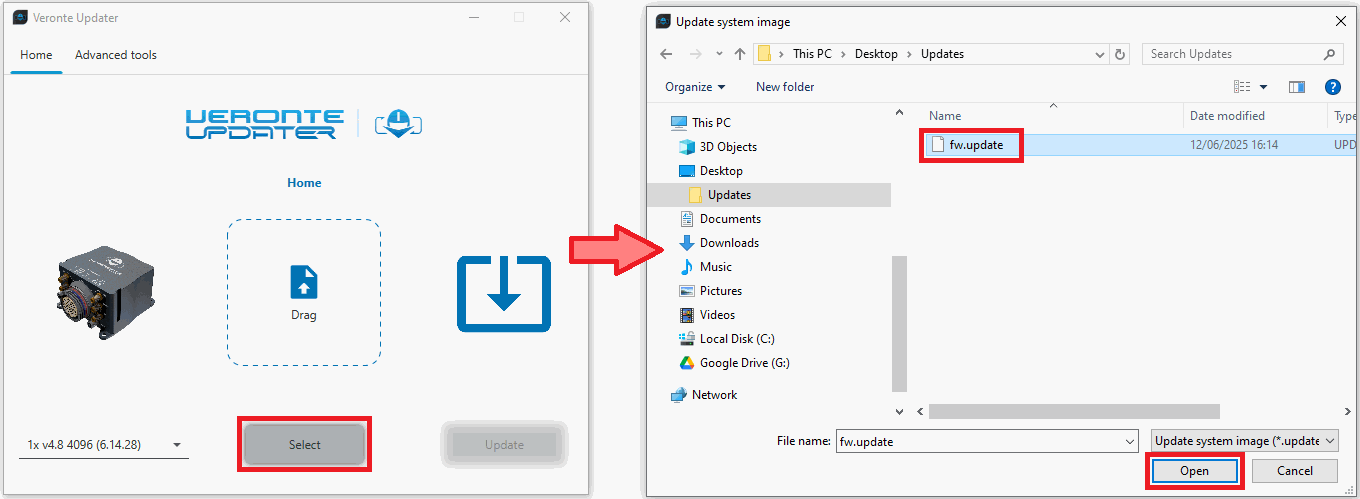
Loading file from local storage -
Selecting the cloud icon
 to directly import the desired firmware version from Cloud:
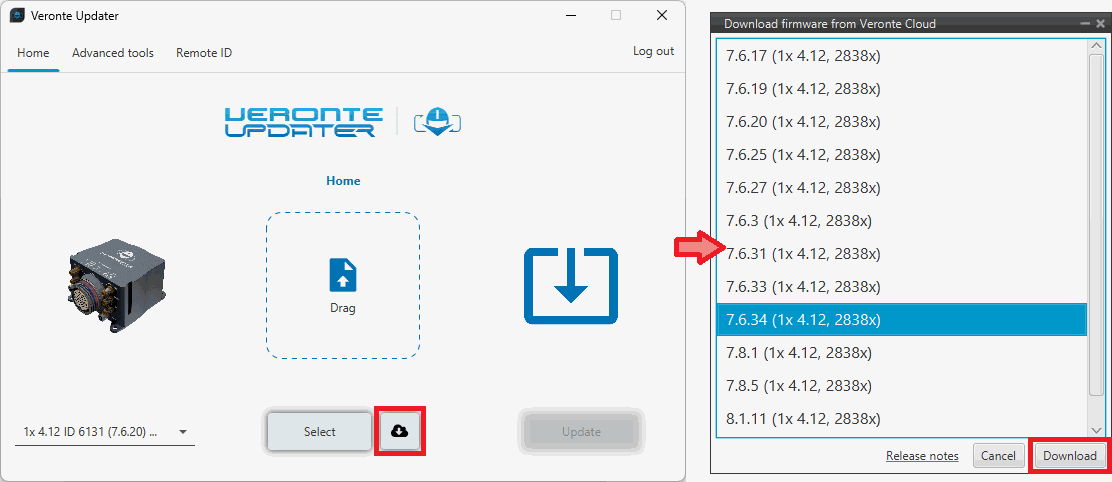
Loading file from Cloud
-
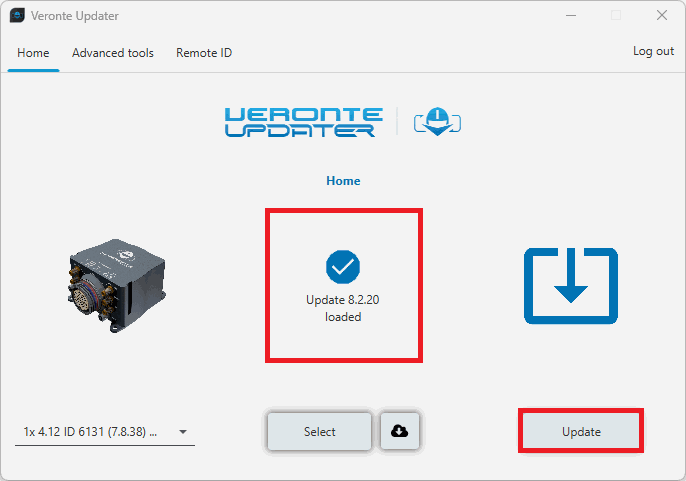
Once the .update file is loaded, click on Update to send the configuracion to the device.
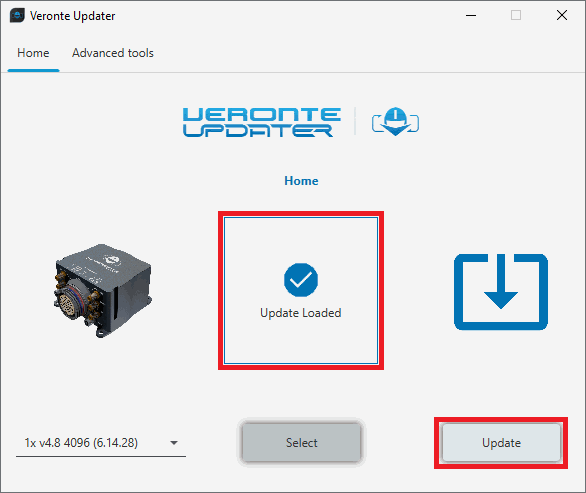
Update loaded -
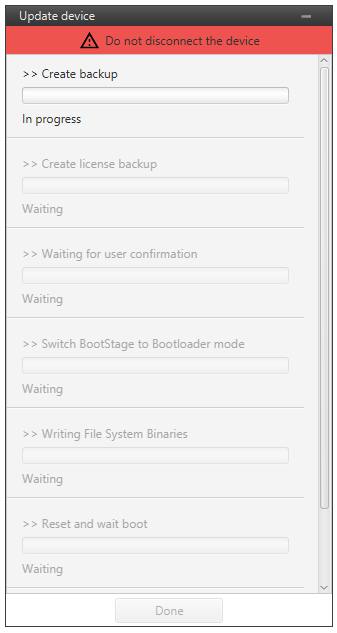
The update process will start, the next window will show the progress:
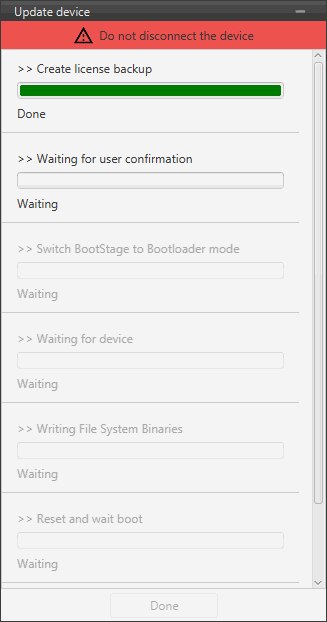
Update device process -
A confirmation panel will then appear to ensure that the user has not connected the device through the Veronte USB.
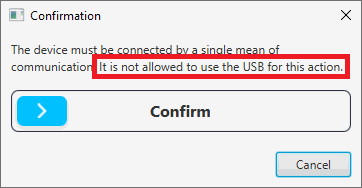
Update device process - Confirmation panel -
If the device is connected in a way other than USB, drag the blue arrow to the right until it turns green to confirm and the update process will continue.
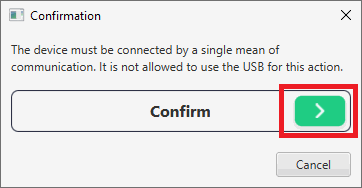
Confirmation panel OK 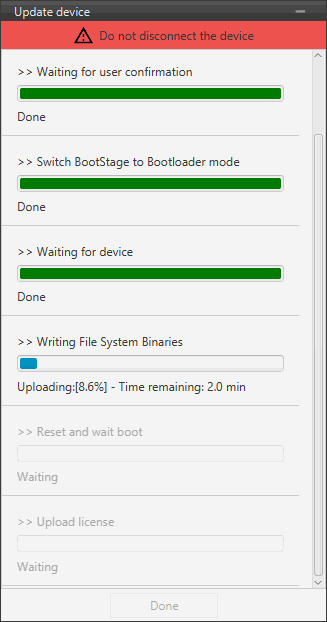
Update device process - Confirmed -
Otherwise, click cancel and the update process will stop:
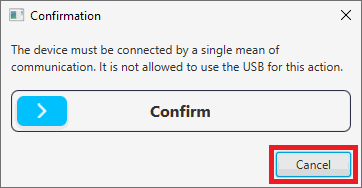
Confirmation panel CANCEL 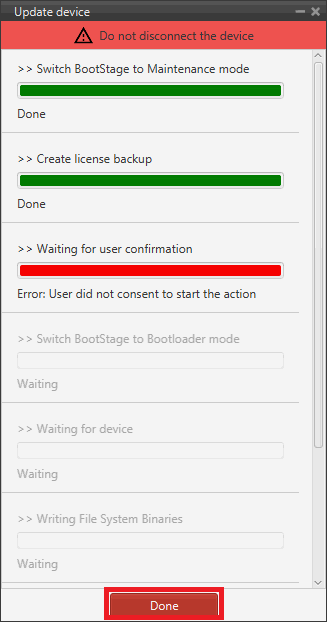
Update device process - Cancelled
-
-
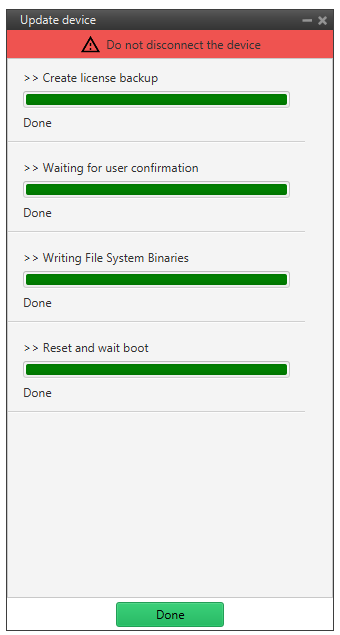
When finished, click on Done:
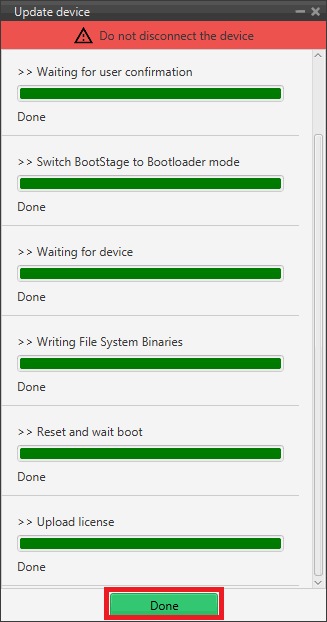
Update device process finished
Upgrade 7 to 8
Danger
To update a device to firmware versions 8, use an RS232 or Ethernet connection. For example, configure a connection via RS232 (users can use an RS232-to-USB adapter to connect it to the PC), or it can also be via Ethernet
Since this user manual will use Autopilot 1x as an example, to configure it via RS232.
- Connect the device with Veronte Link 7 via Ethernet in v4.10 or higher. For more information on this app, refer to the Veronte Link user manual.
- Next, open 1x PDI Builder v.7, select the connected device and open the PDI online.
-
Go to Input/Output menu I/O Setup panel.
Set up a bidirectional connection between RS232 port and a COM Manager port, in this case Commgr port 3 is used.
-
Go to Communications menu Ports panel.
Make sure that the COM Manager port configured in the previous step is set in the Forward column, in this case PORT 3.
- Save the configuration by clicking on the icon.
Follow the steps below to carry out the update process of a Veronte Autopilot 1x:
-
Depending on the Bootloader firmware version of the Veronte Autopilot 1x:
-
If the previous firmware version of the Bootloader of Autopilot 1x is not version 8, the update process will not be be able to proceed. Therefore, users must first update the bootloader to version 8 using the Veronte Updater application in its latest 7 version.
Error
To update the bootloader to version 8, users must use the latest 7 version of Veronte updater application.
-
If Autopilot 1x has the Bootloader on firmware version 8, the update process can start.
-
-
Connect the device (to be updated) to a computer with Veronte Link v8 via Ethernet or RS232.
Then, open Veronte Updater v8 and select the connected device in the marked area:
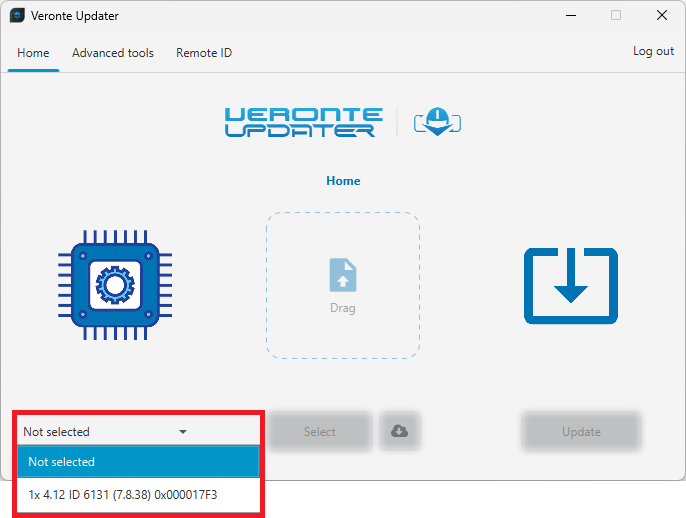
Selecting connected device -
Load the .update file.
There are three ways to do this:
- Dragging the file to the Drag area.
- Using the Select button that will open the following browser to select the fw.update file stored in the user's local storage:
file from local storage -
Selecting the cloud icon
to directly import the desired firmware version from Cloud: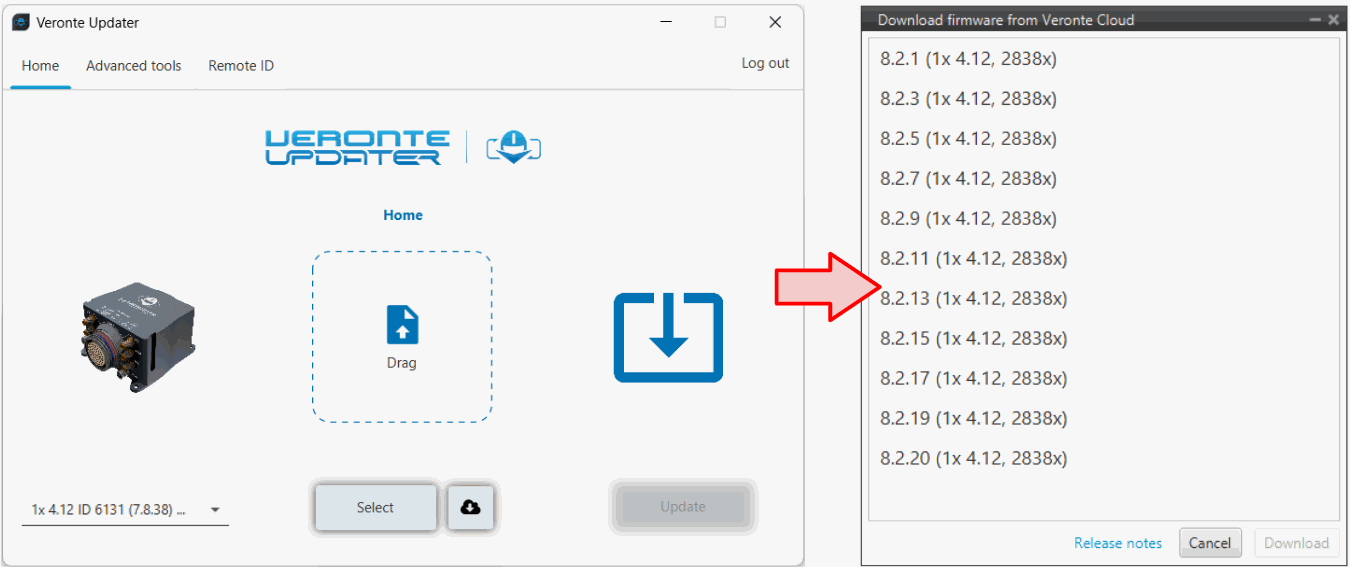
Loading file from Cloud
-
Once the .update file is loaded, click on Update to send the configuracion to the device.
Update loaded -
The update process will start, the next window will show the progress:
Update device process -
A confirmation panel will then appear to ensure that the user has not connected the device through the Veronte USB.
Update device process - Confirmation panel -
If the device is connected in a way other than USB, drag the blue arrow to the right until it turns green to confirm and the update process will continue.
Confirmation panel OK 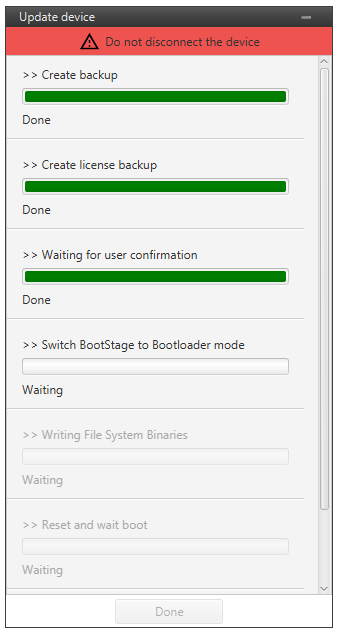
Update device process - Confirmed -
Otherwise, click cancel and the update process will be cancelled:
Confirmation panel CANCEL 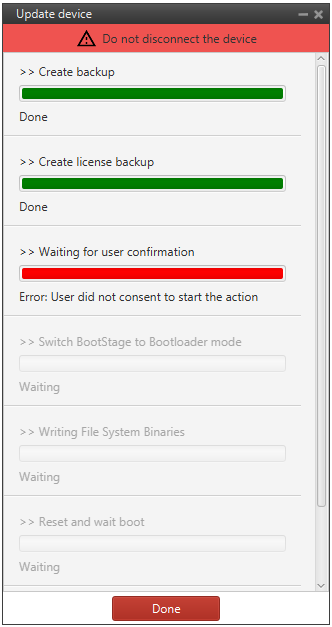
Update device process - Cancelled
-
-
When finished, click on Done:
Update device process finished Note
During the update the device has been formatted and consequently the Autopilot 1x configuration has been deleted.
Therefore Veronte Link will show it as Maintenance mode (loaded with errors) and PDIF: Failed load.
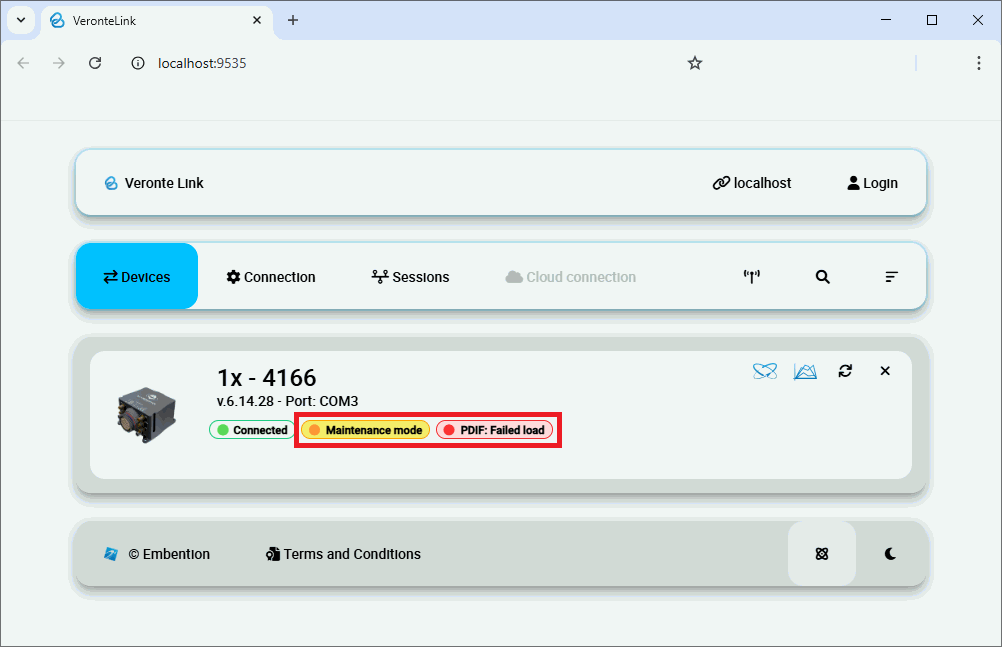
Veronte Link - Failed load -
Finally, upload the .backup file obtained in the Update bootloader to version 8 process.
Use the Upload backup tool of Veronte Updater (v8). For this:
-
Click on Advanced tools Upload backup.
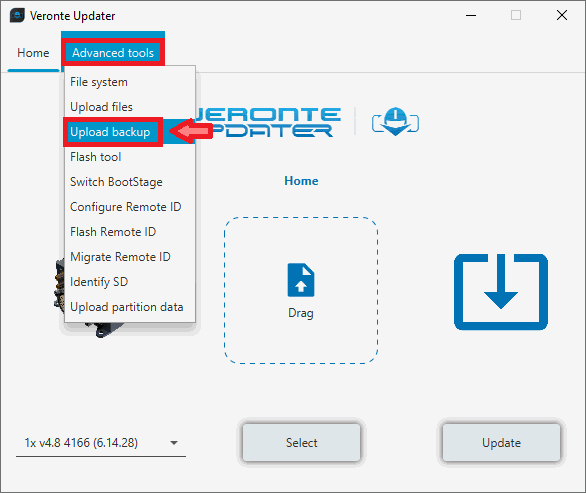
Upload backup -
Load the .backup file. There are two ways to do this, dragging the file to the Drag area or by using the Select button.
The latter option will open the following browser to select the .backup file stored in the user's local storage:
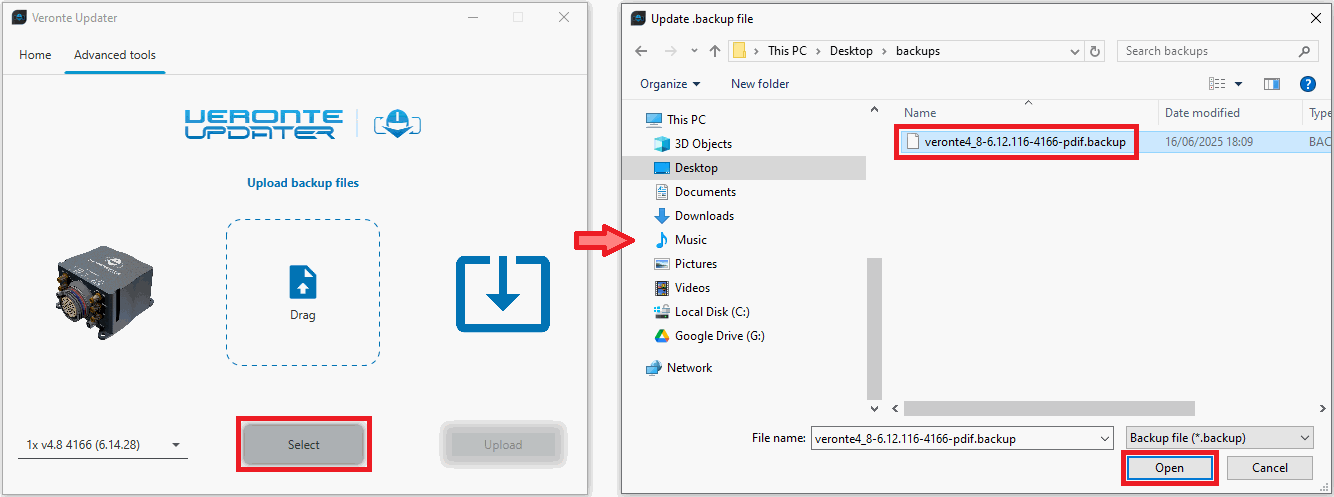
Upload backup - Select .backup file -
Once the .backup file is loaded, click on Update to send the configuracion to the device.
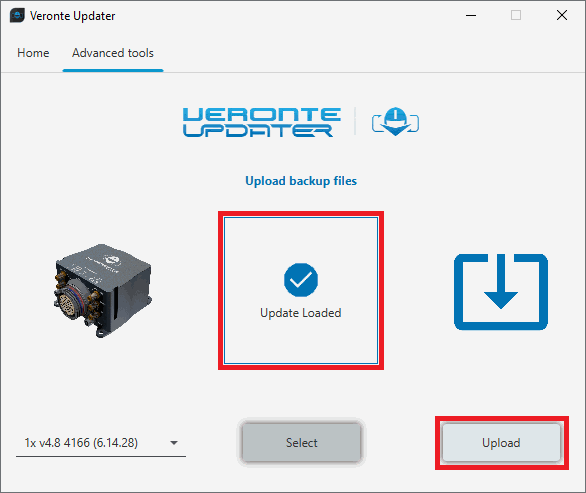
Upload backup - Upload -
Once the process, finish, click on Done.
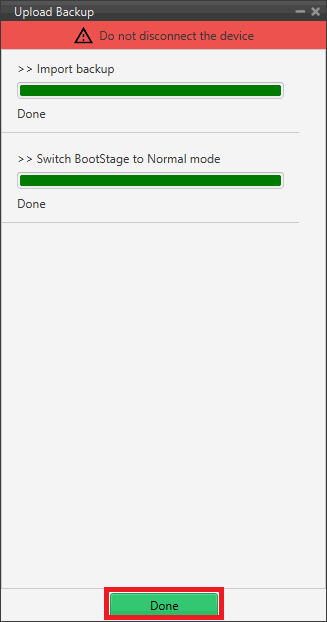
Upload backup - Upload process
-
Autopilot 1x should now be in version 8 with the migrated PDI and switch to Normal mode and Ready status:
DRx
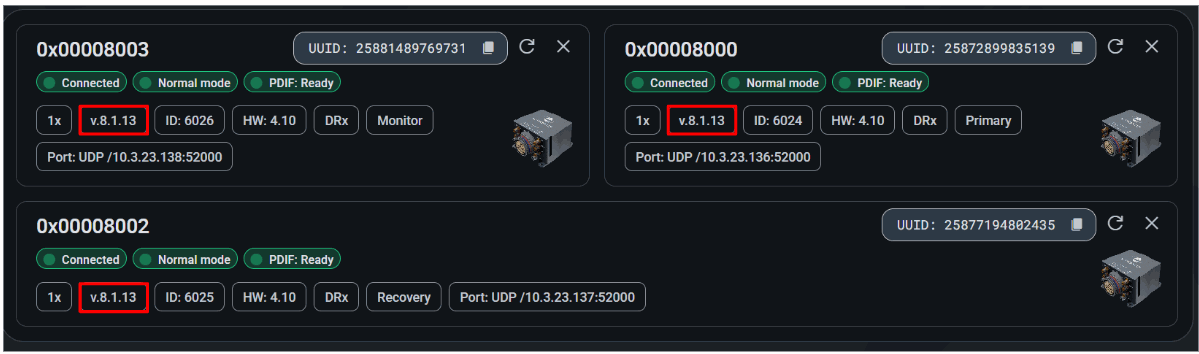
The DRX consists of three individual 1x units. To upgrade the DRX system, each of the three units must be updated individually to the same firmware version.
Note
Following the upgrade, verify on Veronte Link that all three 1x units are running the same firmware version.
PCS
Updating a PCS unit follows the same procedure as a standard Veronte Autopilot 1x, as it contains a 1x unit inside. However, since the upgrade to firmware 7 cannot be performed using the main USB harness connection, a preliminary hardware step is required to establish a direct RS232 connection with the internal Autopilot 1x.
The following steps detail how to prepare a PCS unit for the update:
-
Access the Expansion Bay.
First, users must access the internal connectors of the PCS. The procedure is detailed in the Expansion Bay Access - Hardware Installation section of the PCS Hardware Manual. Follow the steps provided in that section to remove the side plate and front cover.
-
Connect the RS232 Adapter to the Expansion Bay Connector.
The communication link for the update will be established through the expansion bay:
- Prepare an RS232 to USB adapter cable.
-
Connect the adapter wires to the following pins on the Expansion Bay Connector:
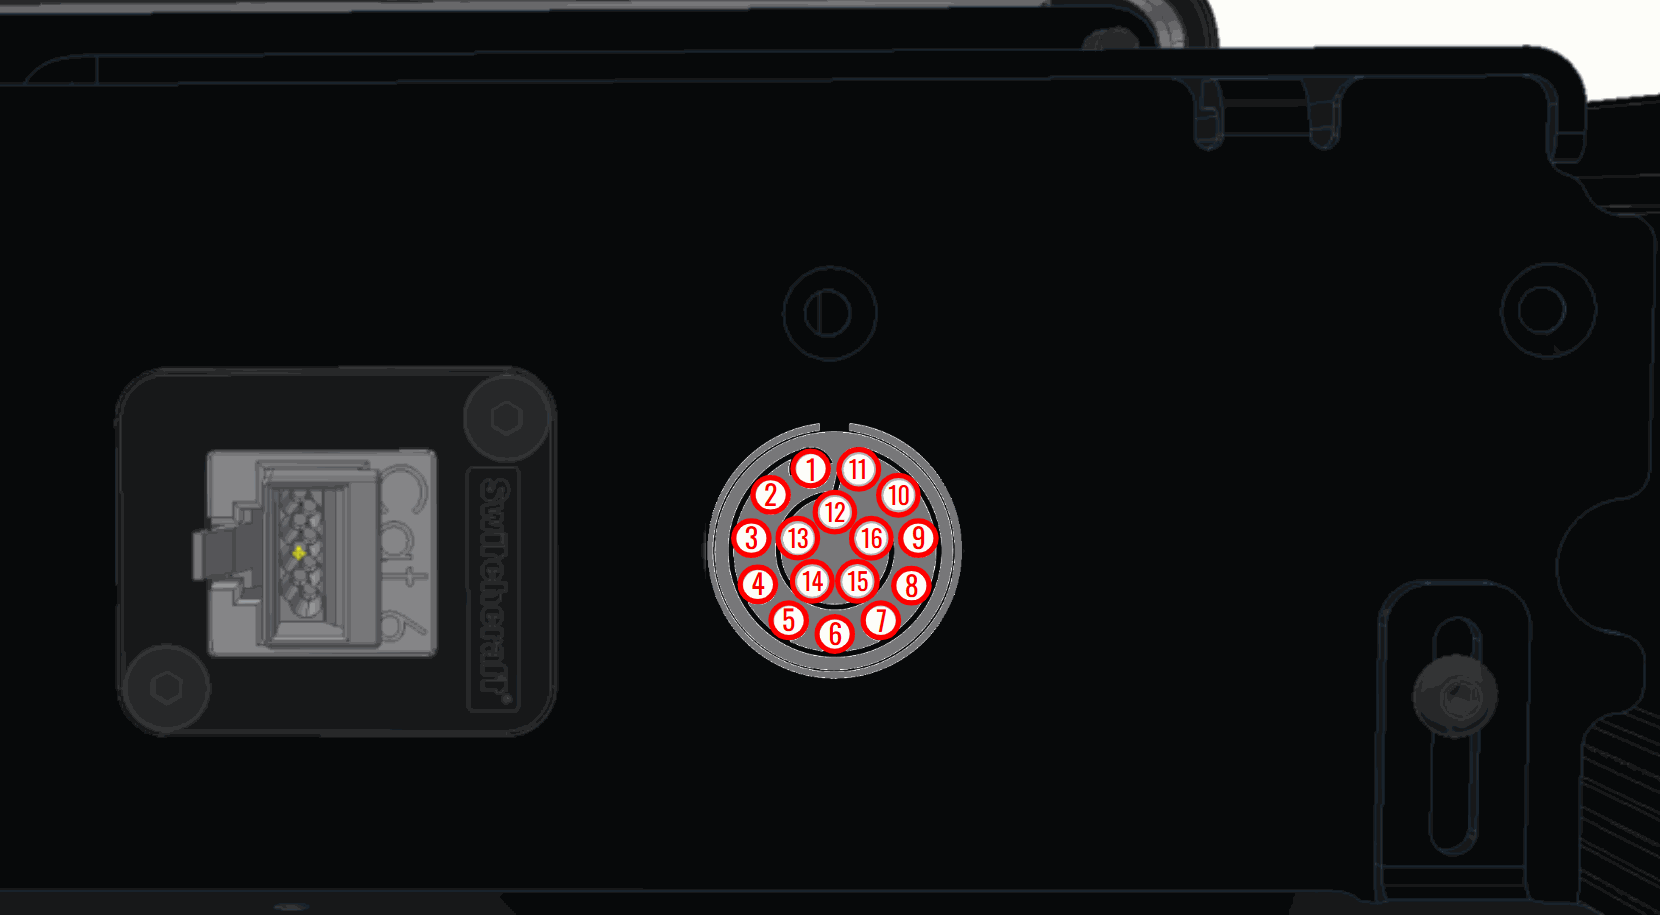
Expansion Bay Connector RS232-USB Adapter PIN Signal Signal 14 RS232-TX RS232 RX 16 RS232-RX RS232 TX 8 GND GND
Note
If any wires are connected to pins 14 and 16, they must be temporarily disconnected before proceeding.
-
Configure the Communication Port in 1x PDI Builder v.7.
Before using the new adapter, Autopilot 1x must be configured to route communication through the RS232 port. To do this, connect the main PCS harness via USB as usual and follow the preliminary steps detailed at the beginning of the Upgrade 7 to 8 section of this manual.
-
Proceed with the Update.
Once the connection configuration is set, the PCS is ready for the update.
- Disconnect the harness from the PCS.
-
Connect the RS232 to USB adapter to your computer. Veronte Link v8 should now detect the PCS (Autopilot 1x) through this new COM port; for further information on this, refer to the Serial connection - Integration examples section of the Veronte Link user manual.
-
From this point forward, the update process is identical to that of a standard Autopilot 1x. Continue with the steps detailed in the Upgrade 7 to 8 section of this manual.
© 2026 Embention. All rights reserved.