Additional apps
Veronte UDP Telemetry CLI
Veronte UDP Telemetry CLI is an additional command-line tool which allows Veronte Link to send Autopilot 1x telemetry over UDP.
Download
Once the Veronte Autopilot 1x has been purchased, a GitHub release should be created for the customer with the application.
To access to the release and download the software, read the Releases section of the Joint Collaboration Framework manual.
Installation
To install Veronte UDP Telemetry CLI on Windows just execute “veronte-udp-telemetry-cli.exe” and follow the indications of the Setup Wizard.
Note
If users have any problems with the installation, please disable the antivirus and the Windows firewall. Disabling the antivirus depends on the antivirus software.
To disable the firewall, go to “Control Panel” \(\rightarrow\) “System and Security” \(\rightarrow\) “Windows Defender Firewall” and then, click on “Turn windows Defender Firewall on or off”.
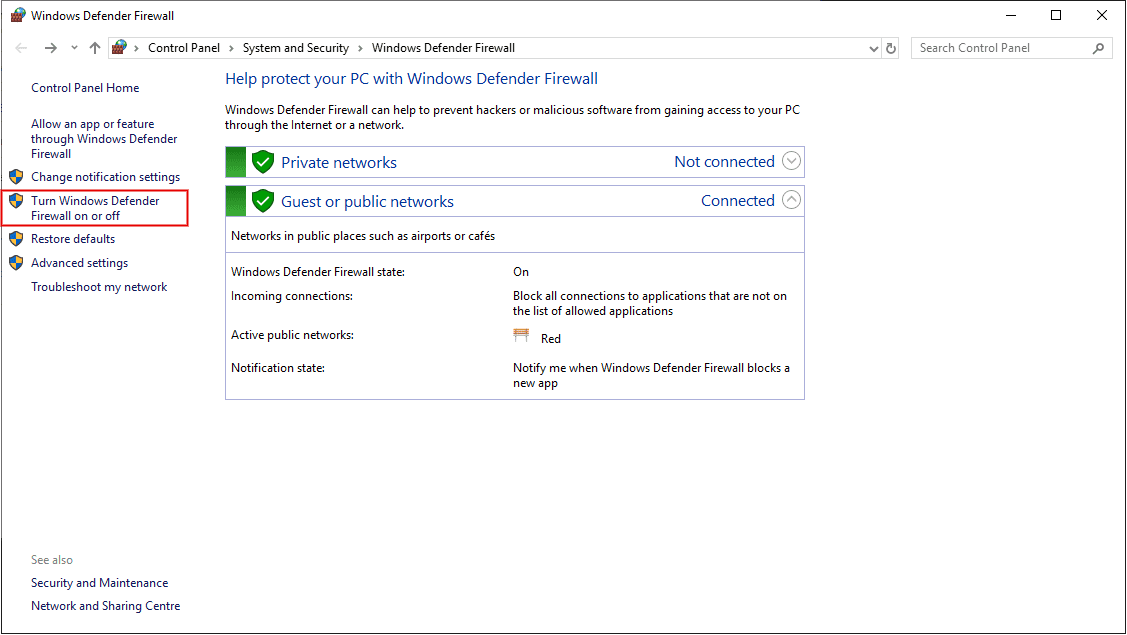
Windows Defender Firewall
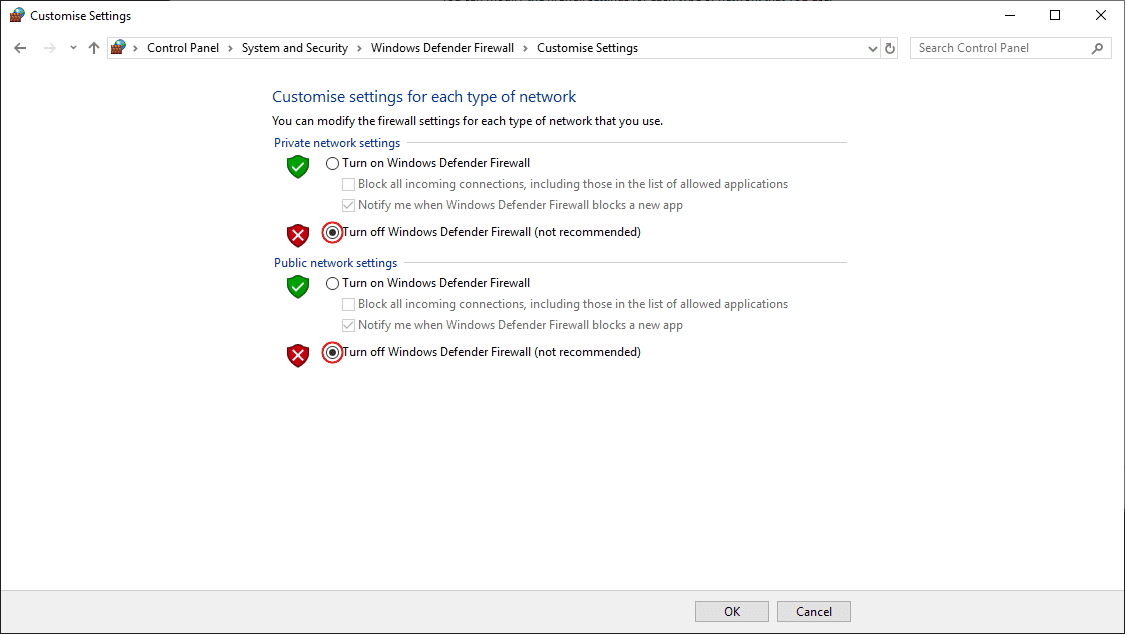
Windows Defender Firewall: Customize Settings
Configuration
The following sections detail the steps to configure the Veronte system to transmit telemetry UDP messages through Veronte UDP Telemetry CLI, after it is installed.
1x PDI Builder
First, in 1x PDI Builder, the intended variables to send must be added to the corresponding telemetry vector.
To do this:
Go to Telemetry menu \(\rightarrow\) Telemetry panel.
By clicking the corresponding
 button, add the desired telemetry variables to one of the telemetry vectors Data to VApp.
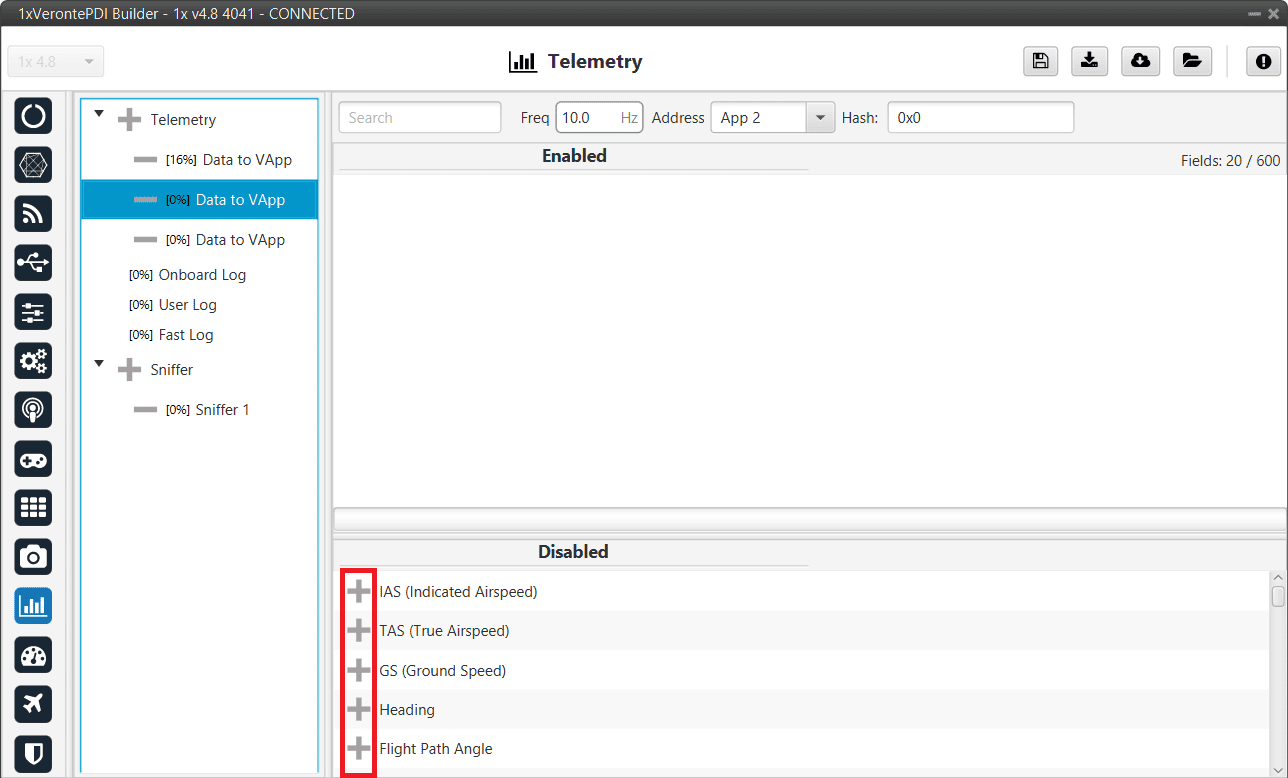
Add variables
Note
For further information about this Telemetry menu, please refer to the Telemetry section of 1x PDI Builder user manual.
Configure the Data to VApp vector where the variables have been added as follows:
Frequency: Desired frequency of data transmission
Address: App 2 (Veronte apps address)
Note
Hash parameter is not configurable, it is automatically calculated by the system based on the telemetry vector configured by the user. It is a hexadecimal representation of the CRC of the fieldset.
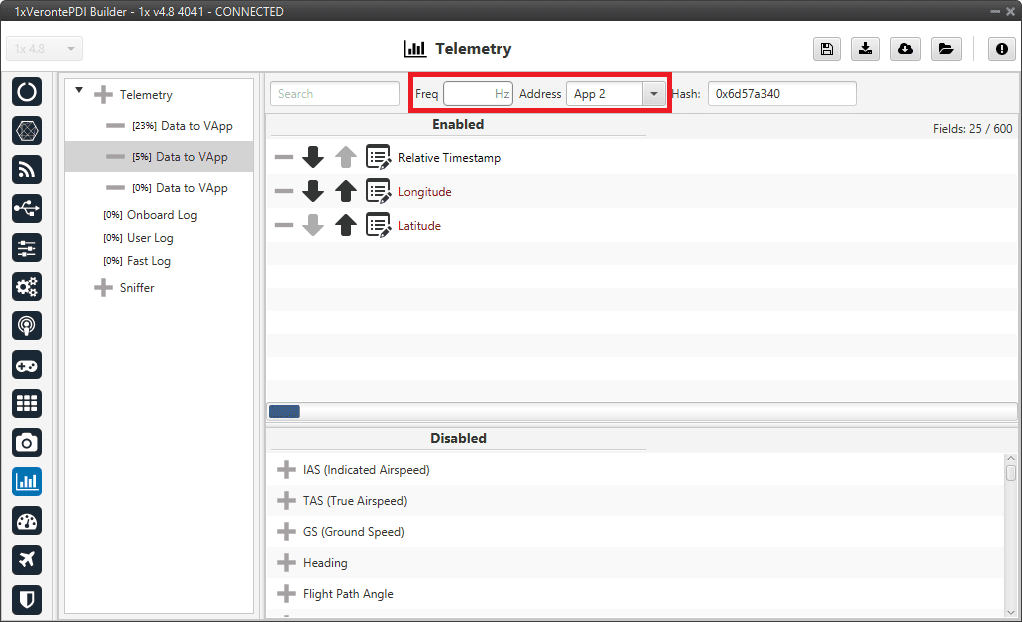
Data vector parameters
Save the changes by clicking
 button.
Veronte UDP Telemetry CLI
Veronte UDP Telemetry CLI has a configuration file (tudp.config) where users must specify which telemetry variables to send. Once the app is installed, this file can be found in C:/Users/user/AppData/Roaming/VeronteUDPTelemetryCli:
Configuration file
Caution
On Windows, the AppData folder is hidden by default, if it is not visible in C:\Users\user, users can “show” it by checking the “Hidden Items” checkbox:
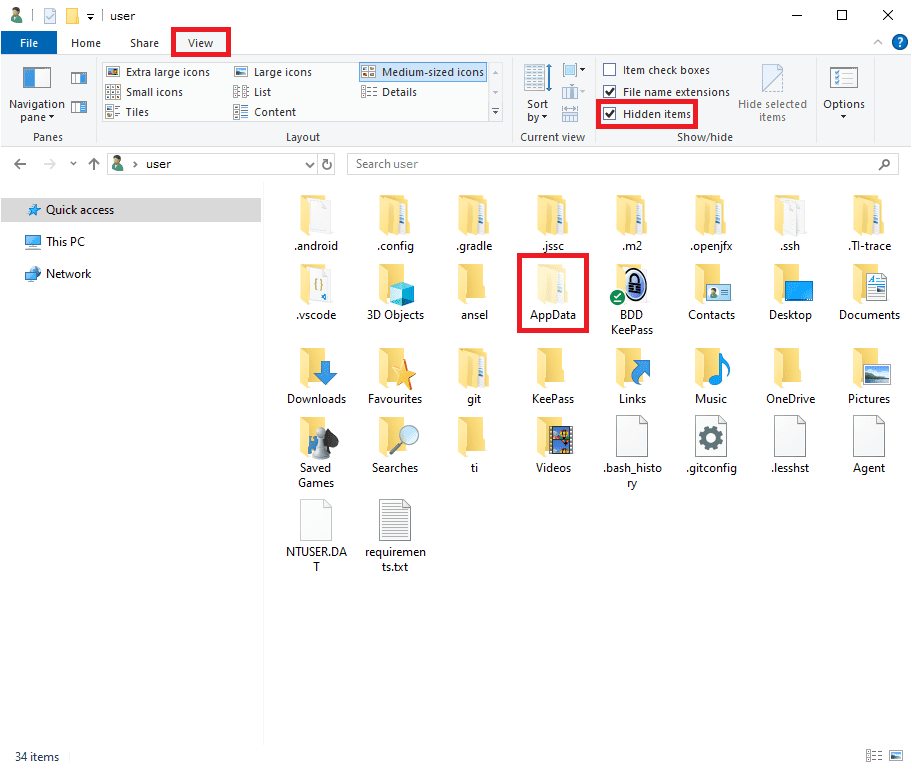
Windows File Explorer
In tudp.config, there is a table where users must fill the following information for each telemetry variable to send:
Important
The variables configured in the tudp.config file must match the previous configuration from
1x PDI Builder configuration section of this manual, so each variable is parsed
according to the organization of the bits.
MULT: Scale factor (the variable is multiplied by this number)
OFFSET: Offset factor (this number is added to the variable)
TVAR: Type of variable coding
byte: Unsigned byte (0 to 255)
bit: A desired number of bits
UInt16: Unsigned 16-bit integer (0 to 65.536)
Int16: Signed 16-bit integer (-32.768 to 32.768)
UInt32: Unsigned 32-bit integer (-2.147.483.648 to 2.147.483.648)
Int32: Signed 32-bit integer (0 to 4.294.967.295)
Float: 32 bit single-precision floating-point ( \(3.4028237 \cdot 10^{38}\) to \(1.175494 \cdot 10^{-38}\) )
UAV: Serial Number of the Autopilot 1x where the variables come from.
VERVAR: Type of variable in Veronte system.
RVAR: Real variables
UVAR: Integer variables
BIT: Bit variables
ID: Identifier of the variable in Veronte. Refer to the List of variables - Lists of interest section of 1x Software Manual for Index-Variable correspondence or check it on the Variables panel of the UI menu of 1x PDI Builder app.
UNIT: Index of the unit of measure of the variable. Please, see the Index-Unit correspondence table for detailed information.
This a configuration example for Relative Timestamp, Longitude and Latitude variables:

Relative Timestamp, Longitude and Latitude example
Index-Unit correspondence table
Unit ID |
Unit |
|---|---|
0 |
m/s |
1 |
kt |
2 |
km/h |
3 |
mph |
4 |
ft/s |
121 |
ft/m |
321 |
mm/s |
5 |
m |
6 |
km |
62 |
mm |
63 |
cm |
7 |
mi |
8 |
NM |
9 |
yd |
10 |
ft |
11 |
in |
12 |
m/s² |
13 |
ft/s² |
14 |
in/s² |
15 |
g (gravity) |
202 |
rad |
16 |
rad [\(-\pi, \pi\)] |
203 |
rad [0, \(2\pi\)] |
205 |
º |
17 |
º [-180,180] |
101 |
º [0,360] |
102 |
º ‘ ‘’ |
103 |
º ‘ ‘’ (N/S) |
104 |
º ‘ ‘’ (E/W) |
21 |
T |
160 |
nT |
23 |
G |
22 |
mG |
24 |
V |
25 |
mV |
26 |
A |
27 |
mA |
340 |
kA |
28 |
Pa |
29 |
kPa |
30 |
bar |
31 |
mbar |
32 |
psi |
33 |
mmHg |
34 |
at |
35 |
atm |
147 |
Pa² |
36 |
K |
37 |
ºC |
38 |
ºF |
39 |
s |
120 |
Time |
40 |
min |
41 |
h |
330 |
ns |
108 |
\(\mu\) s |
109 |
ms |
42 |
rad/s |
117 |
º/s |
43 |
rad/min |
44 |
rad/h |
45 |
rps |
46 |
rpm |
47 |
rph |
57 |
m³/s |
58 |
gal/s |
54 |
gal/h |
59 |
l/s |
55 |
l/h |
56 |
– |
60 |
x1 |
64 |
% |
61 |
pkts/s |
105 |
Hz |
106 |
mHz |
107 |
kHz |
140 |
Bd |
141 |
kBd |
142 |
MBd |
110 |
m² |
111 |
cm² |
112 |
mm² |
113 |
km² |
114 |
mile² |
115 |
ft² |
116 |
yd² |
118 |
bit |
119 |
byte |
131 |
KB |
132 |
GB |
122 |
kg |
123 |
g |
124 |
tonnes |
125 |
lbs |
126 |
oz |
127 |
N |
128 |
kN |
129 |
lbf |
130 |
pdl |
134 |
rad/s² |
135 |
rad/min² |
136 |
rad/h² |
137 |
º/s² |
138 |
º/m² |
139 |
º/h² |
329 |
rpm/s |
143 |
T² |
144 |
(m/s)² |
145 |
(cm/s)² |
146 |
(mm/s)² |
327 |
\(\Omega\) |
328 |
Henrios |
322 |
watios |
323 |
kW |
324 |
Kgm/s |
325 |
erg/s |
326 |
cv |
331 |
m³ |
332 |
dm³ |
333 |
mm³ |
334 |
L |
335 |
mL |
Operation
This section details the steps to transmit telemetry UDP messages through Veronte UDP Telemetry CLI.
Sending UDP messages
Veronte UDP Telemetry CLI connects to Veronte Link to send the previously configured Autopilot 1x telemetry via UDP messages. For this reason, the connection between the autopilot and Veronte Link must be properly established, and Veronte Link needs to be opened.
Note
For more information about this connection, please refer to Connection - Operation section of this manual.
These are the options to send the configured variables:
Launching Veronte UDP Telemetry CLI by double-clicking on the App shortcut or the
.exefile:
Veronte UDP Telemetry CLI shorcut
This will send the UDP messages with the following default configuration:
Host IP: 127.0.0.1
UDP port: 3000
Frequency: 10 Hz
Note
These installation files location will vary depending on the location selected during installation. Note that Veronte UDP Telemetry CLI Installer
.exeis not the Veronte UDP Telemetry CLI.exeto launch.Launching Veronte UDP Telemetry CLI
.exefrom terminal, where it is possible to specify the parameters of the trasmission using the following command-line options:- u: IP address
- p: UDP port
- f: Desired frequency of data transmission (Hz)
This is an example:
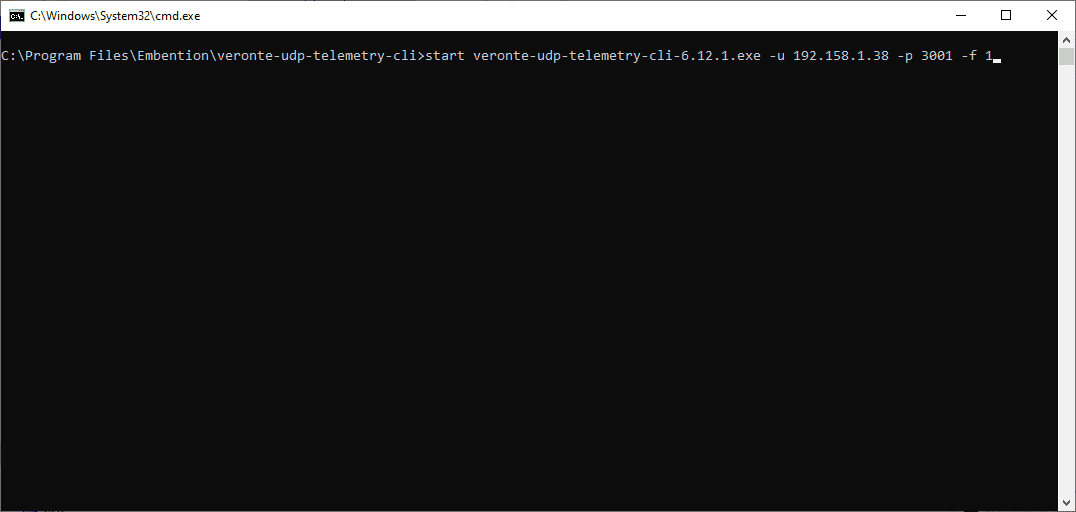
Launching from terminal example
The expected outcome is the following:
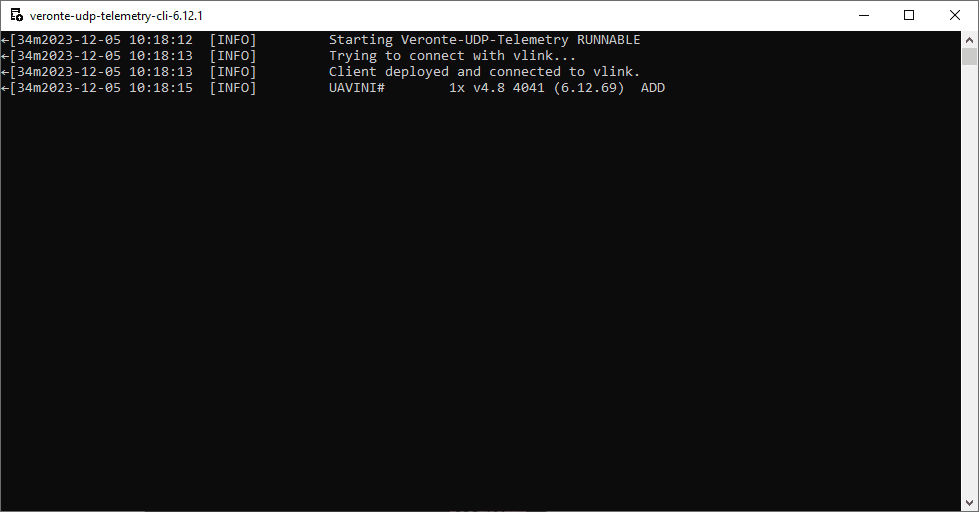
Expected outcome
Note
Veronte UDP Telemetry CLI always adds the matcher 0x0A 0xA0 at the beginning of each sent UDP packet before the variable data.
Therefore the received UDP packet will be: 0x0A 0xA0 followed by the consecutive stream of data in the order and byte width configured in tudp.config.
If users have any doubts about the UDP packets that are generated, please refer to Viewing UDP data - Troubleshooting section of this manual.