Panel
In this menu the user can customize how the phases will look in Veronte Panel, create checklists for each phase, create manual check boxes for particular phase changes and configure some notifications that will appear behind the Veronte Unit (Side Panel) upon activation.
Sort Phases
The first menu gives the option to arrange the phases that will appear on the panel. Just dragging a phase and moving it wherever is desired will change its location in the panel. More than one phase can be arranged in the same line.
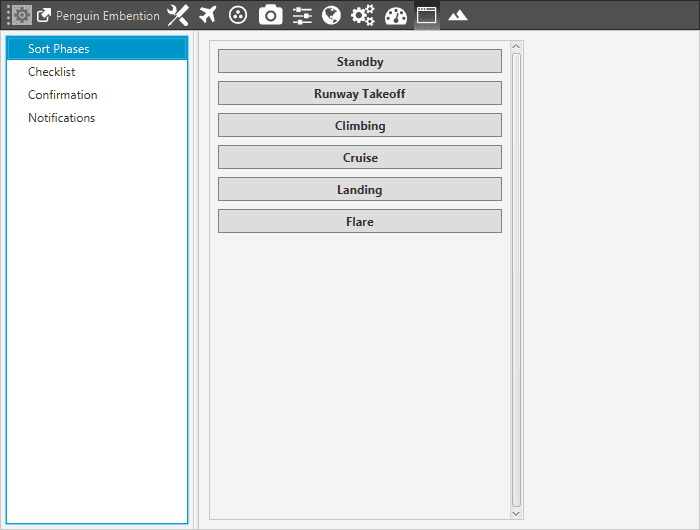
Phases Disposition
Checklists
This feature is used to make sure that some requirements have been accomplished, for example, prior to a phase change or to avoid a possible malfunction.
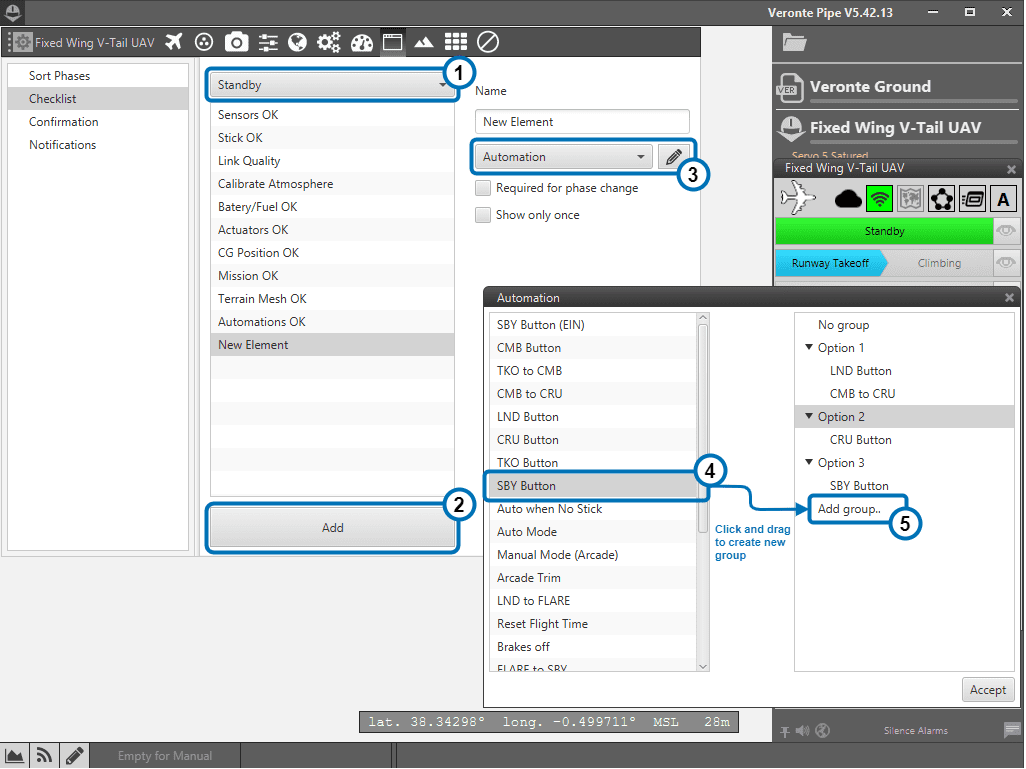
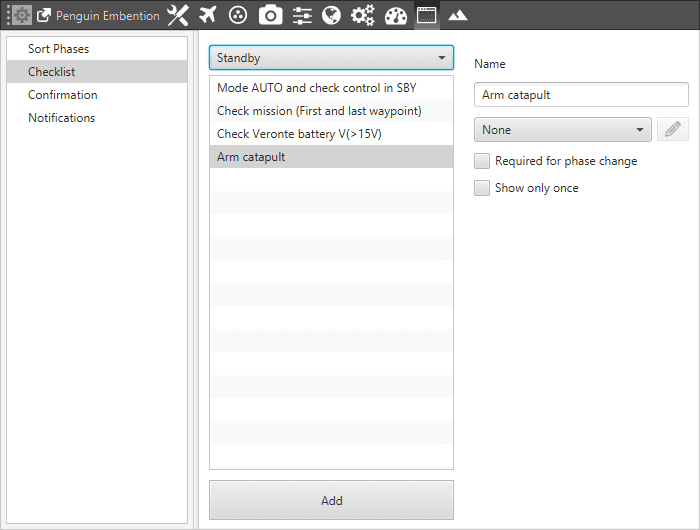
In this menu, the checklist that will appear in the Panel is configured. In (1), the user will find all the phases configured for the operation. In each one of them, new elements for the checklist can be added with the button Add (2). The user can modify the checklist order of the phase by selecting and dragging elements in the list to the desired position.
The configurable parameters for each element are:
Name: the name that will identify the element.
Type: the element chosen from the checklist can be one of the following types.
None: any action is performed, been just a check for the user to do something external to Pipe
Calibrate: the user can request the calibration of the atmosphere model, the DEM or other internal sensors.
Command: send to the UAV a position, a yaw angle or the wind velocity in the three axes.
In Range Check: Allows checking if a variable is between the range selected.
Atmosphere: set the atmosphere parameters (temperature…).
Automation: selection between a set of automations, in order to only activate one of them for the phase that the aircraft is entering in.
Checklist Elements
Click and drag the automations into “Add group” to create a new selection. It is possible to have more than one option.
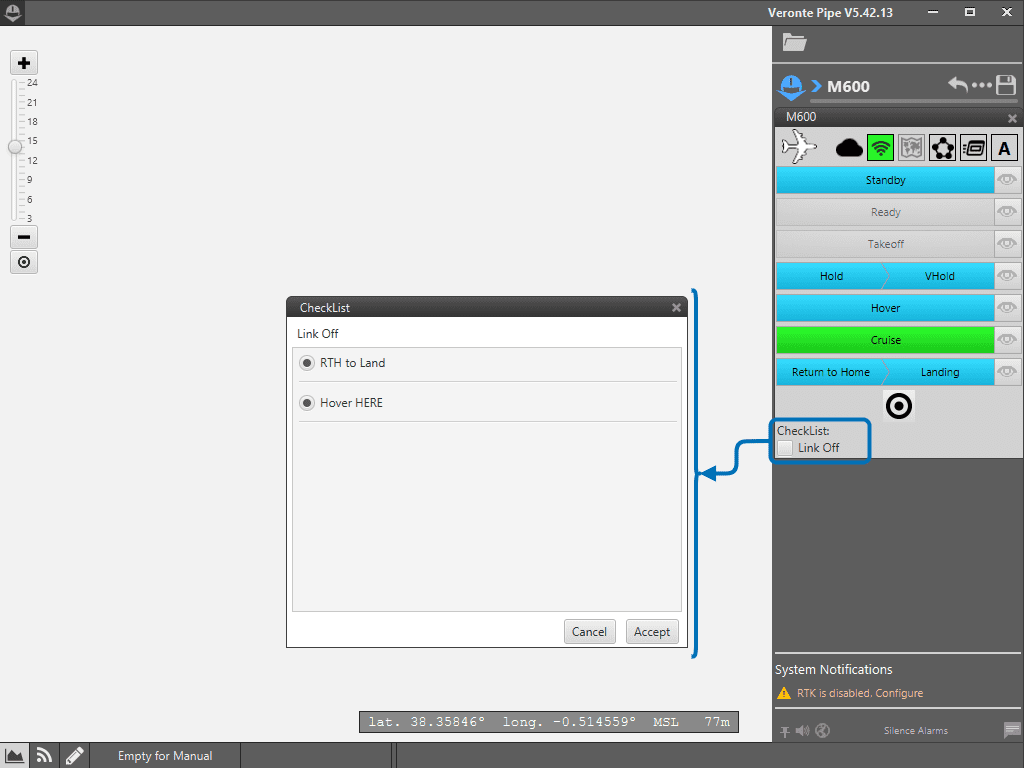
For example, the following figure shows a window with an automation selection on the checklist. The user has to select between two automations previously included in a group. Once one of them is selected, the other one will be automatically deactivated:
Checklist Verification
Required for phase change: the element must be checked to go to another phase.
Show only once: the check will only appear the first time its phase is executed.
Checklist Configuration
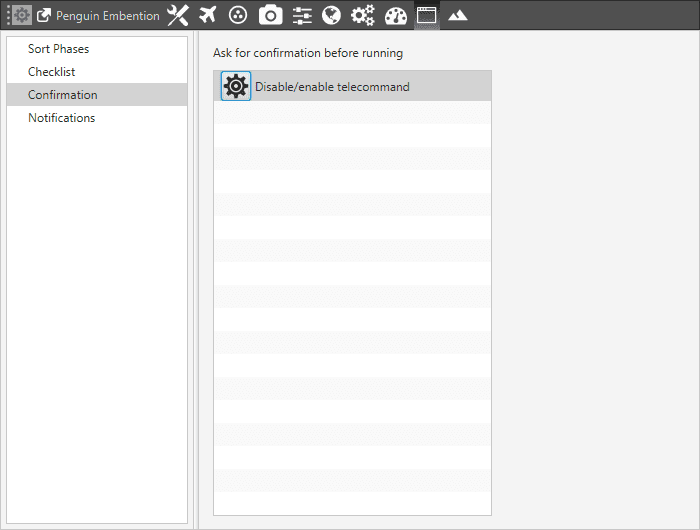
Confirmation
This menu manages the “Disable/Enable telecommand” confirmation message that appear when the radio link button is pressed in Veronte Panel. It is a safety system to avoid pressing this button by mistake.
Panel Confirmation
For the other custom buttons added by the user in the Veronte panel, the confirmation option is alos available. When configuring the Button event, the system provides a check to include a confirmation when selecting that option. For more information check Automations).
When the user is trying to activate an action (previously selected), Veronte Pipe will show a warning message like the following, asking us confirmation:
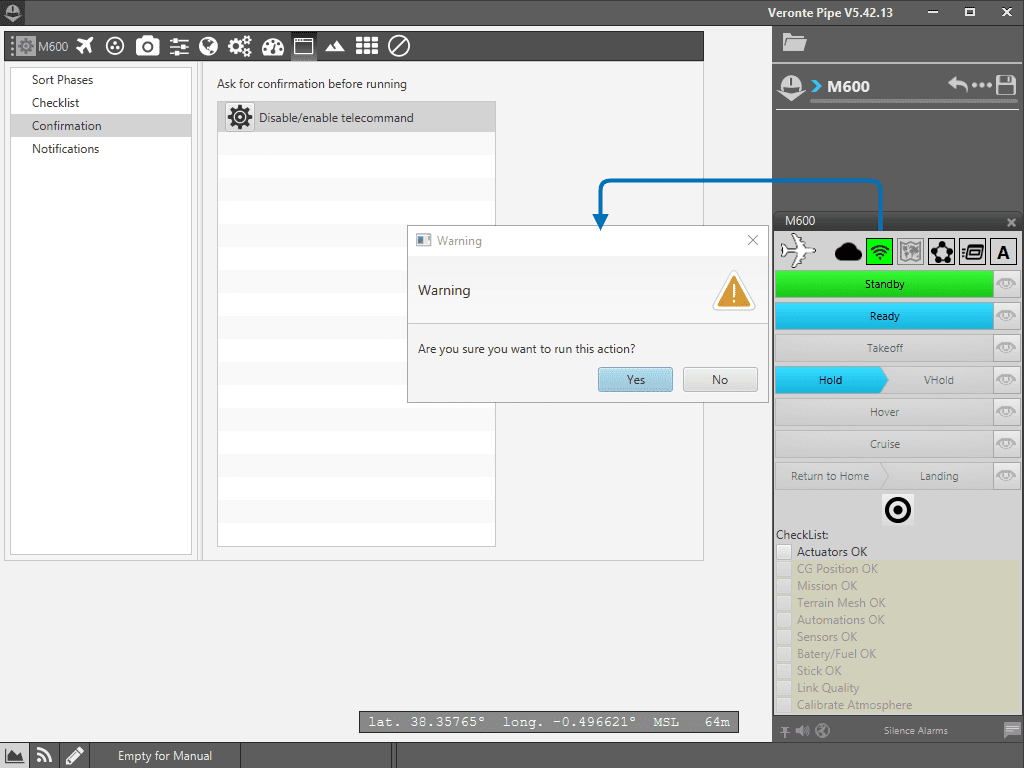
Confirmation – Example
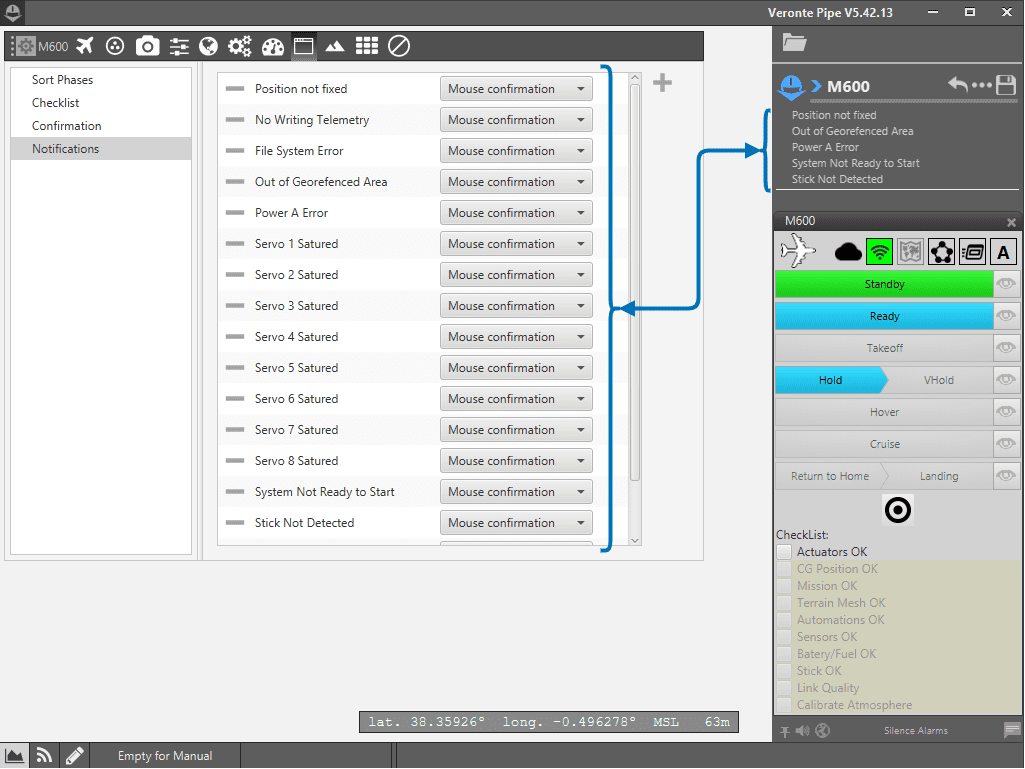
Notifications
This menu is used to select which notifications will appear in the Side Panel and the way in which the user wants to hide them. There are three options:
Mouse confirmation – It is necessary to pass with the mouse on notifications in order to hide them.
Auto-hide – Notification will auto hide in few seconds.
No show – The notifications will not show up.
Panel – Notifications
Besides the notifications that appear by default on this menu, it is possible to include some other system alarms or even custom ones created by the user. Click on “+” to display a pop-up window that allows the selection of a new variable. The window will allow the user to select any BIT variable of the system, including all the custom User BITs. See variables and list of variables for more information.
It is also possible to delete the notifications shown by default, click on the “-” button at the left side of any notification to remove it from the error list.
In the following table, it will be described the error types of the notification panel.
Notification |
Cause |
Possible solution |
|---|---|---|
Position not fixed |
The system is not connected to GPS signal |
Check the GPS signal in the area and the GPS antenna connection |
No writing telemetry |
System is not writing telemetry in the onboard log |
Check the Air micro SD. It could be corrupted or without memory available |
File system error |
System has one or more corrupted files |
Try to repeat the operation or check the micro SD files |
Out of georeferenced area |
The GPS position is out of the areas with terrain altitude information |
Go to Terrain Profile in Mission Panel and move manually Coarse and Fine areas or choose Auto to make the system doing it automatically and save |
Power A error |
The alimentation voltage is out of the admitted range |
Go to “Electrical” section of the manual to check admitted voltages |
Servo X satured |
The servo number X is actually satured |
Check the servos panel to set the moving range |
System not ready to start |
No GPS connection/Licence expired |
See “GPS navigation down”/Update the licence expiration |
Task X real time error |
System is not able to complete all tasks: 1 means High level,5 means Low level |
Check system variables in Variables Panel and move the operations to a lower level |
Stick Not Detected |
The stick is not connected to autopilot |
Check radio signal and stick connection (in case of HIL simulation it will be simulated) |
Sensors Error |
Sensor malfunction |
|
PDI Error |
Some PDI files are inconsistent |
Review errors or import files again |
Warning
In some cases, it will be necessary to restart the autopilot once the solution of one of this problems has been applied (“Out of georeferenced area” for example).