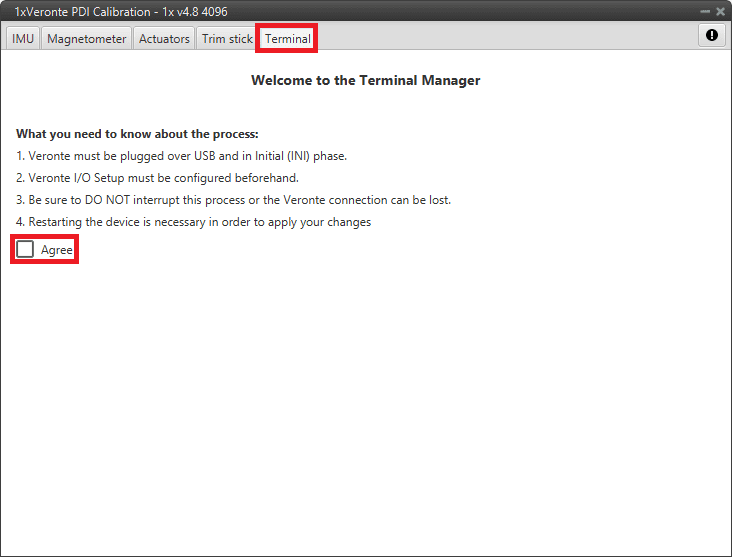
Terminal
The Terminal Manager allows the user to access a Tunnel Console.
This allows the user to see the information/data coming into a certain port (e.g. a serial port) where the device is connected.
Example
If the device is connected to a RS-232 port, in the 1x PDI Builder software the RS232 producer must be bidirectionally connected to a Tunnel consumer and vice versa:
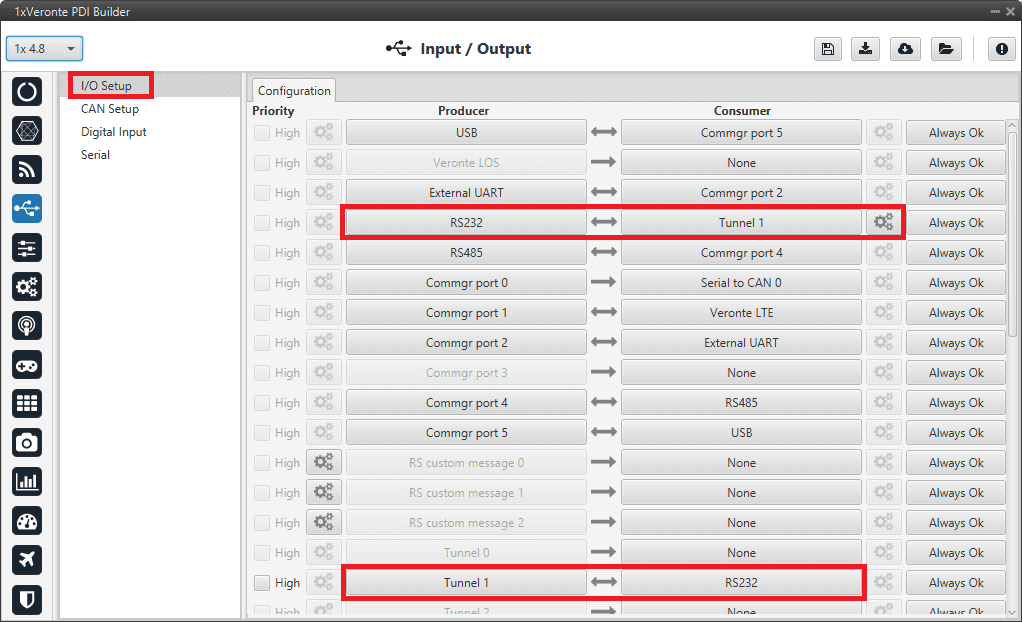
1x PDI Builder - RS232 \(\leftrightarrow\) Tunnel 1
In the case of Veronte Autopilot 1x v4.5, it is integrated with the Microhard Pico Series internal radio module and its configuration can be modified by using the Microhard setup helper.
First, the user must agree the information about the process:
Terminal Manager menu
It is then possible to select the Tunnel (Tunnel 1,2 or 3) that the user has configured and needs.
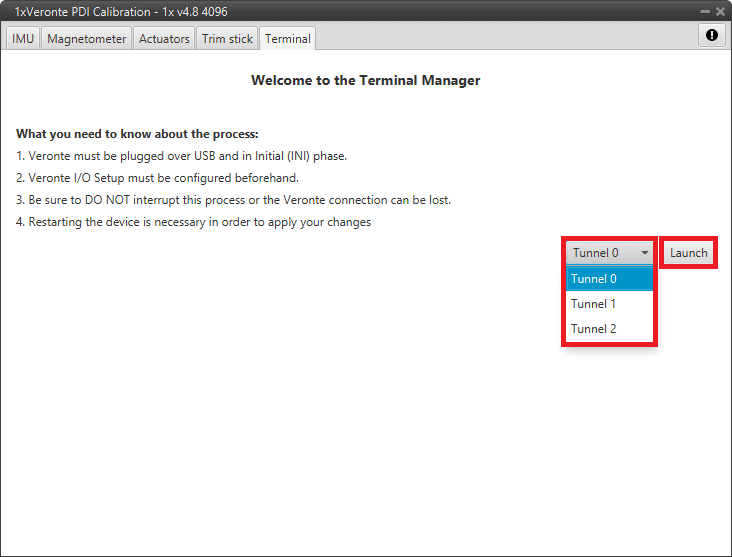
Terminal Manager menu
Once the process is launched (just click on ‘Launch’), everything is correctly configured, the Tunnel Console appears.
Note
If something has gone wrong, the Tunnel Console will not open and, instead, the panel will report of the error occurred and how to fix it:
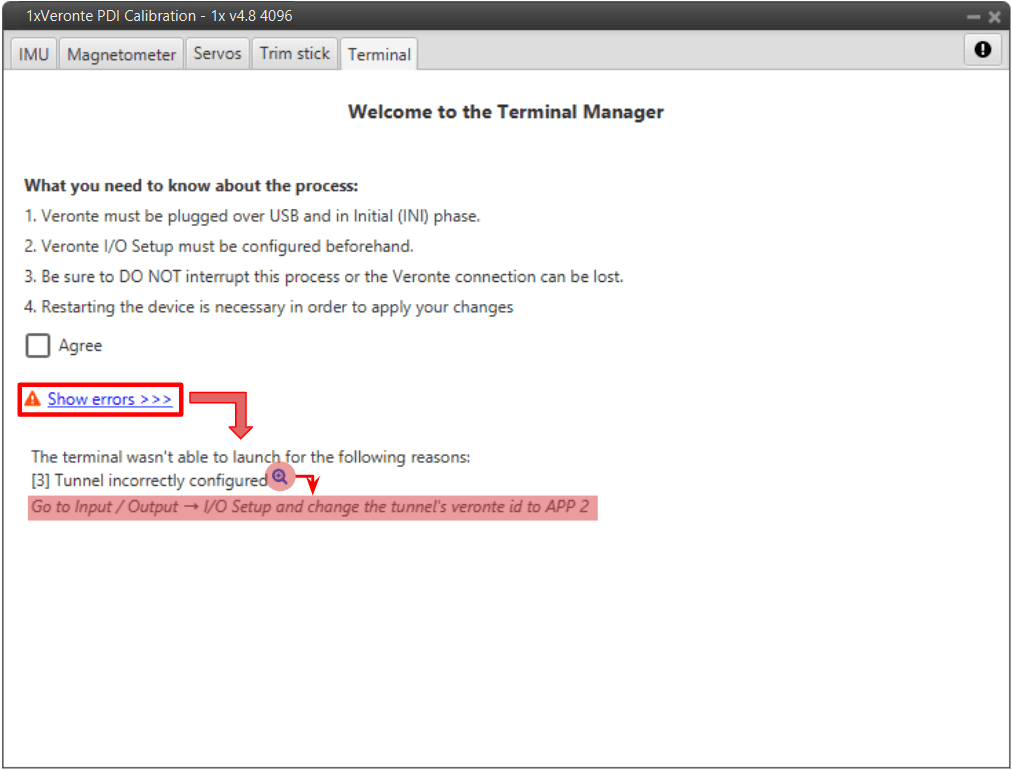
Terminal - Launch failed
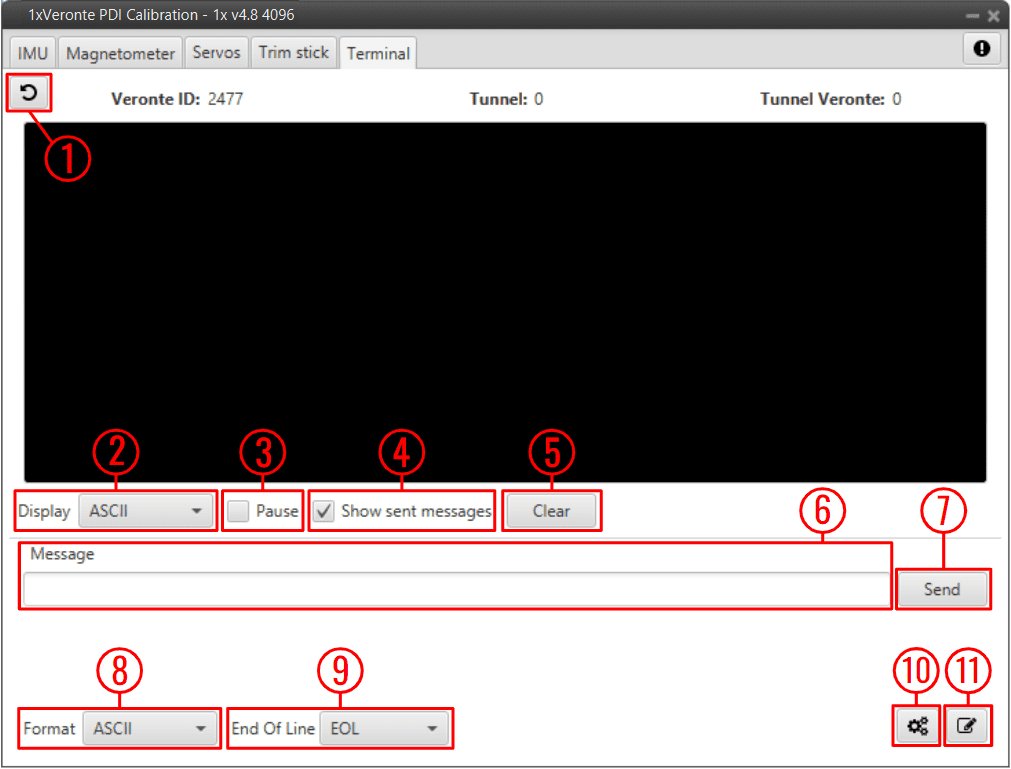
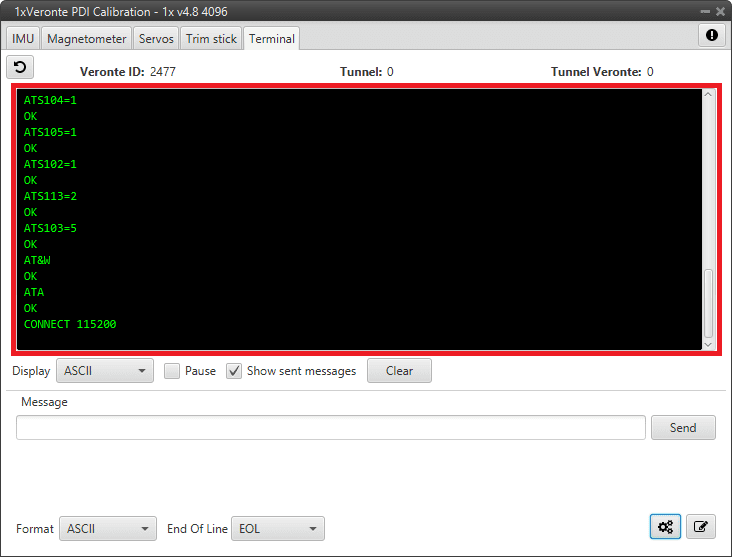
Tunnel Console
Back to Terminal: Click here to return to the initial terminal menu.
Display: Data can be displayed in ASCII or Hexa format.
Pause: When the data stream is running, it is possible to pause it by enable this option.
Show sent message: If enabled, the sent messages are shown in the console.
Clear: Clears the last console data.
Message: Message content.
Send: When clicked, the current message is sent.
Format: Data can be sent in ASCII or Hexa format.
End Of Line: Message “End of line” configuration. The available ‘characters’ are EOL (actually it is the combination of CR and LF), CR, LF or None.
Microhard Wizard: See related subsection below.
Edit: By clicking here, it is possible to construct larger text messages, as well as copy and paste.
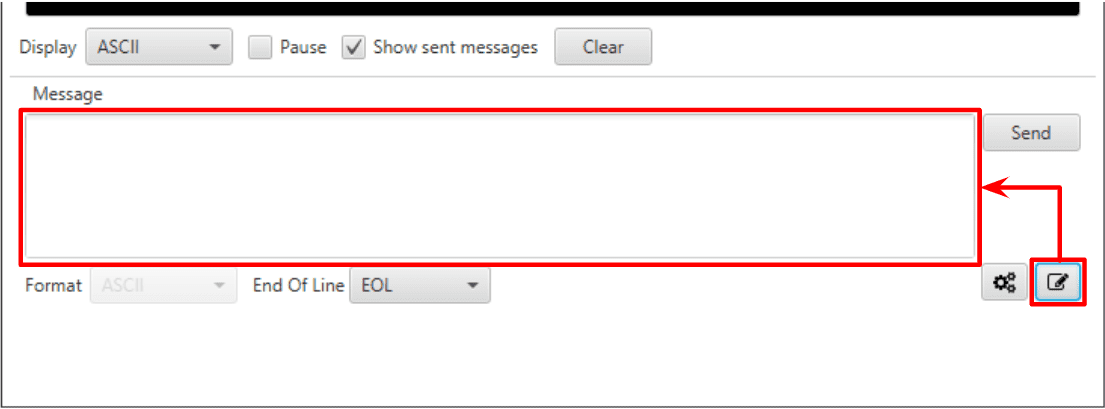
Tunnel Console - Edit message
Microhard setup helper
The Microhard setup helper can be used to easily configure the Microhard internal modules (Veronte Autopilot 1x with hardware version 4.5 internal radio).
To do this, the user must click on the dedicated button ![]() and the Wizard will automatically start the radio searching.
and the Wizard will automatically start the radio searching.
Once the radio is found, its model and the configured parameters are displayed on the console:
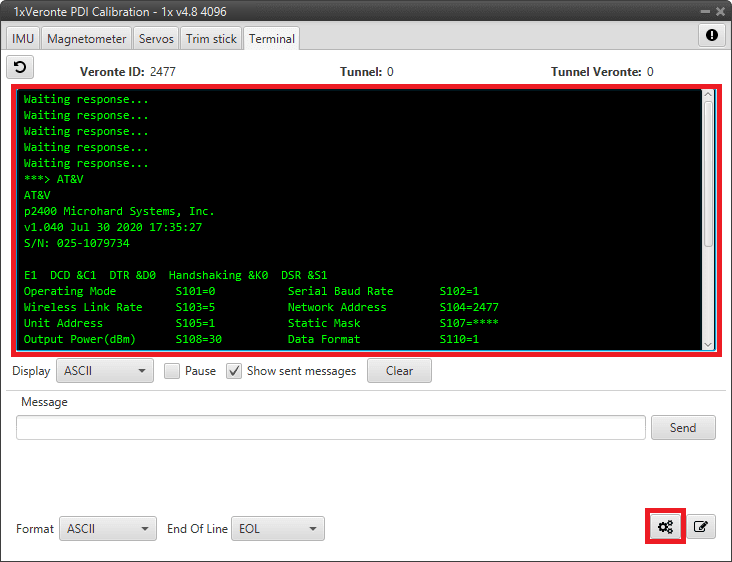
Microhard Wizard - Tunnel Console
The following Wizard menu is displayed:
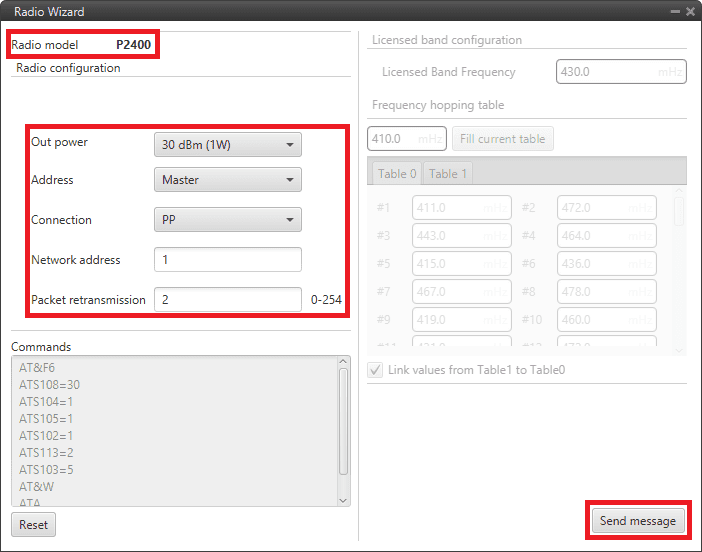
Microhard Wizard menu
Warning
The parameters shown in this wizard menu are not those configured in the radio module.
The default wizard parameters are shown here, the ones configured in the radio module are shown in the tunnel console as shown in the figure Microhard Wizard - Tunnel Console.
These parameters have to be configured according to the radio module installed in the Veronte Autopilot 1x.
Radio model: Each Autopilot 1x has only one of the following radio modules P400, P900 and P2400.
Output power: Sets the available output power.
Address: Select the role for each Autopilot 1x by selectig Master or Slave.
By default, Air units are defined as Slave and Ground units are defined as Master.
Connection: PP (Point to Point) or PMP (Point Multi Point) connections.
By default all units are paired with PP connection.
Network address: This is the address of the network to which the autopilot with this radio module installed belongs. This number must be the same for all Veronte Autopilots 1x on the same network.
Tip
Usually, the address of the ground unit is set as the network address for easy recall.
Packet retransmission: Each data packet is sent as many times as defined here. It is recommended to leave the default value.
By pressing ‘Send message’, the user is able to send all these parameters to the Microhard module.
Note
The commands can also be sent manually. For advanced Microhard configuration, please refer to the User Manual of the specific radio module: Microhard - Pico series.
Once the configuration is sent, the radio wizard menu closes and the tunnel console should appear as shown in the figure below:
Tunnel Console - Radio module configured
The Microhard radio module is now configured.
Finally, the Microhard radio module must be restarted so, the user must restart the Veronte Autopilot 1x.