Advanced Tools
Together, the processes listed under the Advanced Tools tab, involve the entire update process described above, except for the Configure Remote ID, Flash Remote ID and Upload partition data which are not part of the upgrade process.
In other words, this allows the user to submit the device to only one of the processes that is carried out during the entire update process.
These are detailed below:
File system
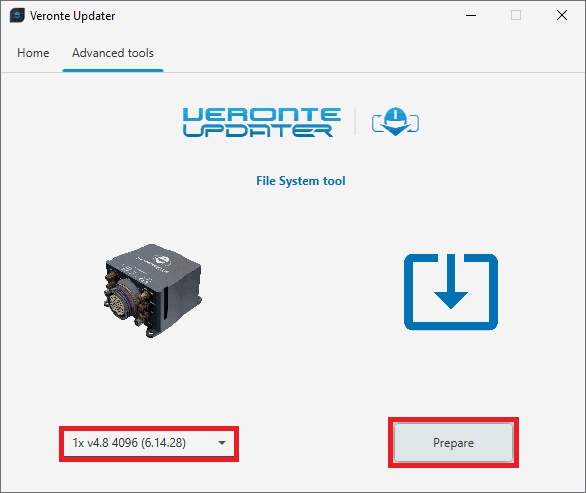
By selecting this option, the file memory of the connected device will be prepared for the update process.
Simply, select the unit to be prepared and click Prepare:
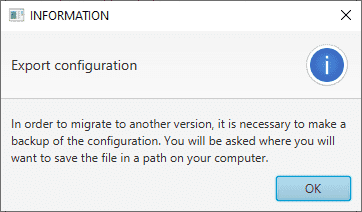
Before the process starts, users must save a back up of the current configuration.
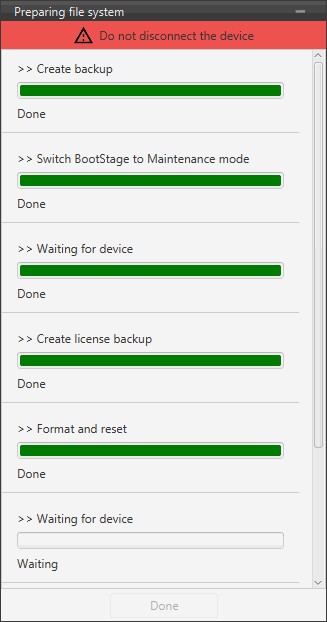
The preparation process will then start and the following windows will show the progress:
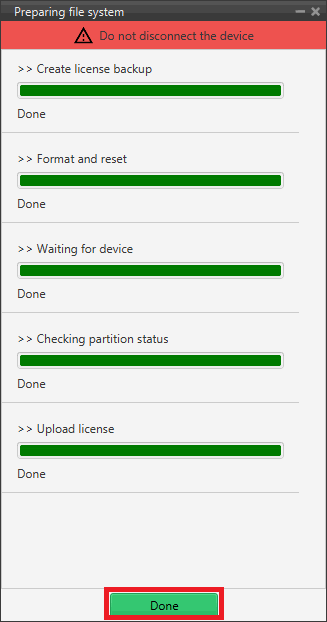
When finished, click on Done:
Upload files
In this tab, the user can load the updating files to the correponding slots of the connected device.
Important
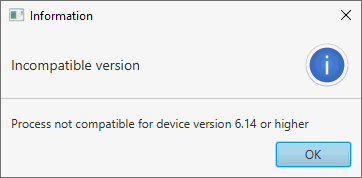
This option is not supported for version 6.14 or higher. If users try to upload the files in these versions, the following message will appear:
There are two ways to do this:
-
Doing it the same way as in the Home tab, i.e. selecting a
.updatefile and letting Veronte Updater internally place each.binfile contained in the.updatefile into each slot.For instance, if slot 0 is selected, one of the
.binfiles will be placed here and the other in the next slot, slot 1. -
Selecting a slot and uploading the first
.bin, then selecting the next slot and uploading the second.binfile.
Note
The available slots in memory are displayed in the drop-down menu under the unit selection drop-down menu.
In this example, the first option has been done:
-
First, select the slot to locate the
.updatefile: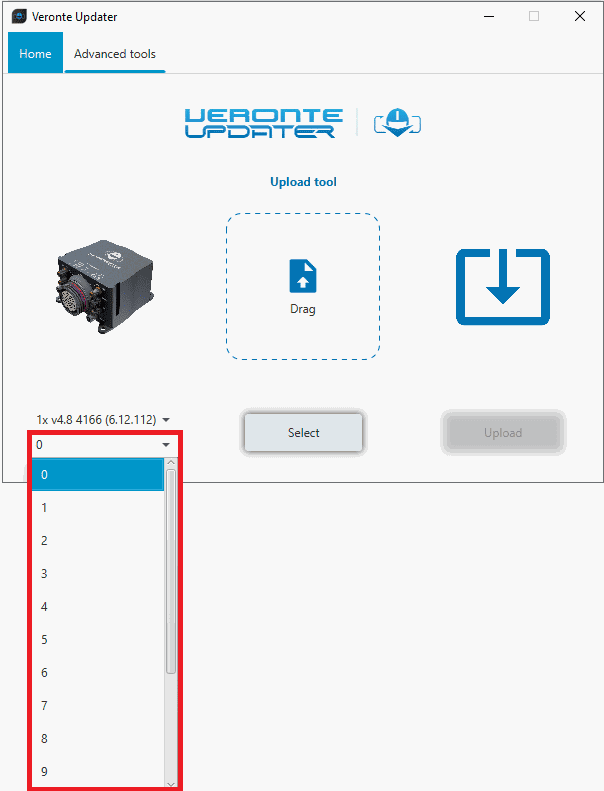
Upload files - Slot selection -
Secondly, drag the file to the Drag area or click on Select and select it from the local storage:

Upload files - Loading file -
Once the
.updatefile is loaded, click on Upload to send the configuracion to the device: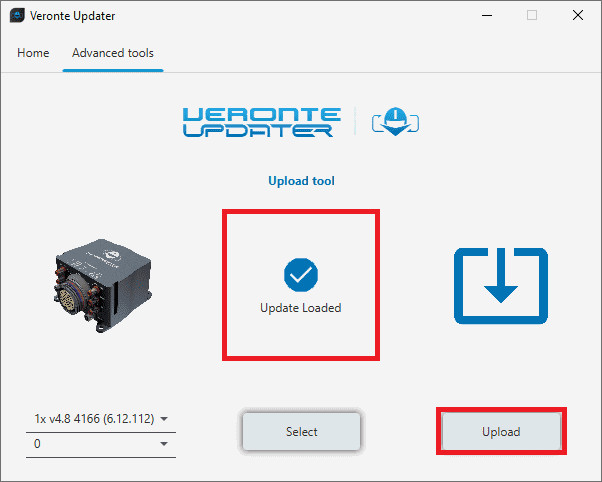
Upload files - Update loaded -
The process will start and the following windows will show the progress:
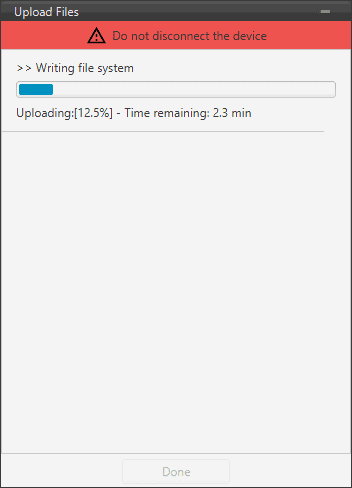
Upload files process -
When finished, click on Done:
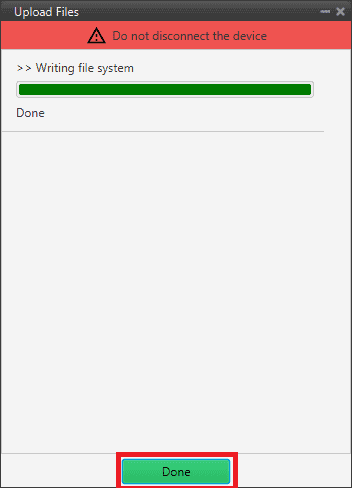
Upload files process finished
Upload backup
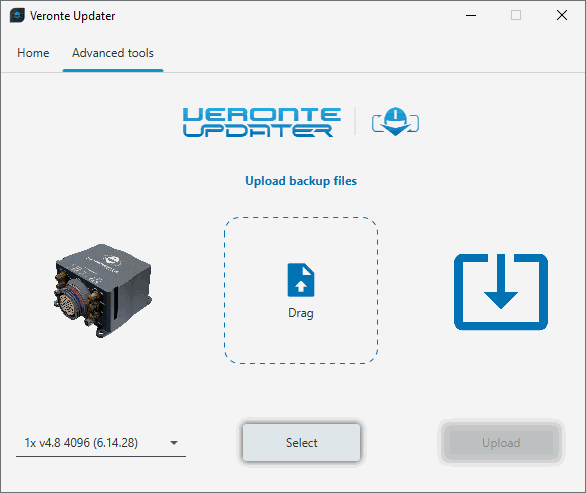
By selecting this option, users can upload the .backup file to the connected device.
-
Load the .backup file. There are two ways to do this, dragging the file to the Drag area or by using the Select button.
The latter option will open the following browser to select the .backup file stored in the user's local storage:
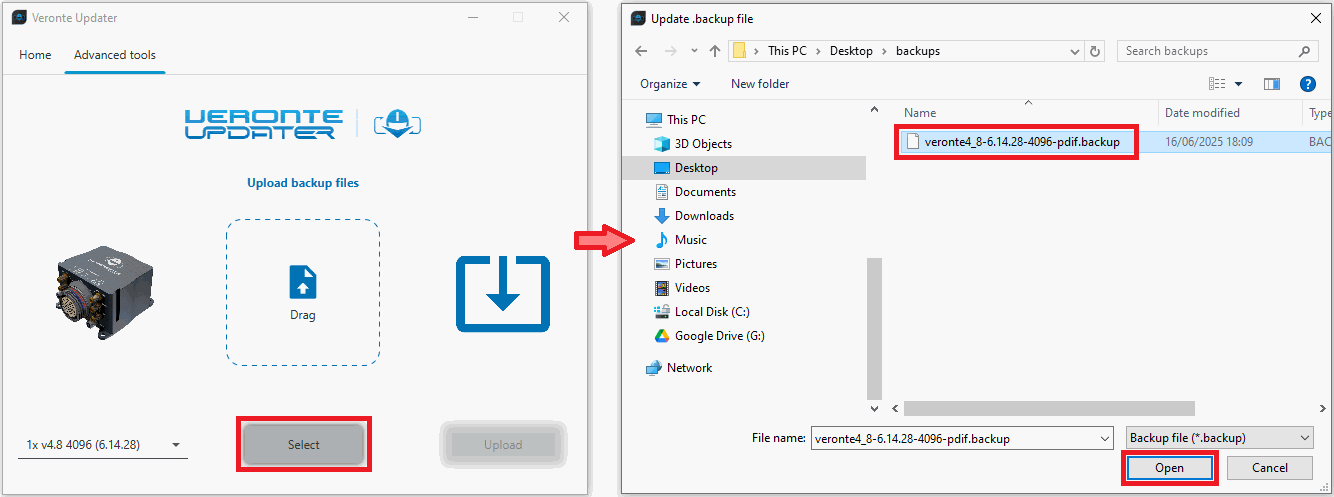
Upload backup - Select .backup file -
Once the .backup file is loaded, click on Update to send the configuracion to the device.
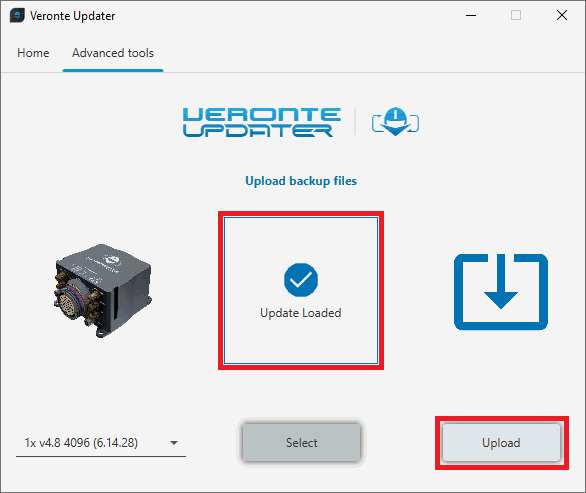
Upload backup - Upload -
Once the process, finish, click on Done.
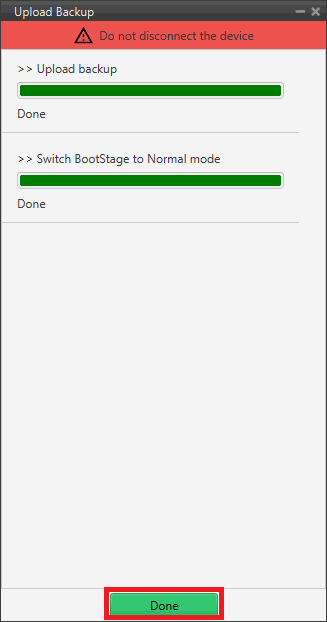
Upload backup process
Flash tool
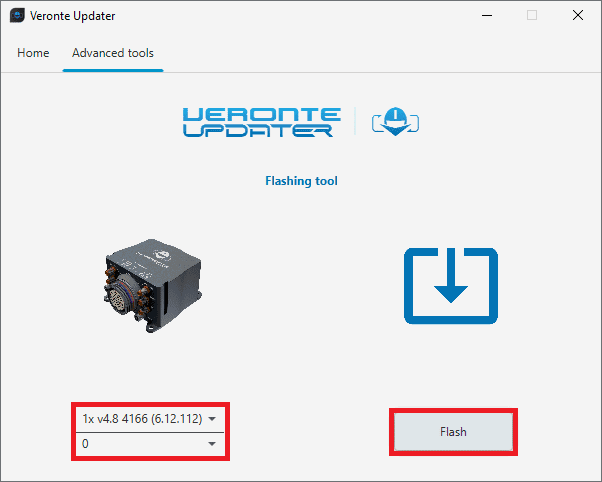
This tab will flash the device. That is, the connected device is reset and the files previously loaded into memory (in the slots) will be uploaded to the connected device.
Important
This option is not supported for version 6.14 or higher. If users try to flash the device in these versions, the following message will appear:

Simply choose the desired unit to be flashed and the slot where the .update file has been located and click Flash:
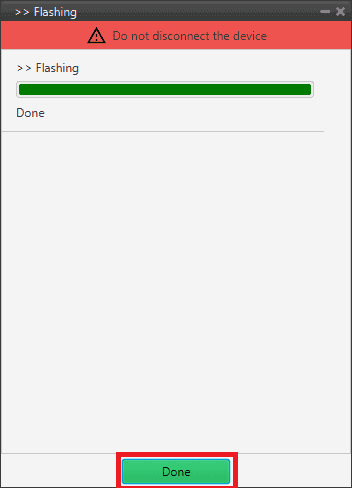
The flashing process is quite quickly, finally click on Done:
Switch BootStage
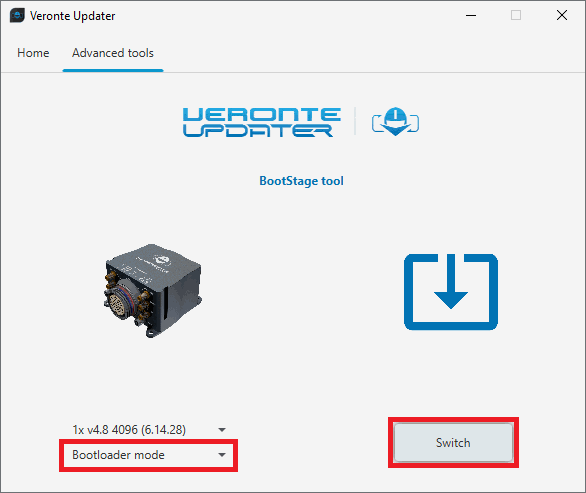
With this option, users can switch between the modes shown in the drop-down menu.
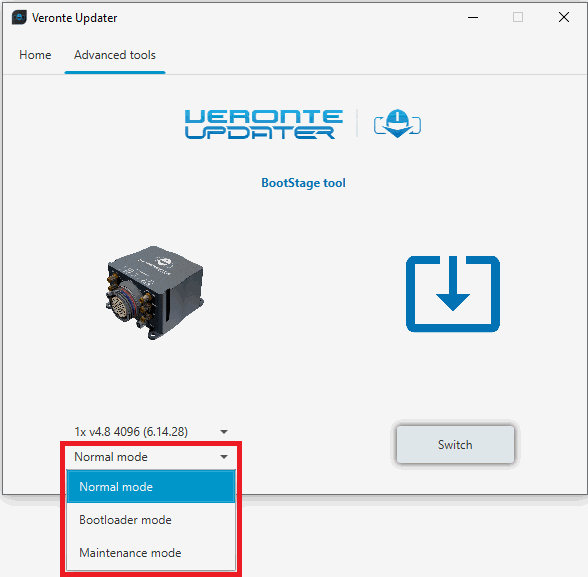
- Normal mode
- Bootloader mode: This is the mode a device must be in to be updated.
- Maintenance mode
Select the desired mode to switch to and click Switch:
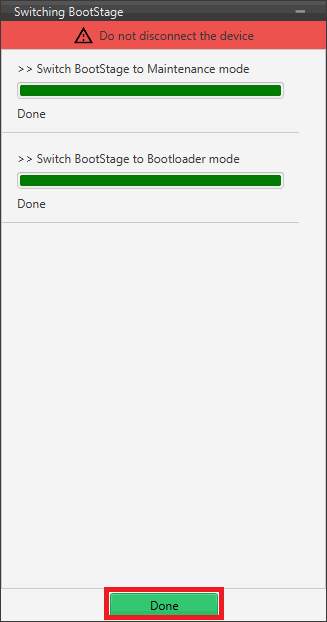
Once the process, finish, click on Done.
Configure Remote ID
Warning
THIS IS NOT PART OF THE UPGRADE PROCESS.
In this panel, the Remote ID of the connected Autopilot 1x is configured.
Note
This panel only applies to Veronte Autopilots 1x with Remote ID.
There are different settings:
-
UAV Identification
- UAV Type: Select between the options the type of the platform.
- ID Type: Select the type of ID that will appear in external Remote ID applications.
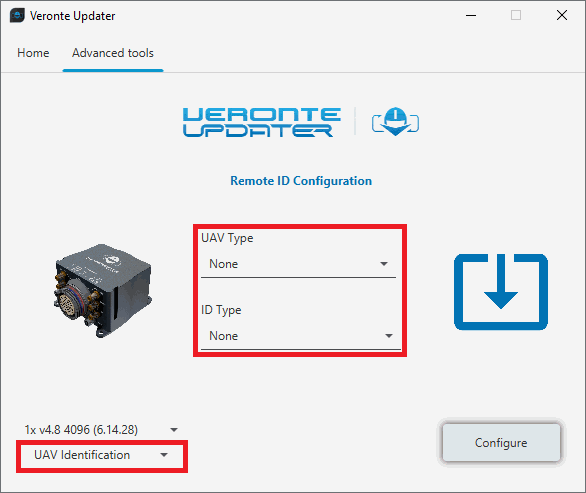
Configure Remote ID - UAV Identification -
Operation Description
Users can write a brief description of the mission. It is optional and its maximum length is 23 bytes.
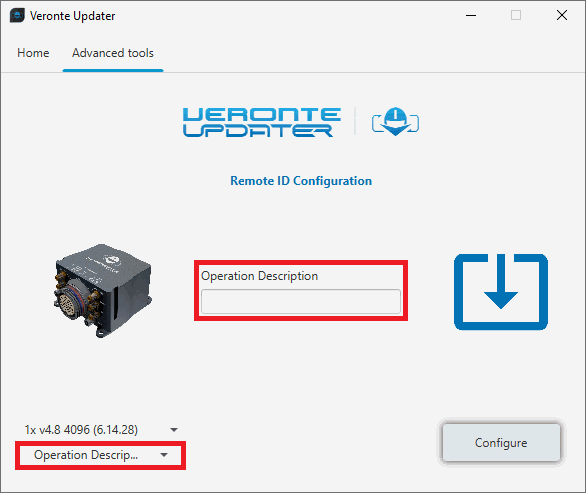
Configure Remote ID - Operation Description -
UAV Classification
Define the three classifications of the aircraft:
- Region where the aircraft will fly.
- Risk classification according to EASA:
- Open: Low risk. LOS with an operator is required, it must be at safe distances from airports and flights over crowds are not allowed.
- Specific: Increased risk. Approval is required by the National Aviation Authority, which is based on the Specific Operations Risk Assessment.
- Certified: High risk. Regulations similar to manned aviation, with approval for all the systems employed.
- Open category defined by EASA.
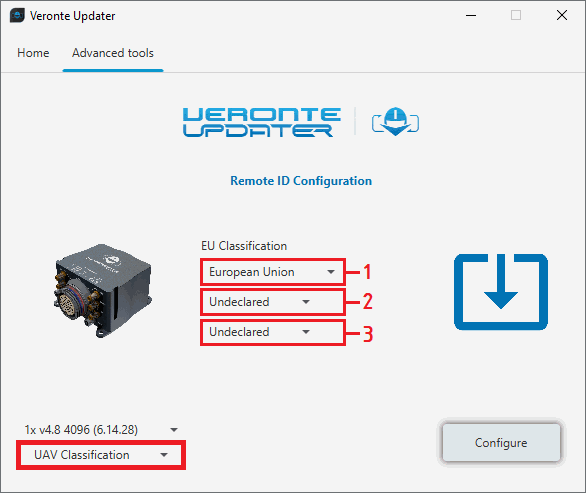
Configure Remote ID - UAV Classification -
UAV Operator ID
Enter the Operator ID of the user.
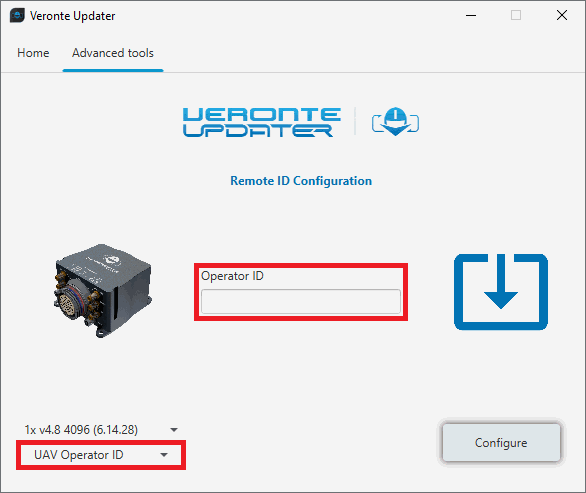
Configure Remote ID - UAV Operator ID -
Once the configuration has been finished, click on Configure to upload the configuration to 1x.
For more information about this product, please contact sales@embention.com.
Flash Remote ID
Warning
THIS IS NOT PART OF THE UPGRADE PROCESS.
With this option, users can update the Remote ID product.
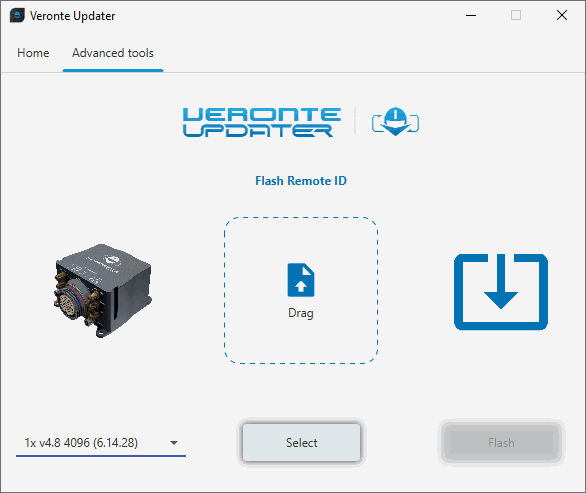
Load the .bin file. There are two ways to do this, dragging the file to the Drag area or by using the Select button.
The latter option will open the following browser to select the .bin file stored in the user's local storage:
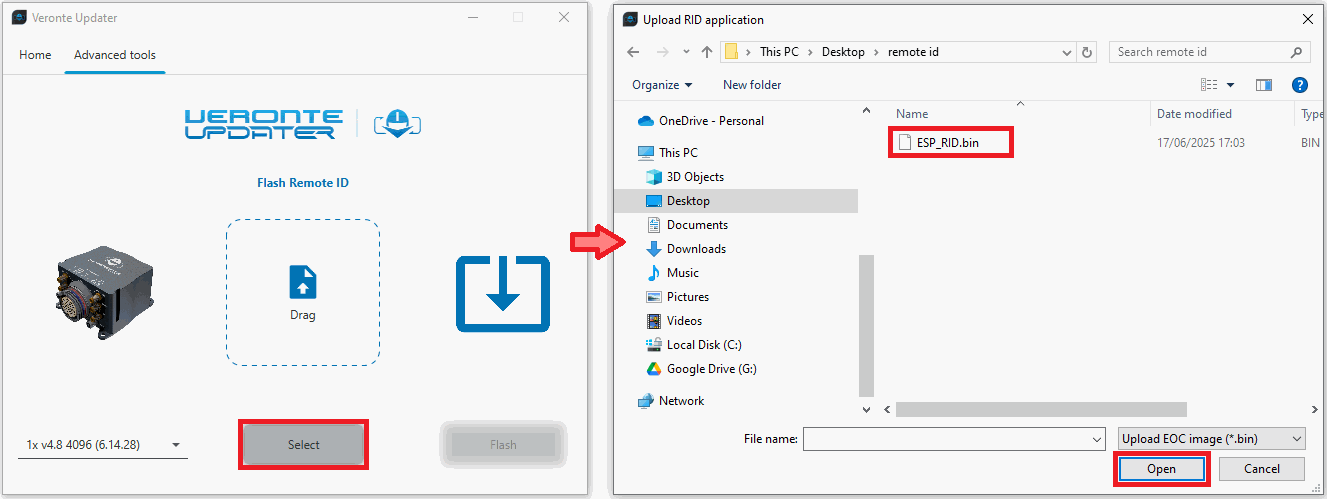
Once the .bin file is loaded, click on Flash to start the process.
For more information about this product, please contact sales@embention.com.
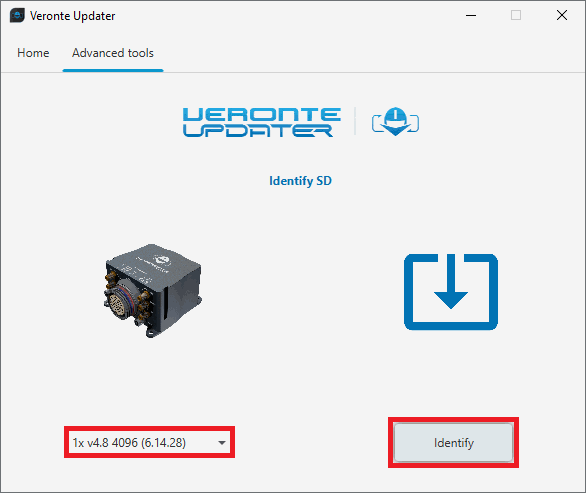
Identify SD
Selecting this option will identify the file memory capacity of the connected device.
Simply select the unit to be indentified and click Identify:
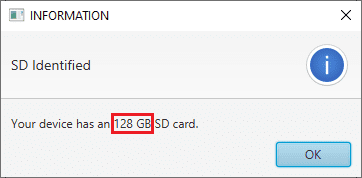
As the identification process is quite fast, a message with the information about the capacity of the SD card will quickly appear:
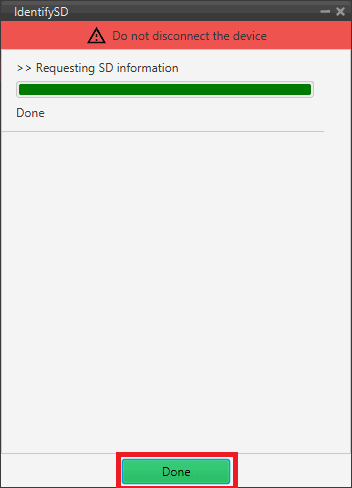
Finally click on Done:
Upload partition data
Warning
THIS IS NOT PART OF THE UPGRADE PROCESS.
Veronte Updater shall require the user to carry out this action in the event that the device's file memory has no magnetic field and geoid data.
Follow the steps below to upload the needed partition data:
-
Simply select the desired unit, choose Magnetic field or Geoid and click Upload:
Note
The process carried out only uploads the chosen data (Magnetic field or Geoid). Repeat the process for uploading the remaining data.
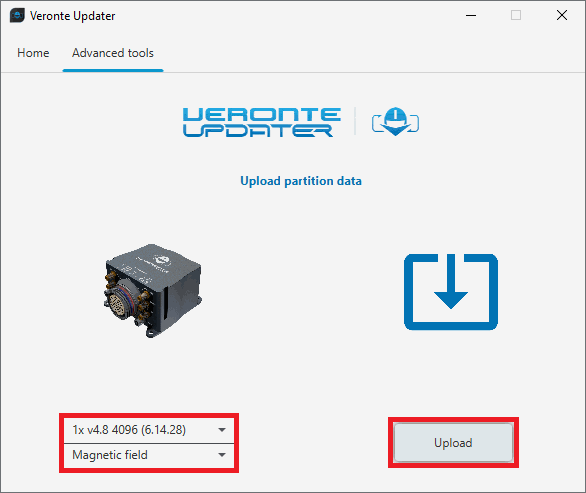
Upload partition data - Uploading Magnetic field -
If the device already has the data to be uploaded, a window will pop up to confirm continuing with the process.

Upload partition data - Process confirmation -
Once confirmed, the uploading process will start and the following window will show the progress.
Warning
Writting file step is a long and slow process that can take a few hours.
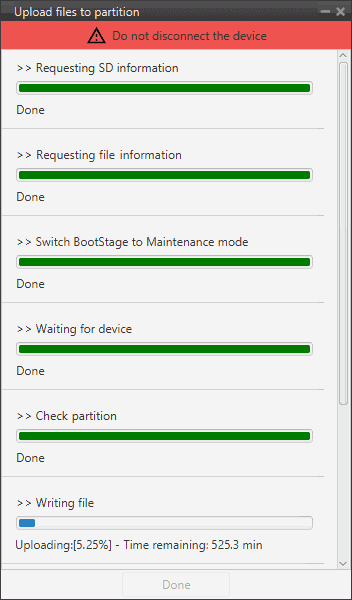
Upload partition data - Uploading process When finished, click on Done.
© 2025 Embention. All rights reserved.