Stick
Virtual sticks are created to simulate a radio controller that controls the channels of the aircraft directly from the computer.
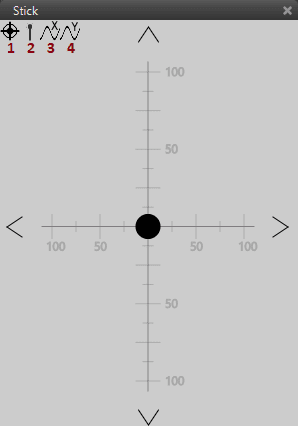
In the stick display, there are four icons and their function are:
Return the stick to the centre
Activate/Deactivate the virtual stick
Move the stick in the X direction in a sinusoidal way
Move the stick in the Y direction in a sinusoidal way

Stick Display Configuration
Last two are normally used in order to test the stick or servos.
Warning
If the Stick is not active it will make no effect on the system. Activate it by clicking on the second icon (some waves will appear near the icon and the stick will be actived). In order to deactivate it, only click on the antenna icon one more time.

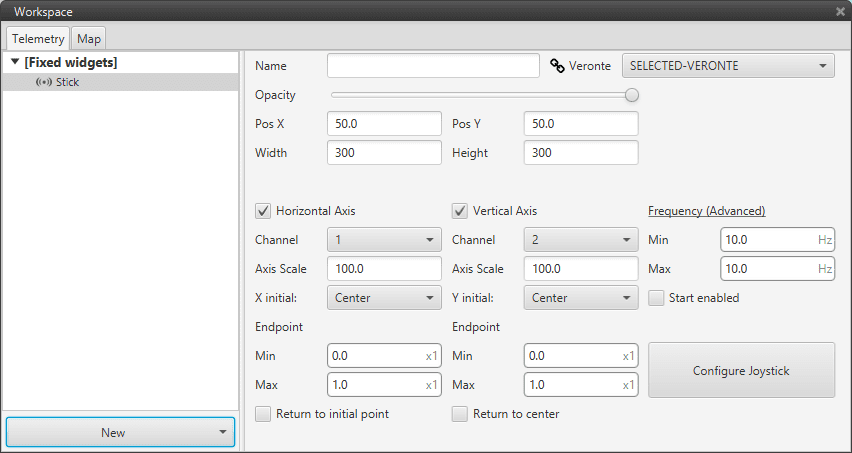
Stick Configuration Menu
In the dropdown on the top right corner, the user can select the Veronte to be used in this widget.
Item |
Description |
|---|---|
Name |
Define widget’s custom name. |
Opacity |
Change widget opacity. |
Pos X/Y |
Define widget’s position in the screen’s X/Y axis. |
Width/Height |
Define widget’s widt/height |
Channel |
Select which channel is controlled by each axis. |
Axis Scale |
Scale to show in the axis of the stick. |
Endpoint Min & Max |
Establish the minimum and maximum values reached by the stick. |
Frequency Min |
Sets the minimum quantity of messages sent when there is no movement. |
Frequency Max |
Sets the maximum quantity of messages that can be sent. |
Return center |
When it is selected the stick automatically returns to middle position on stick release. |
Configure Joystick |
Configure external USB joystick for camera control. |
