X-Plane 11 Settings
X-Plane 11 Configuration
Since now, Veronte system is compatible with X-Plane 11 for HIL simulation. The demo version of the program can be downloaded from this link.
X-Plane 11 communications settings must be edited in order to have communication with Veronte 4 system. Follow the next steps in order to make a proper configuration.
For low-performance computers, it may be needed to reduce the graphics quality on the simulator, as described below.
Aircraft Model Installation
X-Plane 11 simulator is compatible with a wide variety of platforms: airplane, helicopter, multicopter, surface vehicle…. In order to create the platform model, Plane Maker tool provided by X-Plane 11 must be used.
Once the aircraft model has been created, it can be integrated on the X-Plane 11 simulator by following next steps:
Copy the model folder to the “Aircraft” folder within the X-Plane 11 installation directory.
Copy the content in the “Airfoils” folder, available on the aircraft model folder, to the “Airfoils” directory within the X-Plane 11 installation directory.
X-Plane 11 Setup
On X-Plane 11 execution, Quick Flight Setup window will be displayed; select which aircraft to use, the starting airport and weather conditions to be simulated during the flight.
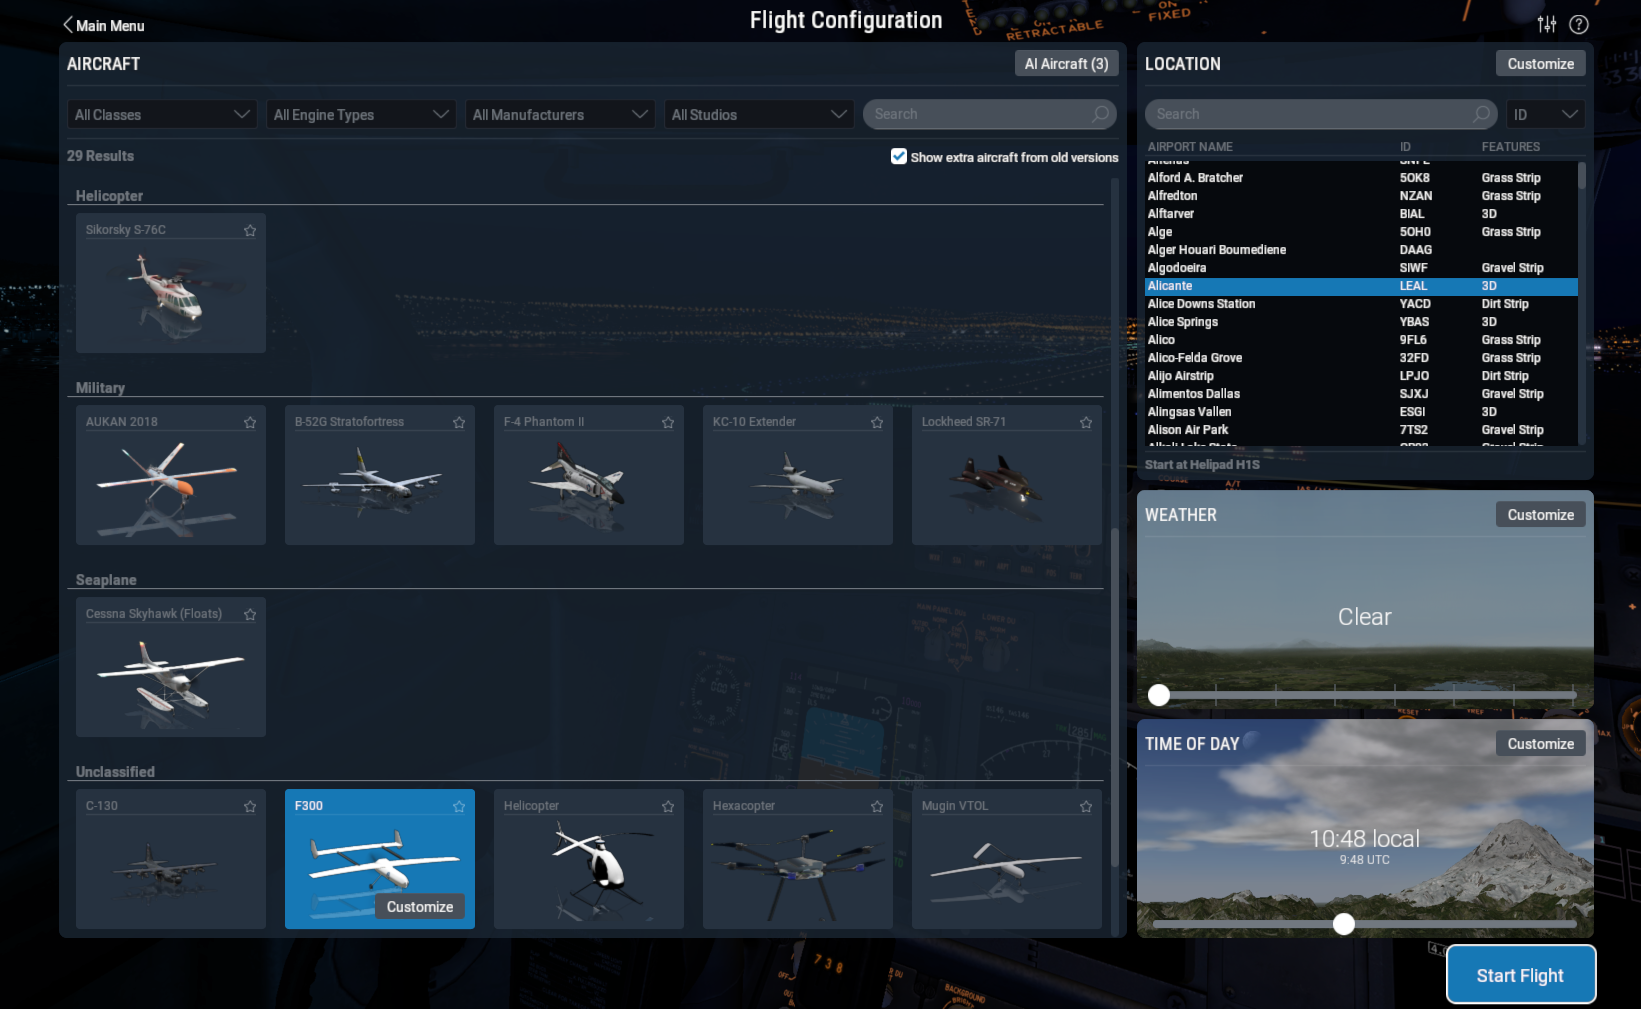
Quick Flight Setup
Data transmission settings must be edited on the Data Output tab. Select all the variables in order to be sent through the UDP Network and set the UDP rate at maximum speed. The network configuration must be configured as shown in the following picture.
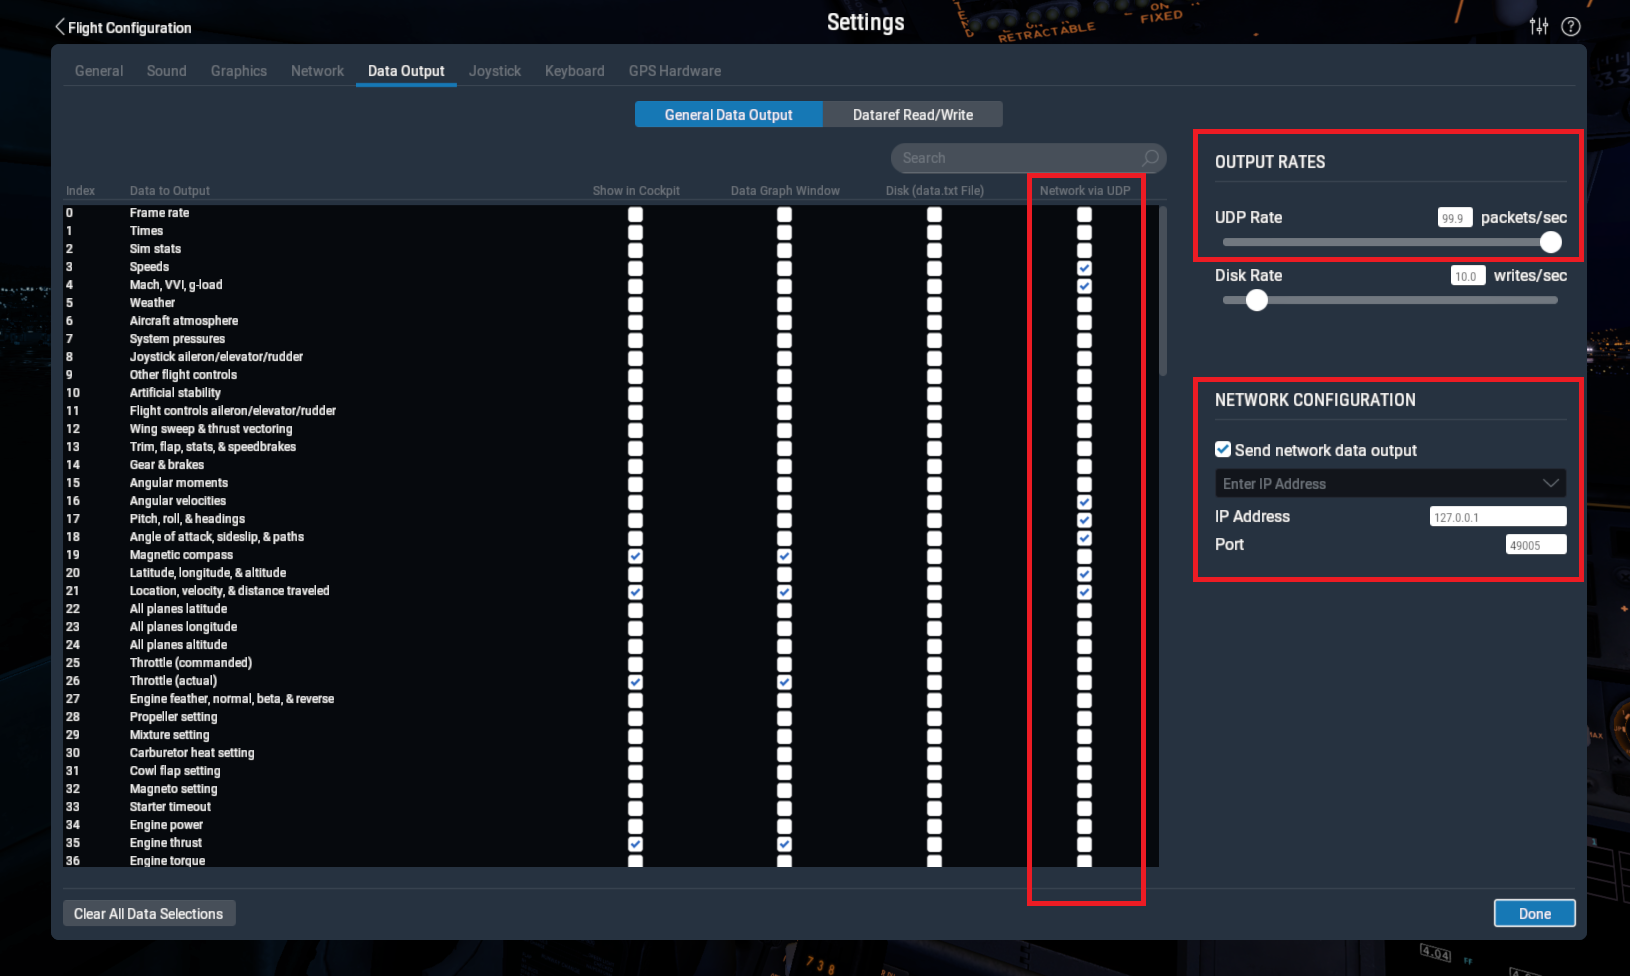
X-Plane 11 I/O configuration