Magnetometer
Magnetometer calibration should be performed once Veronte Autopilot 1x has been installed on the platform, so that the magnetic field during operation is similar to that measured during calibration.
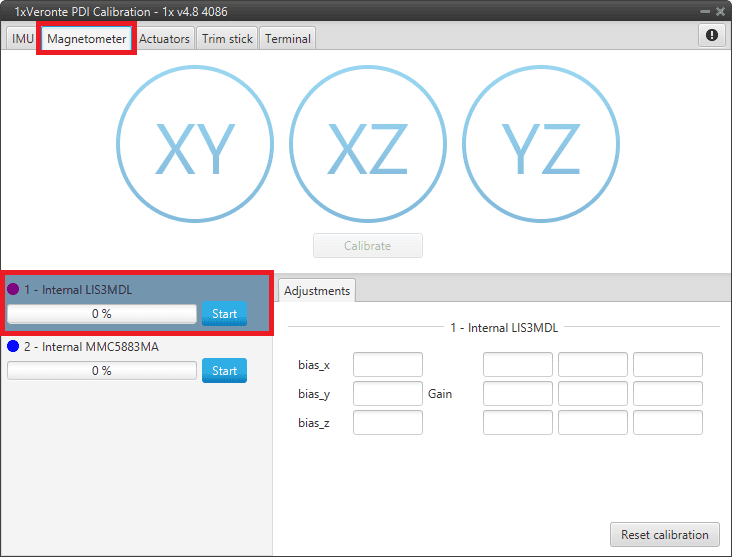
Magnetometer Calibration menu
To start the calibration, press the Start button of the magnetometer sensor to be calibrated, so that the system can capture the data from the magnetometer.
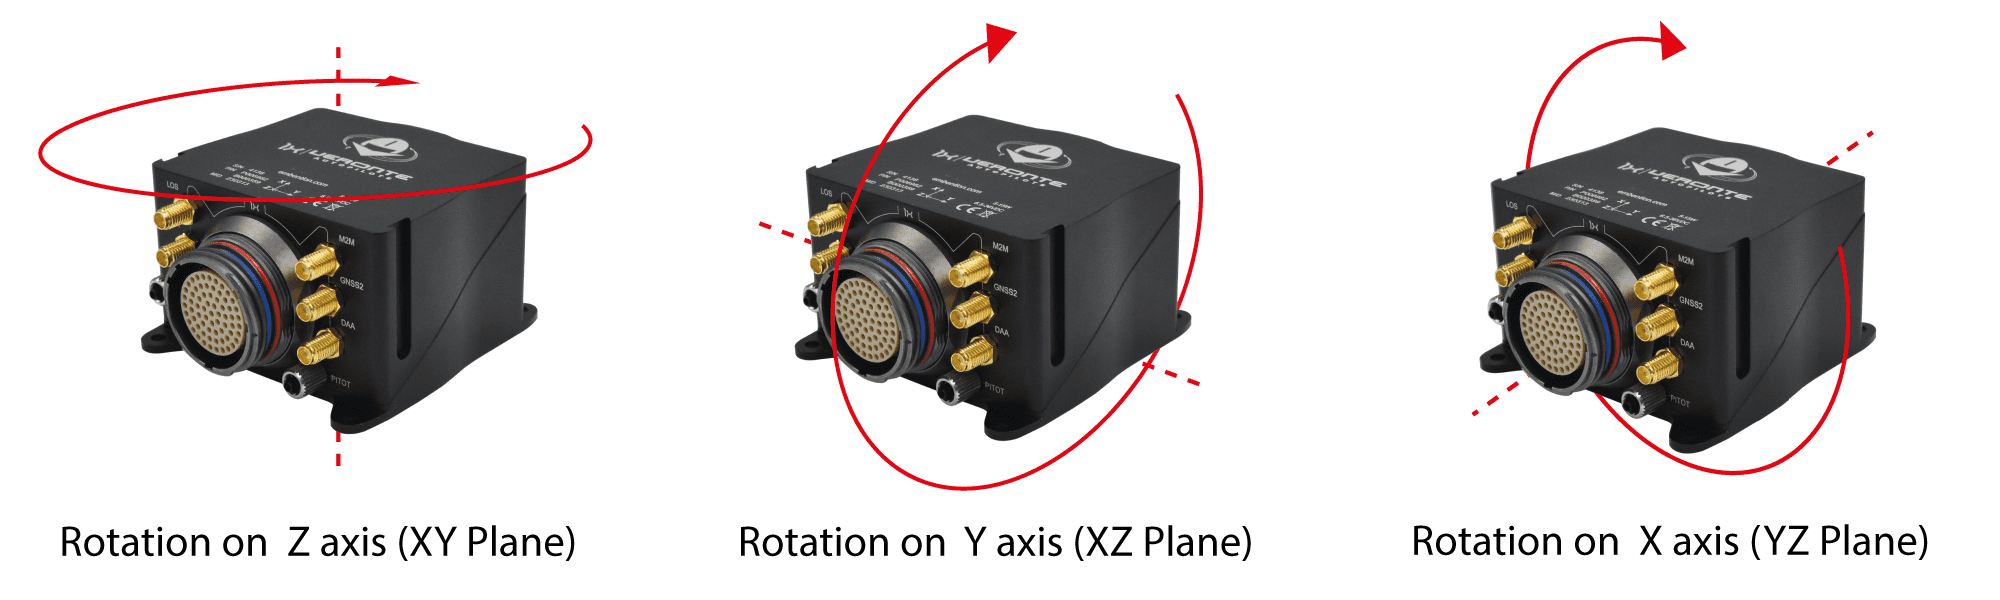
During calibration, the system must be rotated around all 3 axes, X, Y and Z, in order to capture sufficient data. It is important to have approximately the same number of samples for each axis of rotation, so rotate it around a different axis every 33% approximately.
The calibration procedure should be performed as follows:
Rotate 1x autopilot around the Z-axis (XY plane) until the progress bar reaches approximately 33%.
Repeat the same process for the Y-axis (XZ plane) until the progress bar reaches approximately 66%.
Finish the calibration by repeating this process for the X-axis (YZ plane) until 100% is reached.
Note
The order in which the user rotates the autopilot about each of the axes does not affect the calibration, this is just an example of how to do it. So the user can first rotate on the Y-axis, then on the X-axis and finally on the Z-axis.
These different rotations to which Veronte Autopilot 1x must be subjected can be seen in the figures below:
Calibration procedure
Calibration procedure
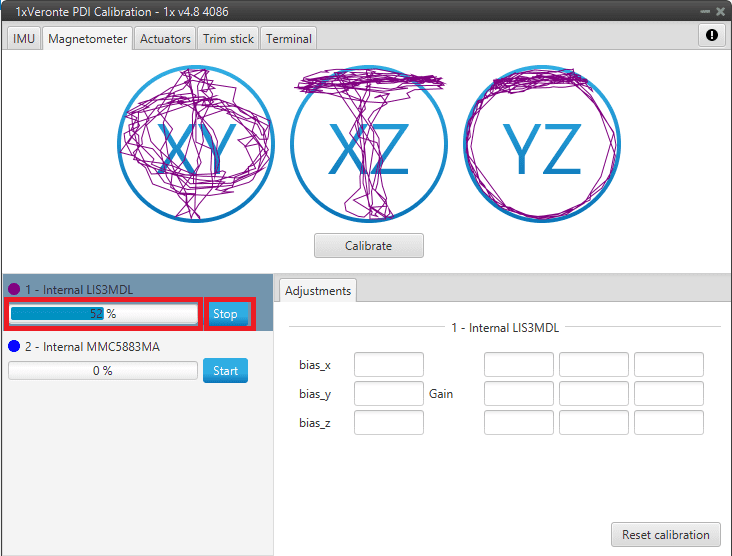
The progress bar will increase according to the number of samples measured, and these samples will be drawn in each circle (one circle for each plane of rotation):
Calibration process
Note
If the user wishes to interrupt the calibration, simply click on the ‘Stop’ button.
Once 3 circles have been drawn on the screen and the progress bar reaches the 100%, the calibration process is complete. The following image shows an example of the calibration:
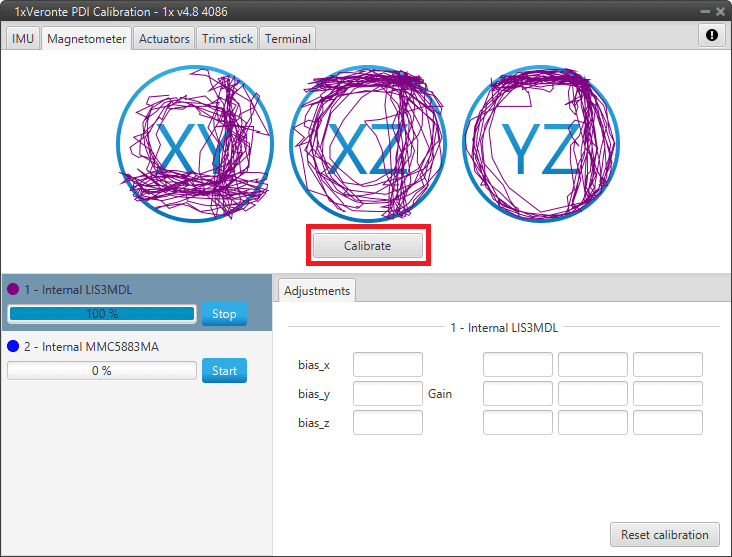
Calibrate
Then press the ‘Calibrate’ button to save the calibration in 1x autopilot, and the following success message will appear:
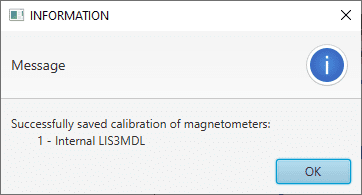
Calibrate success message
Note
If not enough samples have been collected in the calibration process, the following message will appear after pressing ‘Calibrate’:
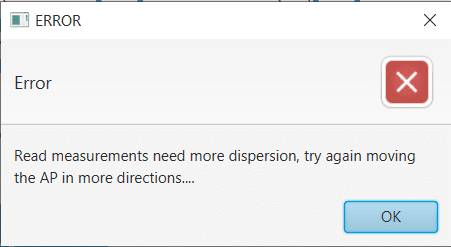
Calibrate error message
Then, it will appear:
A colored percentage indicating the quality of the calibration measurements:
Red (0-39%): Repeating calibration is recommended.
Orange (40-79%): Acceptable.
Green (80-100%): Optimal.
The calibration results, bias x/y/z and Gains measurements, are displayed in the Adjustments tab.
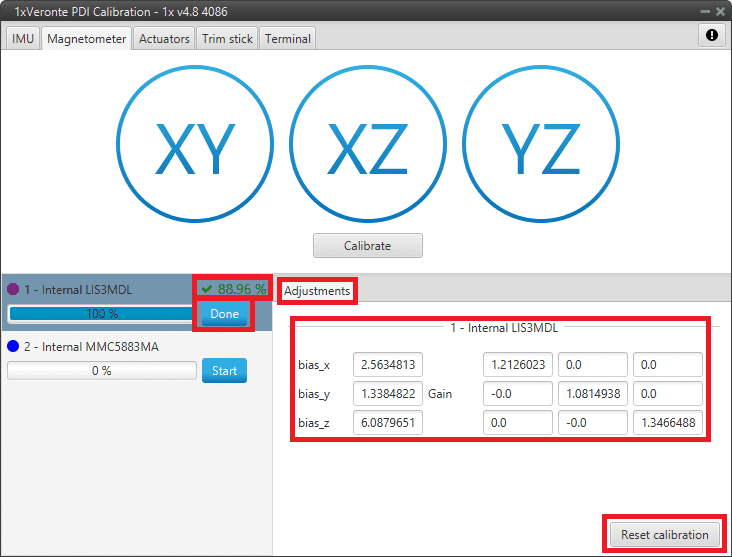
Calibration done
If the calibration is good enough, click ‘Done’. Otherwise, if the calibration is not satisfying, click ‘Reset calibration’ to calibrate again.
Note
Reset calibration will delete the current calibration on the connected 1x autopilot.