Operation
First of all, connect the Autopilot 1x or 4x to the computer using Veronte Link. Read the Veronte Link user manual to know more.
Once the autopilot has been connected, set it to maintenance mode. The easiest way to do it is opening 1x PDI Builder, selecting the device (1) and clicking on the status bar (2).
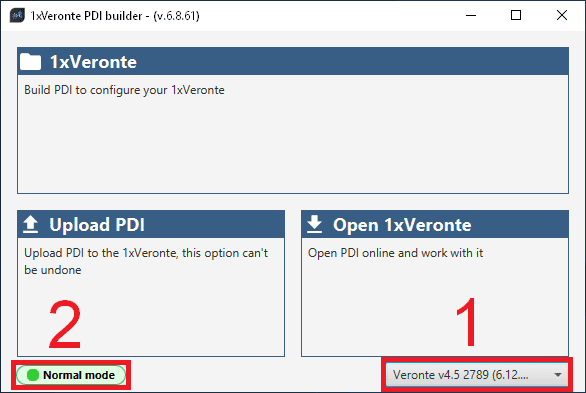
Setting maintenance mode
To know more about maintenance mode, read 1x user manual -> Maintenance mode, which also explains other ways to set the autopilot in maintenance mode.
Graphical User Interface
Open Veronte FDR and a similar image to the following one will be displayed:
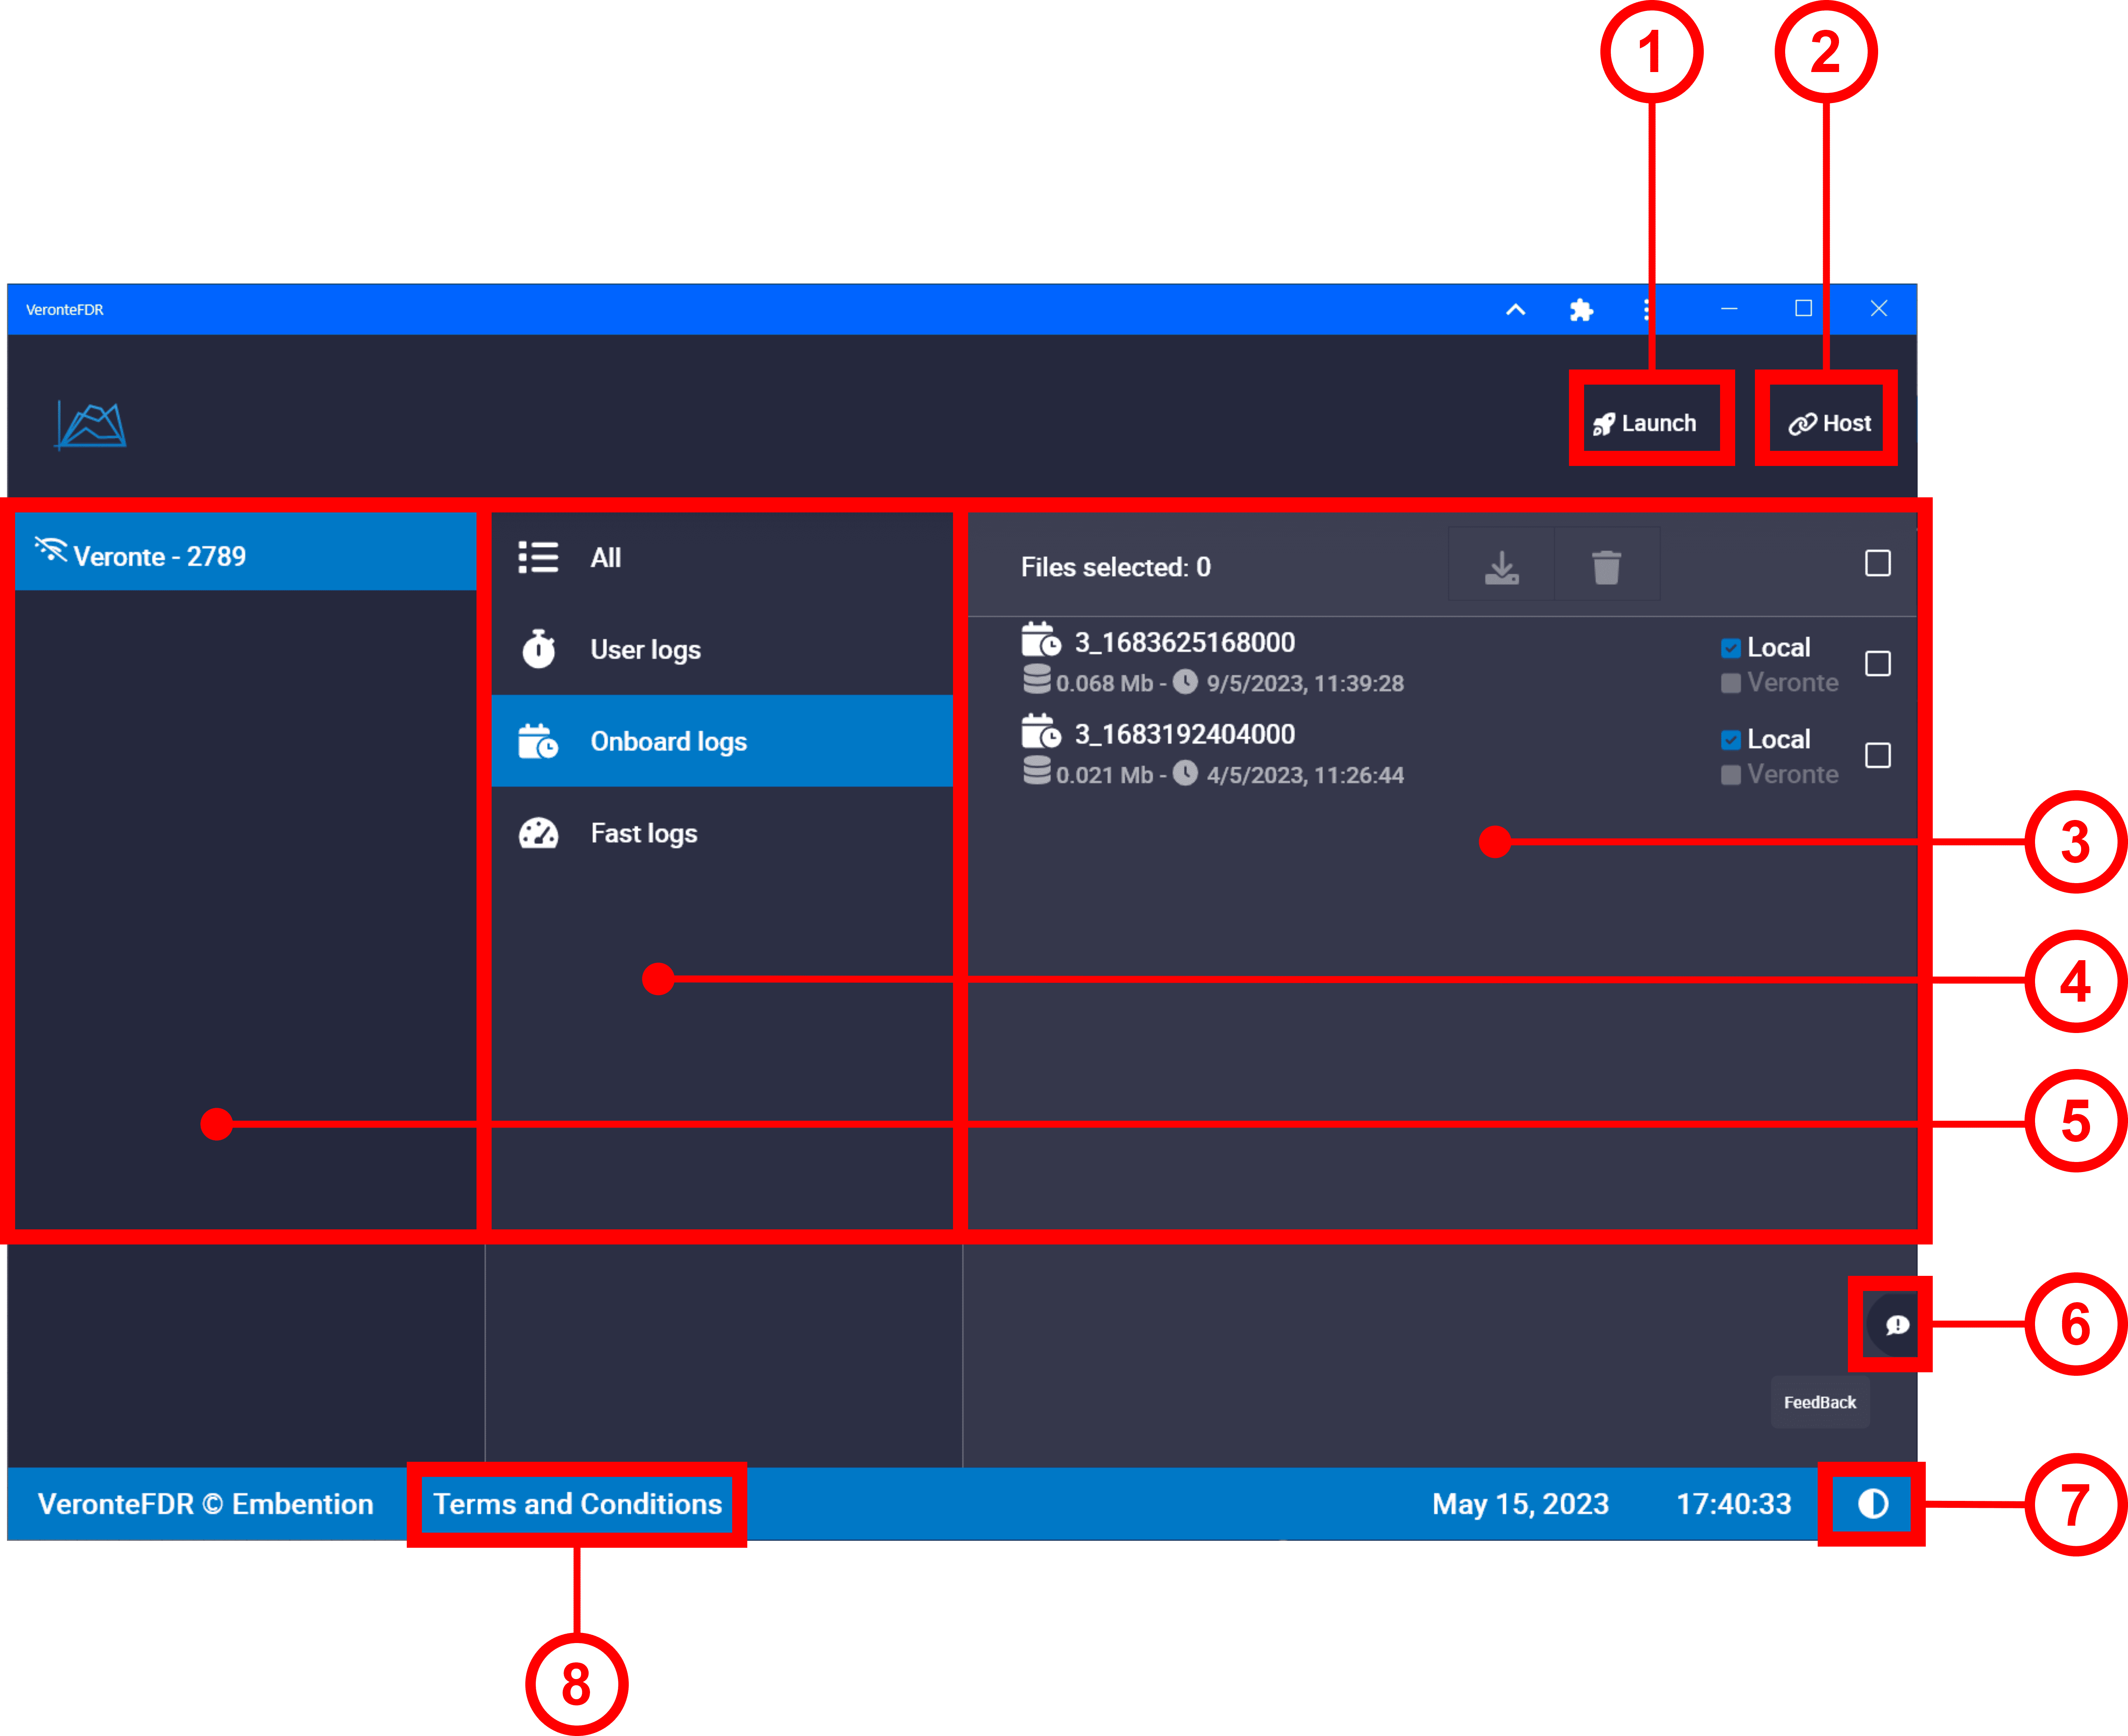
Launch. Users can access Veronte Ops and Veronte Link by pressing this button.
Read the Veronte Link manual or the Veronte Ops manual.
Host. It allows connecting to the local IP address or to another desired IP address.
To do it, click on Add new VLink Host and write the IP address.
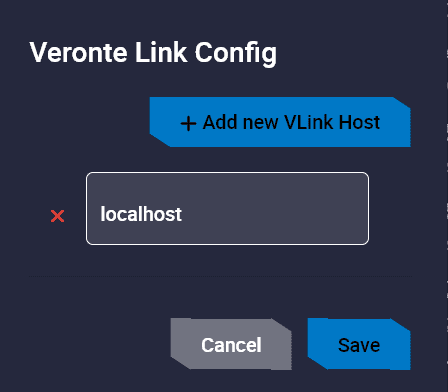
Host window
Log files panel. As shown in the image, here all records of the log type selected in Type of logs panel are displayed in a list.
Type of logs panel. Select a log type to display them.
Select All to display all types of logs. To know more about logs, read 1x PDI Builder manual -> Telemetry.
Autopilots panel. Autopilots can be connected, indicated with
 ; or disconnected with
  .
.Select the autopilot to access its logs.
Feedback. After clicking here, the following window will pop up:
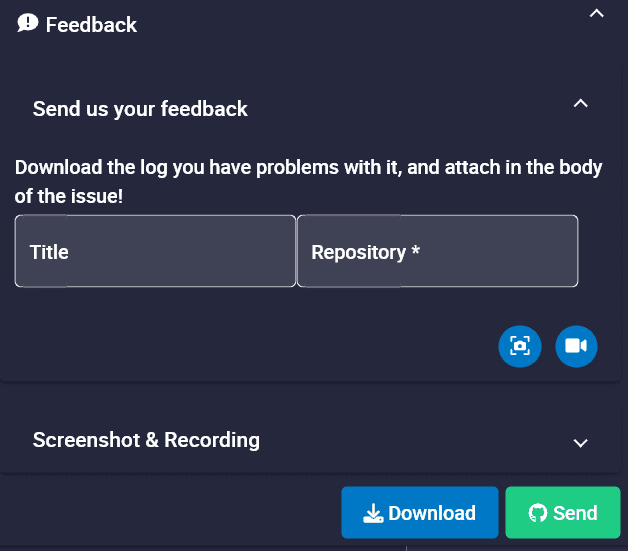
Users can report a problem they have encountered by creating an issue in their own ‘Joint Collaboration Framework’.
In addition, clicking on
 will take a snapshot or
  will record a video, which can help explain any problem.
Note
The user’s ‘Joint Collaboration Framework’ is simply a Github repository for each customer.
To use the Joint Collaboration Framework read its user manual.
Clicking on the Download button downloads a zipped folder with the data of the operation to easily identify the problem. It is advisable to attach this folder when creating the issue.
Finally, by clicking on the Send button, a Github window will open in the browser with an issue. This issue is created in the repository indicated before with the title that has been defined.
Find below an example of the creation of a feedback:
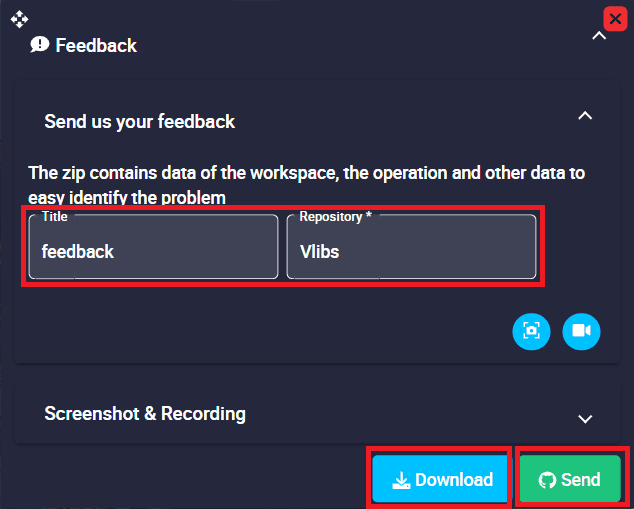
Feedback example - Feedback menu
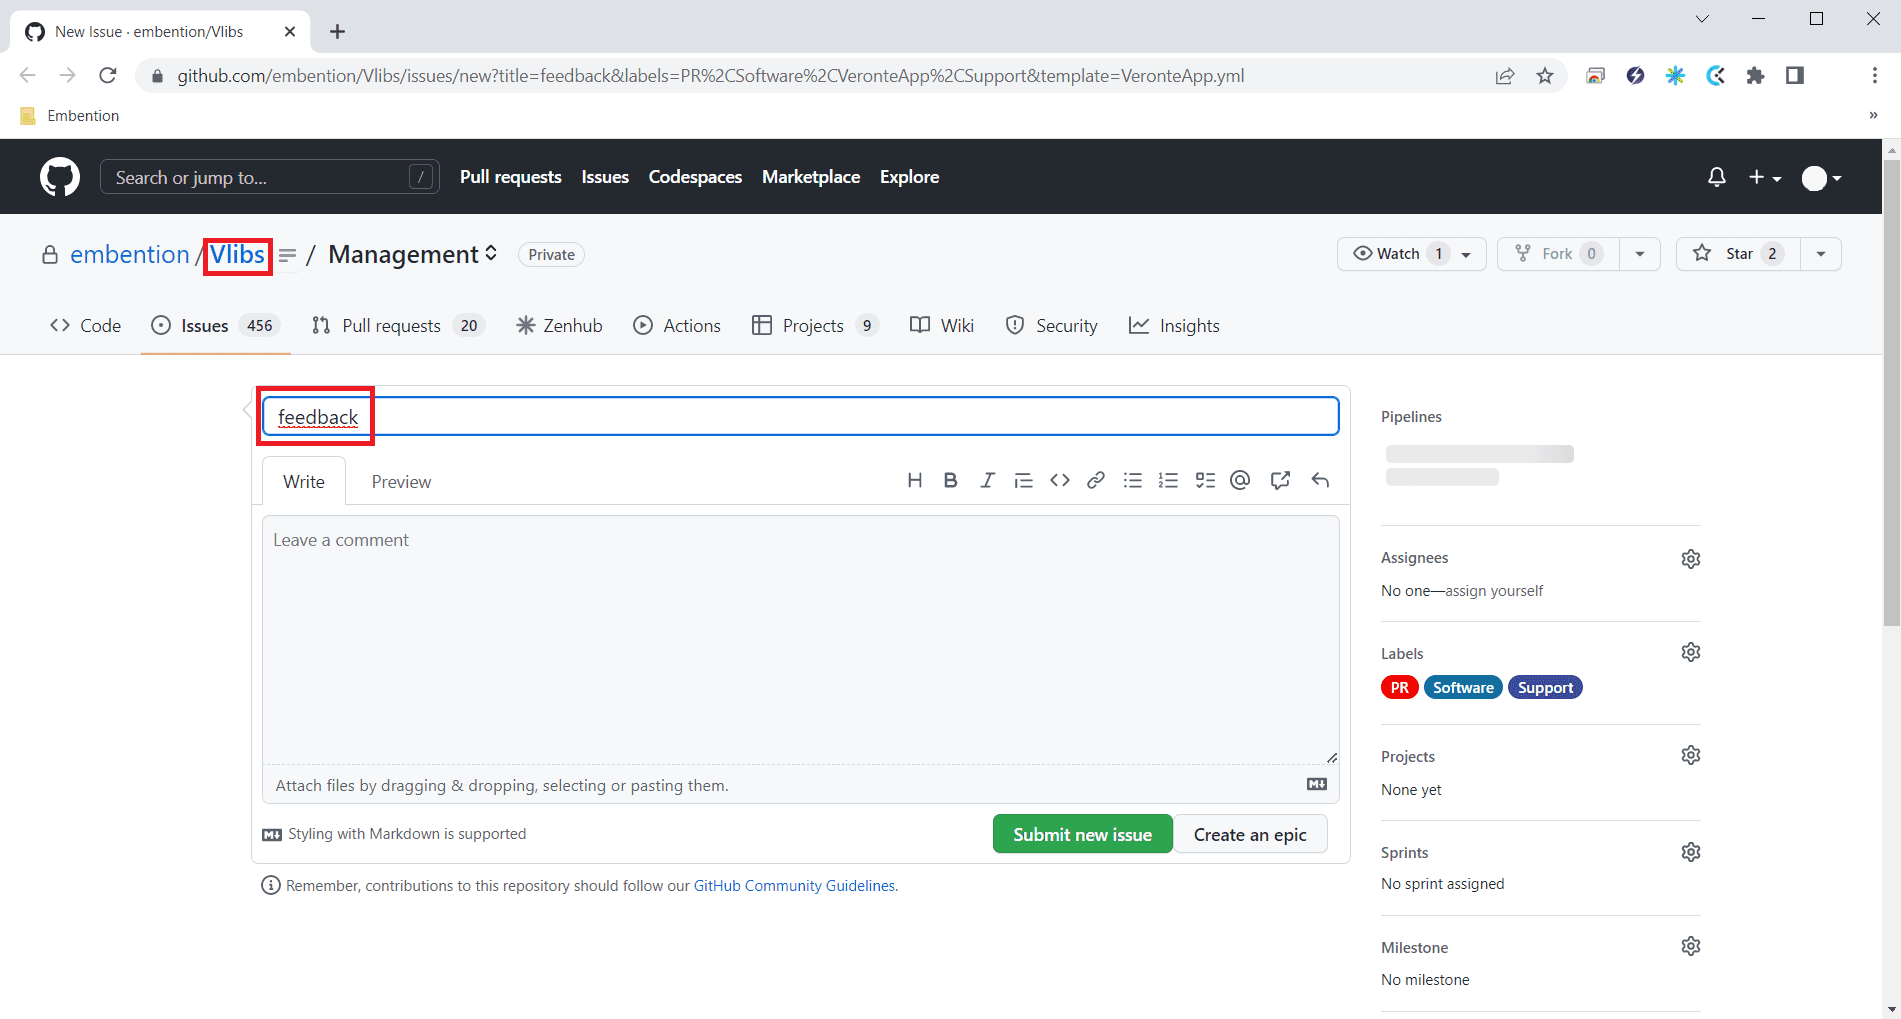
Feedback example - Issue created in Github
Light/dark mode. It changes the display mode of the interface.
Terms and Conditions. Users can consult the End User License Agreement (EULA).
Log Files
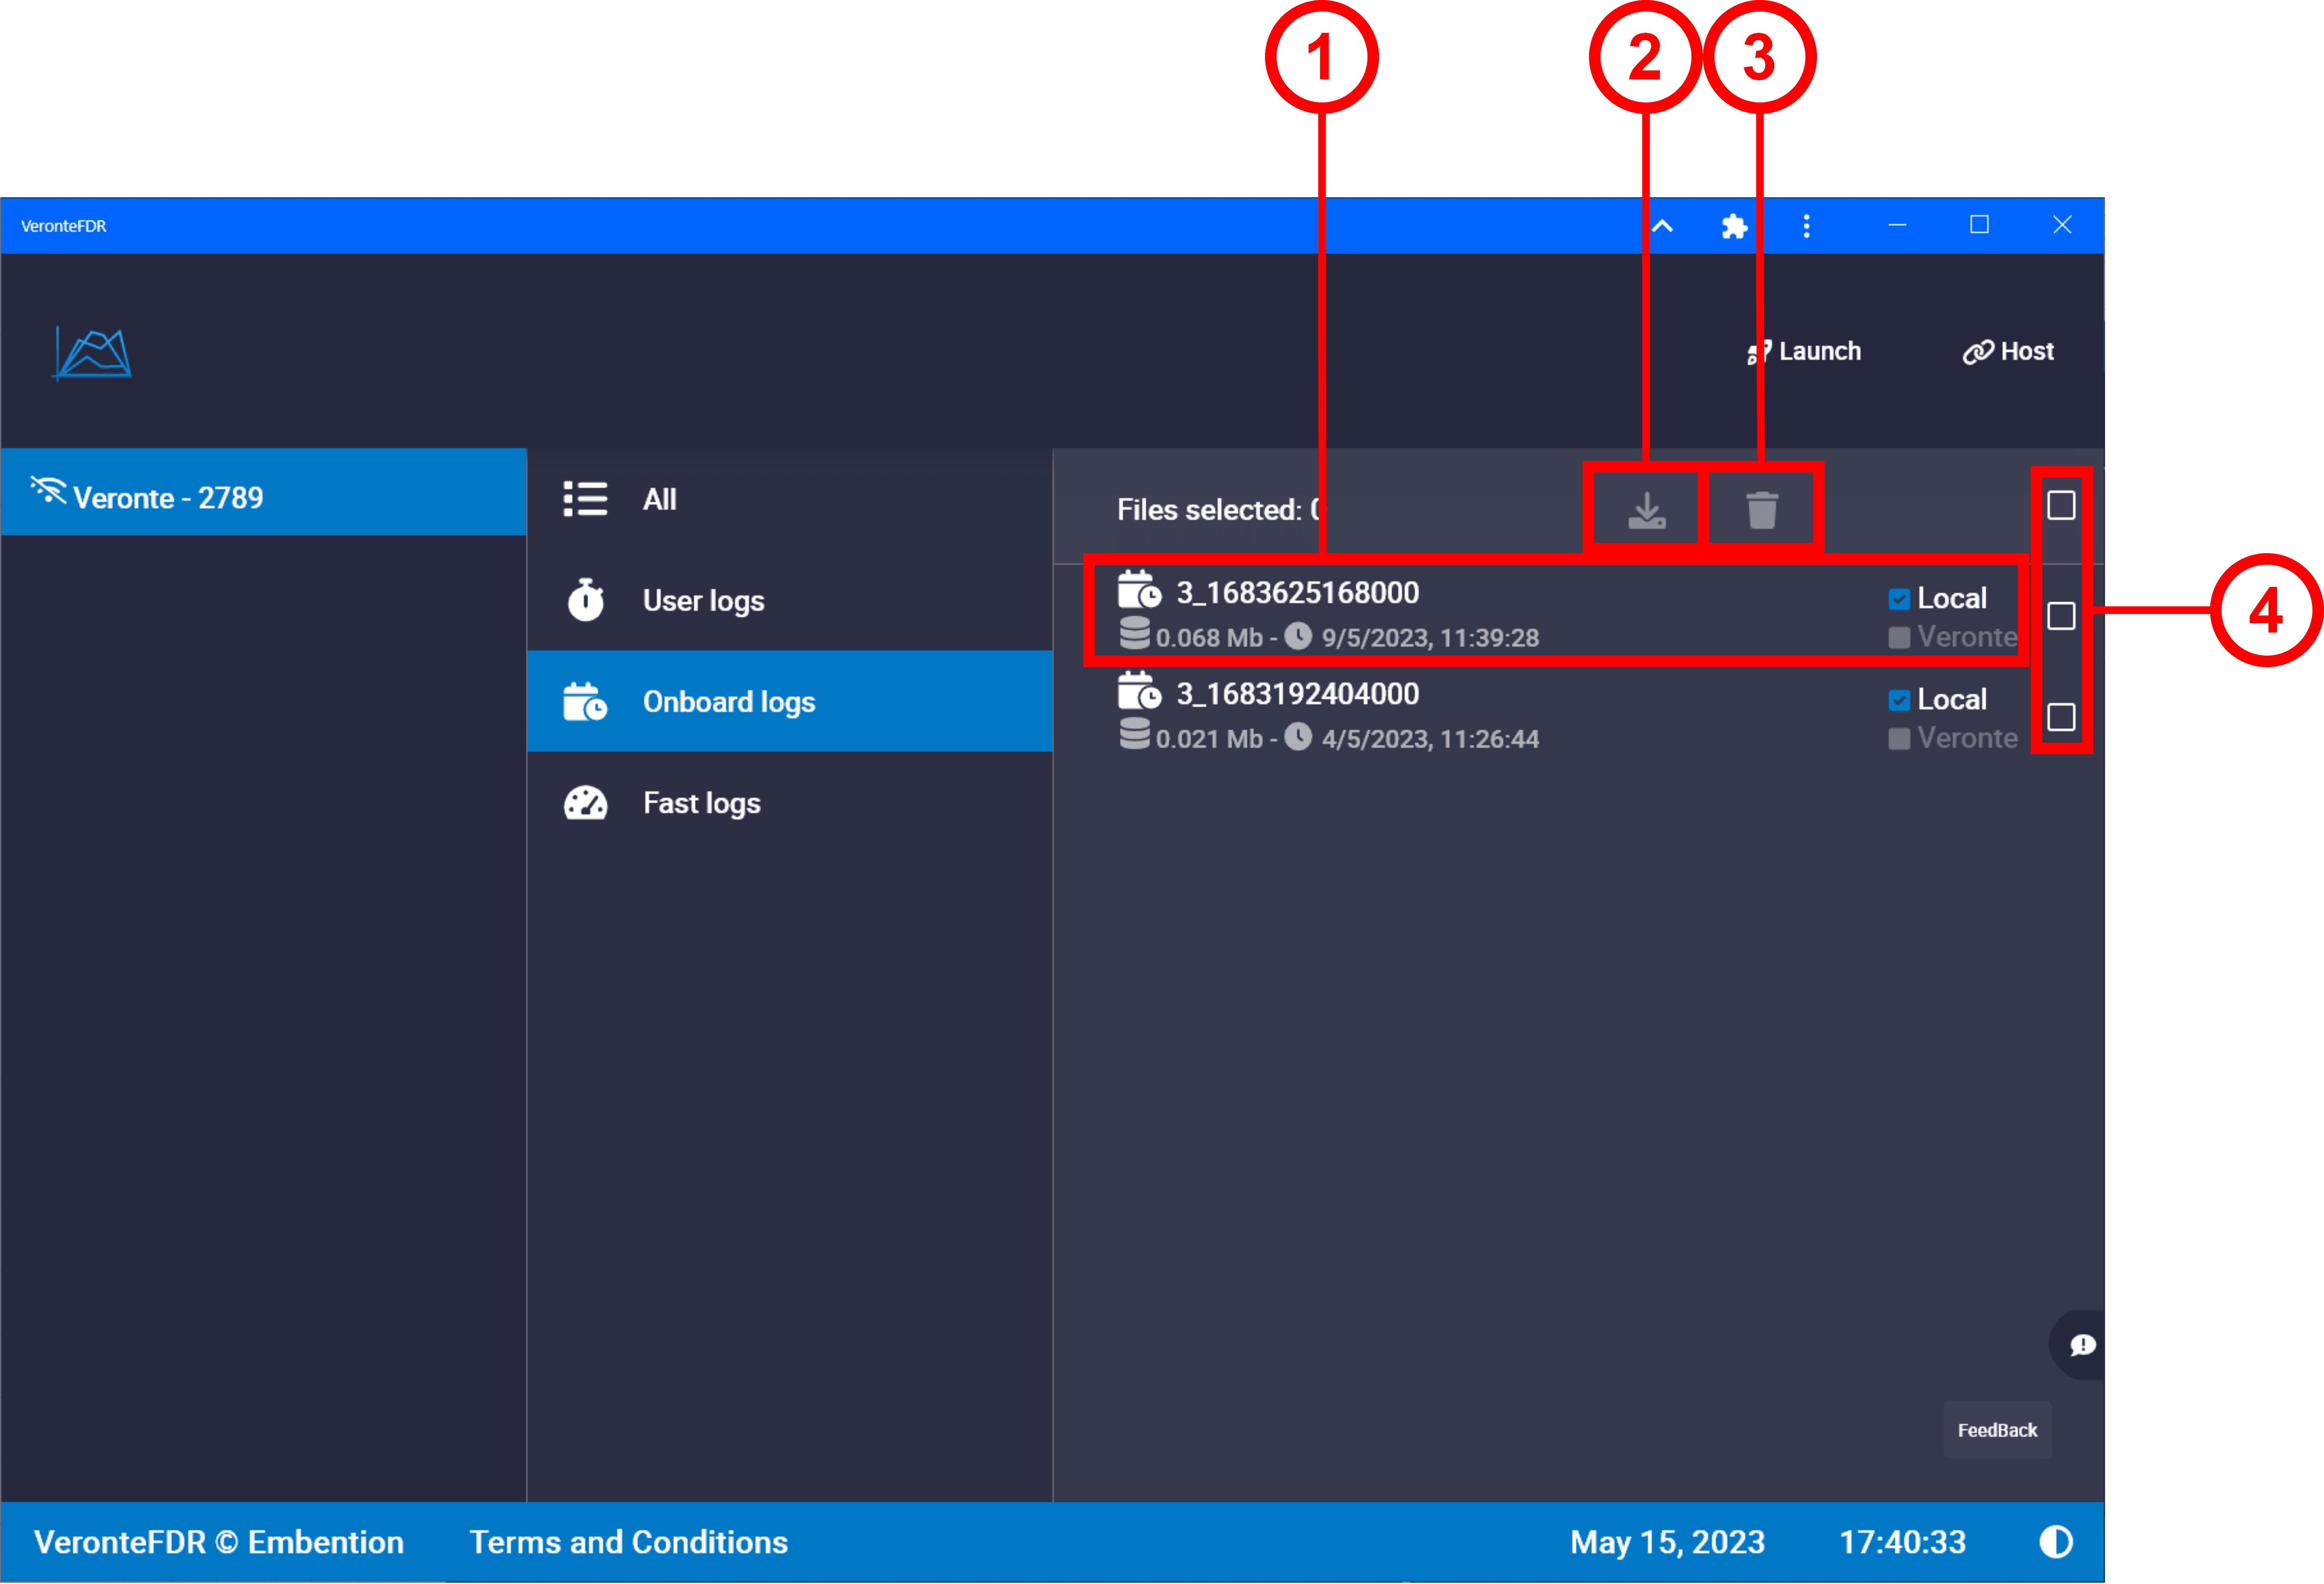
Register. Each register has date and hour creation to be identified. They have two checks:
Local: logs located in computer.
Veronte: logs located in Autopilot 1x.
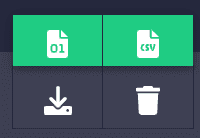
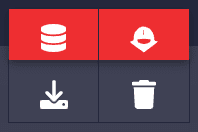
Download. Selected log files can be downloaded as binary files clicking on
 or as csv clicking on
  .
.
Download options
The download progress is indicated by a progress bar below the window, where it can be canceled by pressing on
 .
.
Download progress bar
Delete. Files located in the autopilot can be deleted clicking on
 . Those located in the computer can be deleted on
  .
.
Delete options
Selection boxes. They allow to select logs to download or edit them.