X-Plane 11
Veronte systems are compatible with X-Plane 11 for HIL simulation. X-Plane 11 communications settings must be edited in order to have communication with Veronte systems. Follow the next steps in order to make a proper configuration.
Note
For low-performance computers, it may be needed to reduce the graphics quality on the simulator, as described below.
1. Aircraft Model Installation.
X-Plane 11 simulator is compatible with a wide variety of platforms: airplane, helicopter, multicopter, surface vehicle… In order to create the platform model, Plane Maker tool provided by X-Plane 11 must be used. Once the aircraft model has been created, it can be integrated on the X-Plane 11 simulator by following the next sub steps:
1.1: Copy the model folder to the “Aircraft” folder within the X-Plane 11 installation directory.
1.2: Copy the content in the “Airfoils” folder, available in the aircraft model folder, to the “Airfoils” directory within the X-Plane 11 installation directory.
2. Custom airport.
X-Plane flight starts from an airport; a custom airport must be defined for simulating in case of not having available airports. In addition, it is possible to create a new airport. In order to do that, the user should follow the X-Plane tutorial presented in the next link. Once the airport has been created, copy the model folder to the X-Plane 11 installation directory.
3. X-Plane Settings.
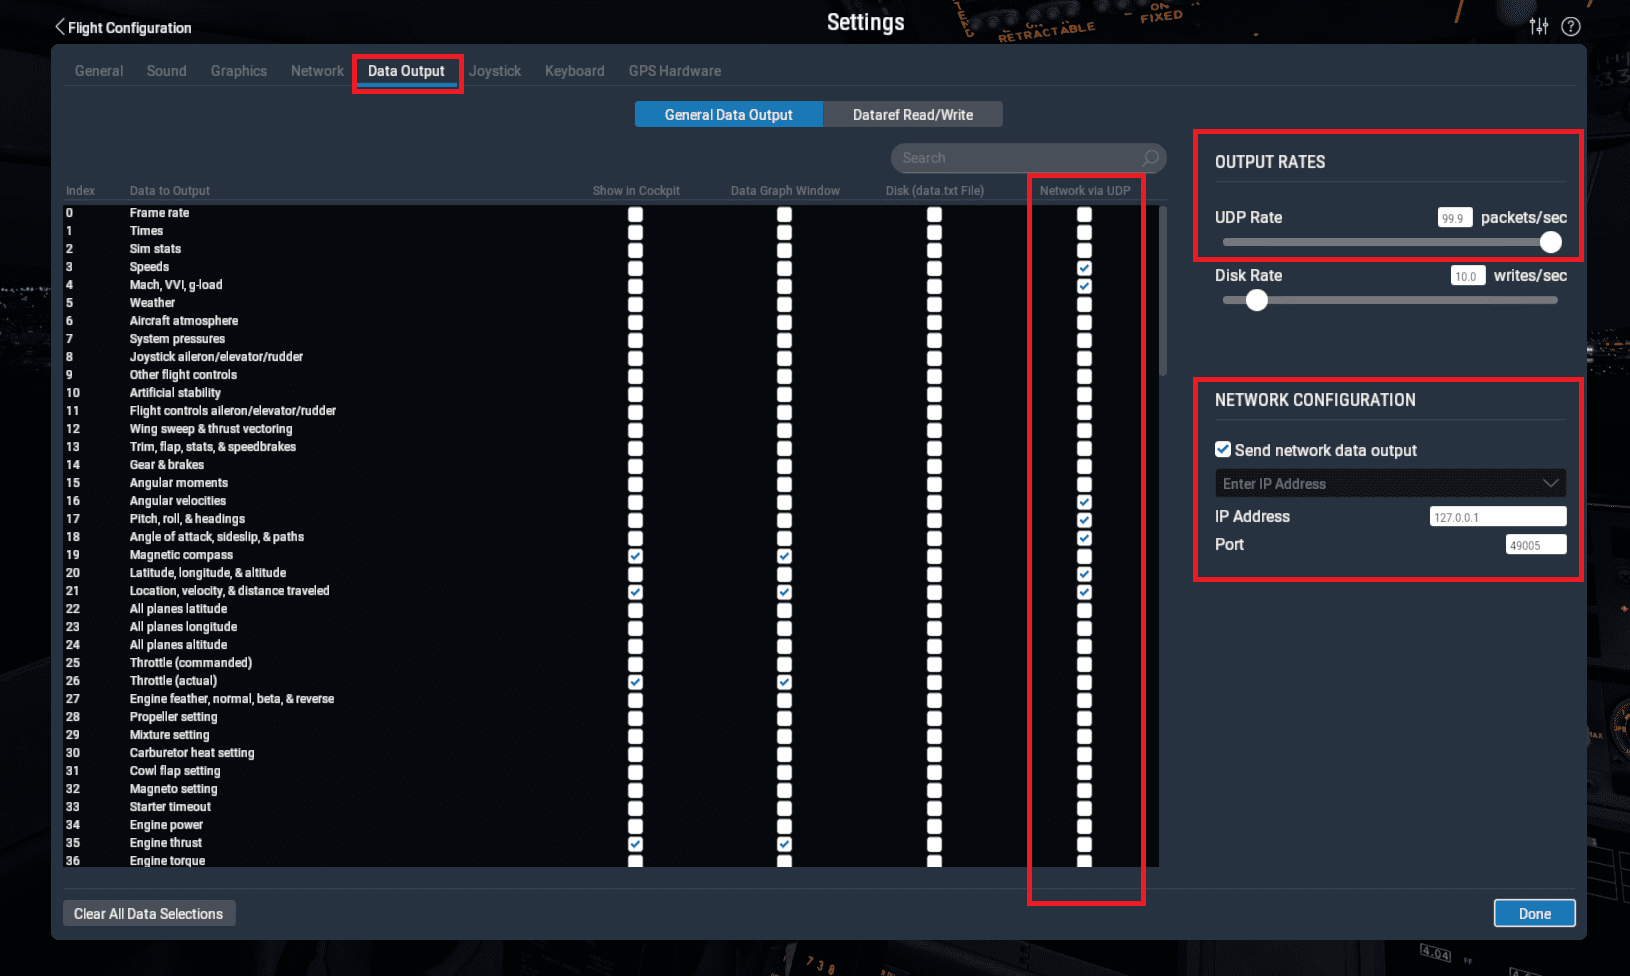
Data transmission settings of X-Plane must be edited on Settings \(\Rightarrow\) Data Output. This configuration must coincide with Hil Simulator. Select all the variables to sent through the UDP Network and set the UDP rate at maximum speed. The network configuration must be configured as shown in the following table and picture.
Parameter
Value
3 - Speeds
Mark
 in the Network via UDP column
4 - Mach, VVI, g-load
16 - Angular velocities
17 - Pitch, roll & headings
18 - Angle of attack, sideslip & paths
20 - Latitude, longitude & altitude
21 - Location, velocity & distance traveled
IP
127.0.0.1
Receive port
49005
Send port
49000
UDP rate (packets / second)
Hil Simulator frequency, with 99 as maximum value
4. X-Plane 11 Setup.
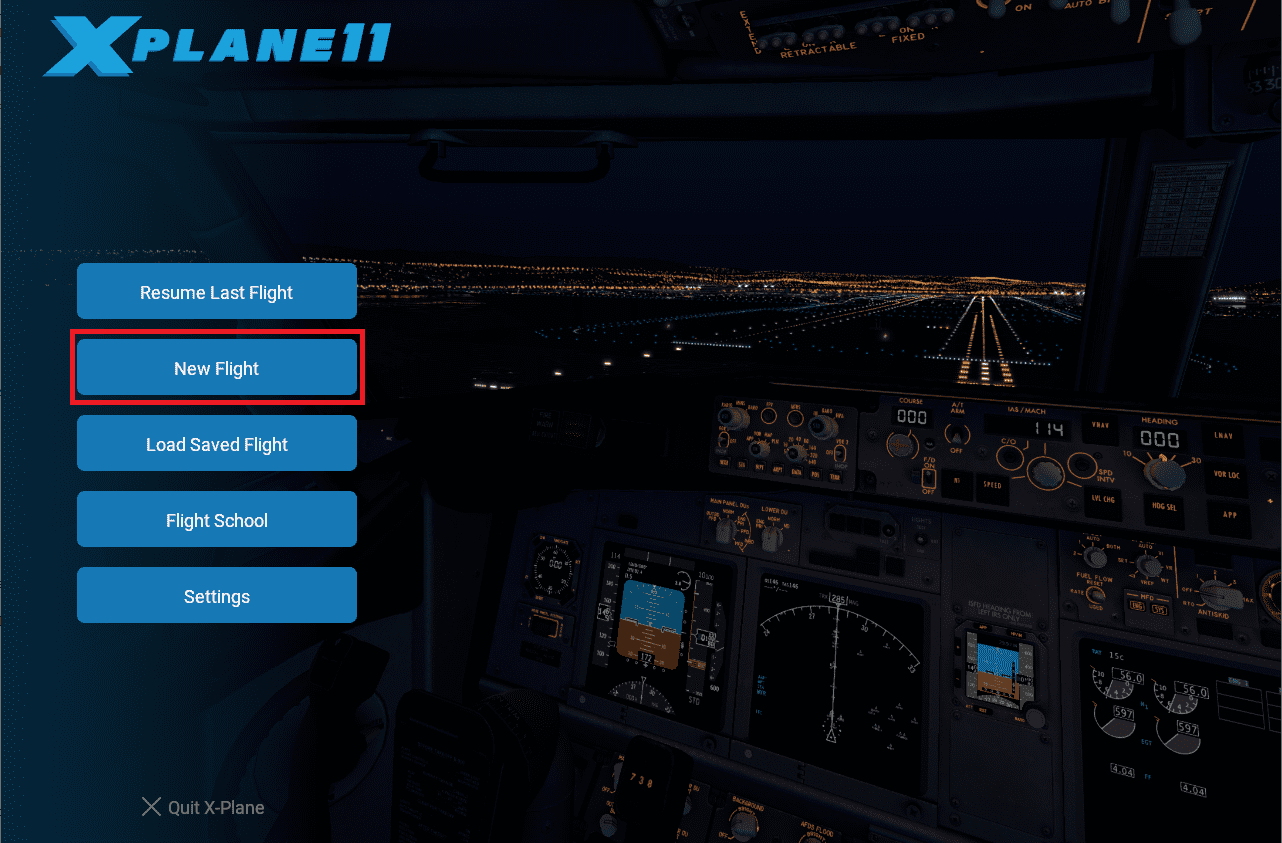
Open X-Plane 11 \(\Rightarrow\) Main menu. To start a simulation click on New Flight:
Then, the following window will be displayed. Select which aircraft to use, the starting airport and weather conditions to simulate. Finally, click on Start Flight the start de simulation:
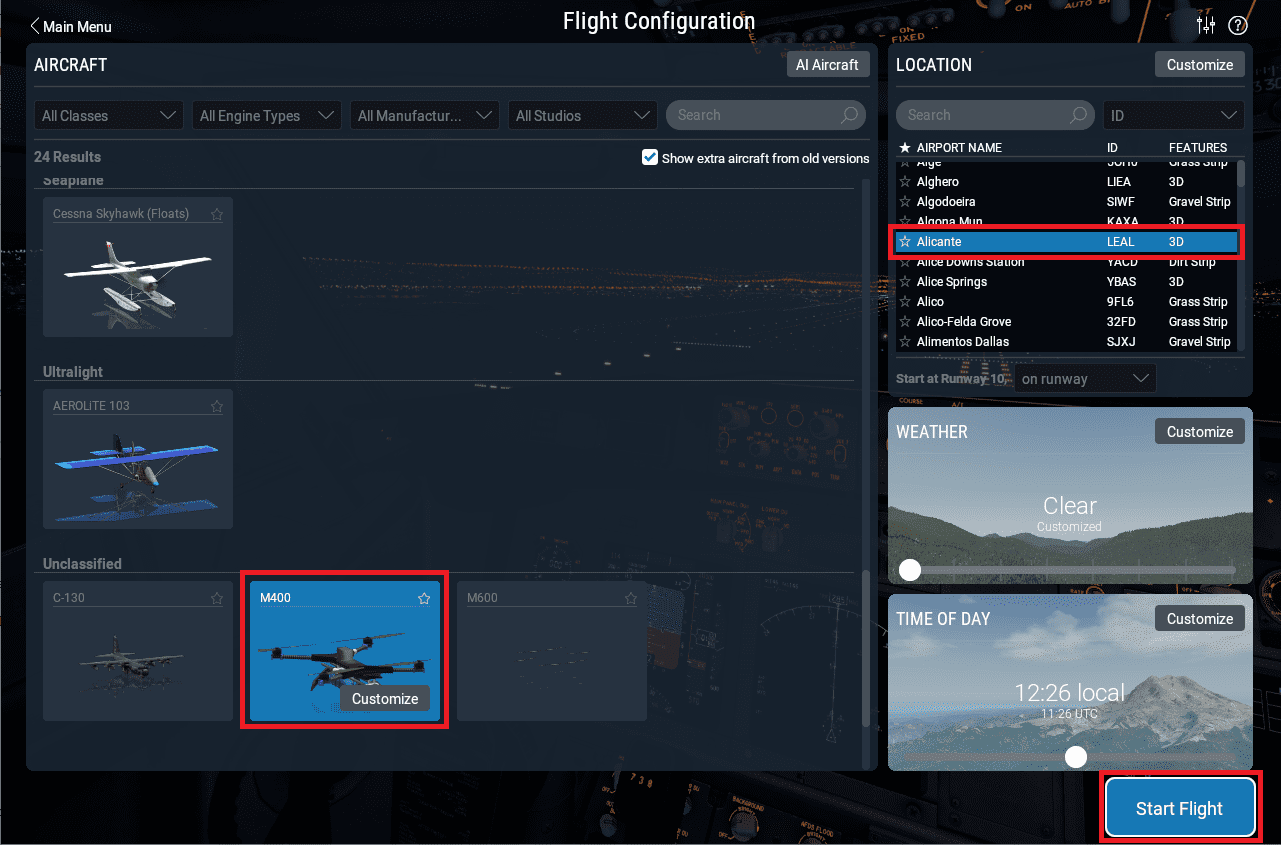

X-Plane 11 Setup
5. Run simulation.
Once X-Plane is configured, click on
 of HIL Simulator to enable the sending of commands. The frequency to the simulator should then be set to, approximately, the previously configured frequency:
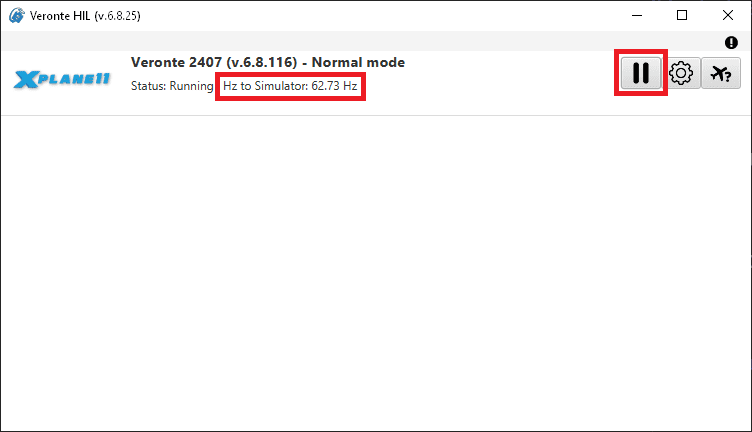
HIL - Run simulation
6. Check sending/receiving data.
Go to Settings \(\Rightarrow\) Network tab. Check that the sending and receiving data to is correct:
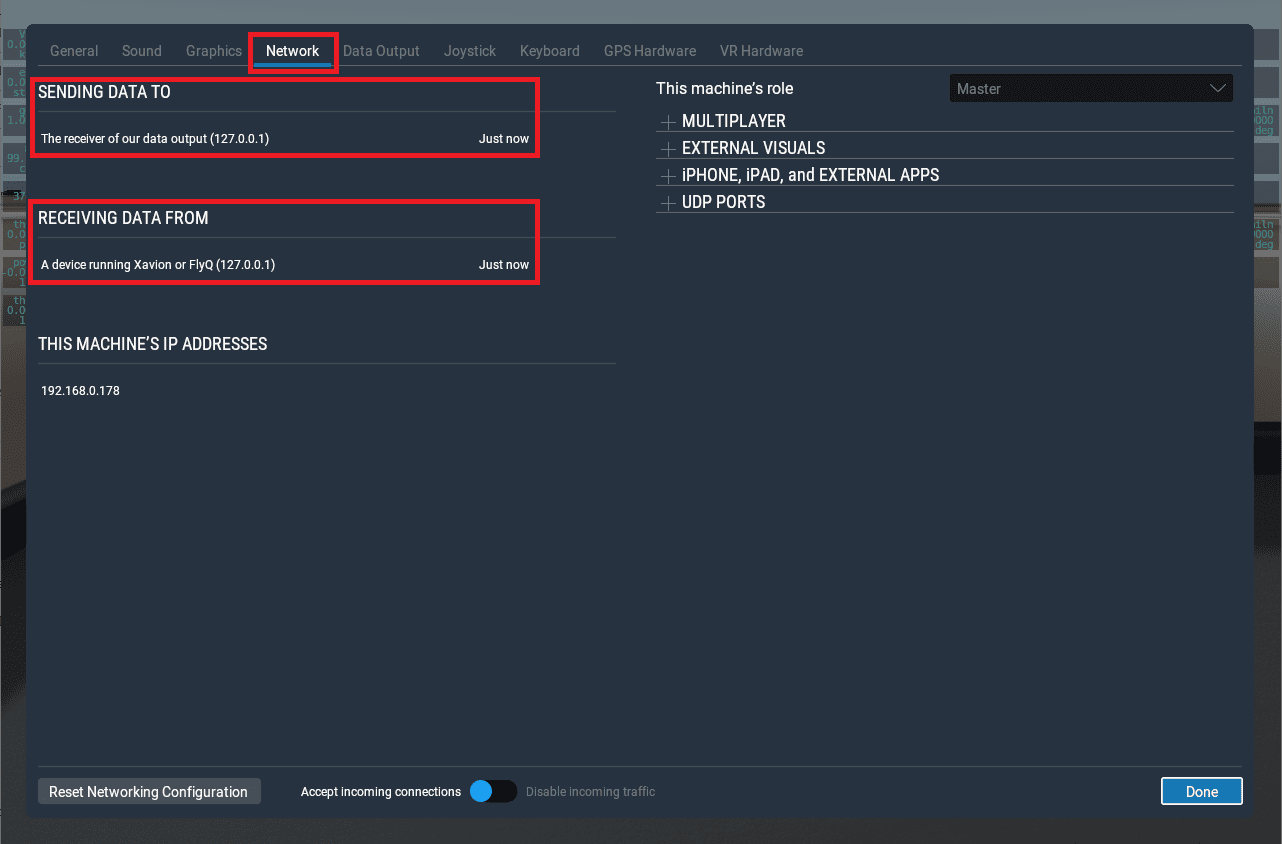

Check sending/receiving data
Once the hardware has been connected and the software has been configured, operation can start and the system can be operated as a real flight.
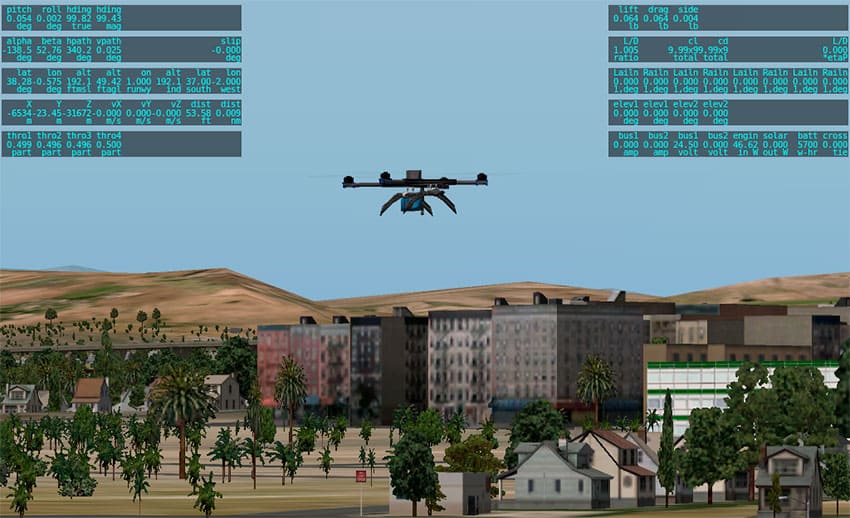
GPS will be simulated and the UAV should be visible on Veronte Ops in the selected airport, with a colored icon as follows:

Veronte Ops
Warning
The simulation starts when the aircraft is in the initial phase (when it is powered). In this phase, X-Plane will simulate the GPS signal to locate the autopilot.
With GPS signal it is possible to pass the system to Standby phase and to start flight. Once the aircraft has taken off from the airport on X-Plane, the automatic control will start and the aircraft will fly, according to the defined mission on Veronte Ops. For more information about Veronte Ops, read the User Manual, remember to select the employed software version.