Camera
When adding a Device, the user can choose adding a Camera. This will create a default Camera under Devices - Payload - Camera.
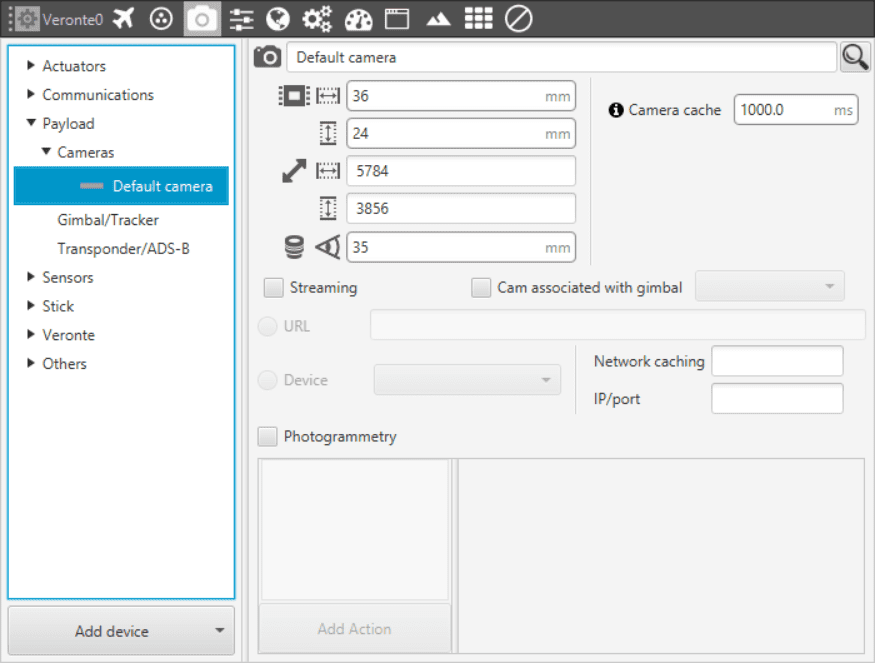
Camera Menu - Configuration Parameters
Name. Put a name to the camera define or use the lens on the right to choose from the predefined list of cameras. Making this will automatically establish the following values (which in other way would have to be define manually):
Sensor. Defines the camera sensor width and height in mm.
Resolution. Defines the camera resolution width and height.
Lens. Defines the focal length from the camera in mm.
Camera cache. Defines the cache time used to play the selected camera on the gimbal widget.
Streaming. Section used to define a streaming service with which to configure a payload system to be able to have its video in Veronte Pipe, particularly in Workspace - Gimbal widget.
URL. Cameras whose protocol goes through Ethernet are configured introducing its URL in this field.
If it is from a Gimbal device, it is important to be sure to configure the field Cam asssociated with gimbal if the user wants to move the Gimbal from the Widget.
Device. If the Camera is a system connected directly to the computer it will be selected from here. Generally speaking, Device 0 is linked to the Screen, Device 1 to the internal camera (if portable computer).
Photogrammetry. The actions undertaken in a Photogrammetry mission can be defined here, following the same possibilities as in Automations - Actions. A maximum of 4 Actions can be defined.
Veronte Gimbal Wizard
Veronte Pipe has an option which allows the user to configure from a basic menu all needed parameters for a Veronte Gimbal (in any of its four models).

Camera Menu - Veronte Gimbal Wizard
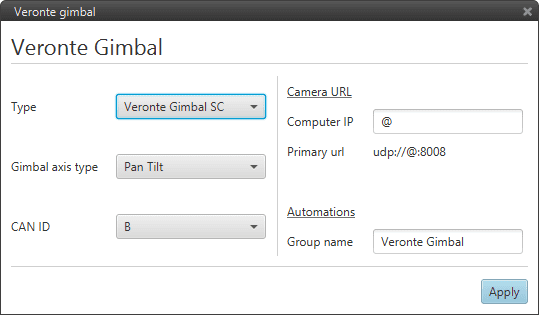
The parameters to be configured are:
Type. Defines the Veronte Gimbal model which is being configured:
Veronte Gimbal
Veronte Gimbal SC
Veronte Gimbal PRO
Veronte Gimbal PRO SC
Gimbal axis type. Defines the angles that Veronte will be controlling from the payload system from a Combination of Pan (Z axis, the same as Yaw), Tilt (Y axis, the same as Pitch) and Roll. The two options are as seen below:
Pan & Tilt.
Roll & Tilt.
CAN ID. Chooses the CAN which will be configured for using the Gimbal between A and B.
Camera URL. Set the computer IP for the wizard to create the corresponding links between Gimbal and PC.
Automations. Defines the name of the group of automations which will be created after the Wizard.
Camera Menu - Veronte Gimbal Wizard - Configuration Parameters
When clicking on apply, the wizard will automatically generate the CAN Messages, the cameras needed (either EO or IO depending on the model), the Gimbal configuration and a set of Automations for its use.
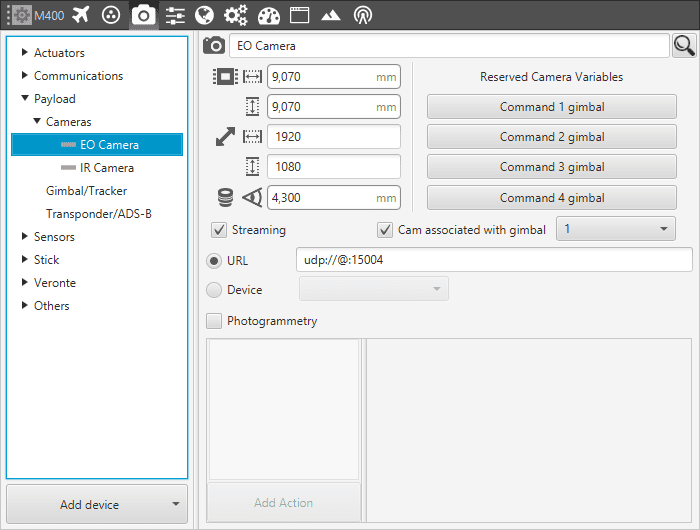
Camera Menu - Veronte Gimbal Wizard Results
Warning
If the camera has not been properly configured or the user wants to delete the previous configured model there are 4 menus to clear:
CAN A/B - Telemmetry - TX
Devices - Payload - Cameras & Gimbal/Tracker
Automations - Group Defined