Post Flight
The post flight menu allows the user to check all the information stored during a flight operation. There exist different options to display the telemetry of a certain operation, and they are presented in this section.
To access the menu, click on  (Main Menu), and then select Post Flight in the pull-down menu.
Tour Play

Post Flight Panel
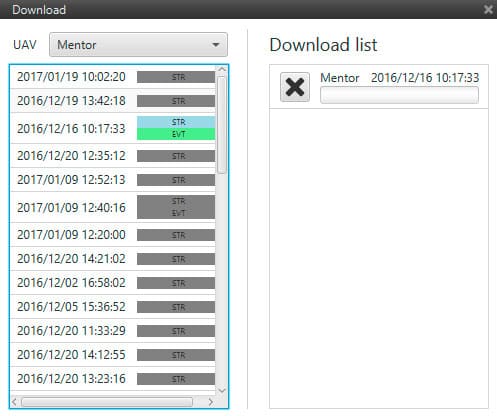
When opening the post flight menu, there are a series of options to configure in order to display the tour:
The autopilot, whose information wants to be played on the tour, has to be selected among the ones that appear on the list on the left side.
The user here can select the date of the flight that is going to be replayed.
The speed of the tour can be configured in this option (x1 means normal speed).
The play button starts the tour.
When clicking the play button, a new autopilot will appear in the right sidebar with the name of the unit plus Offline. As it can be seen in the previous figure, a new Veronte Panel appears on the screen showing the phase changes as they occurred in the real operation.
Regarding the telemetry, all the variables that were in the Telemetry Link during the real flight can be displayed in the tour.
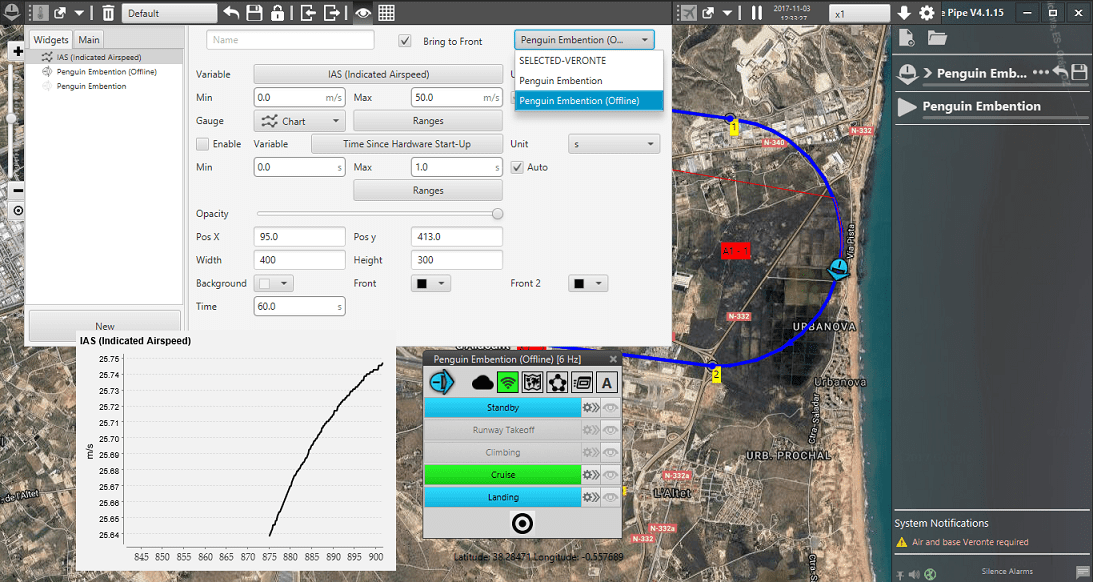
Workspace Panel
For example, to display the IAS that the aircraft had during the flight played, just select the offline autopilot in the pull-down menu, and the gauge will show the indicated airspeed of that operation.
Warning
If a variable was not in the telemetry link during a flight, it can not be later shown in the tour of that flight.
Data Export
The telemetry generated during an operation is stored in different ways (see section Telemetry). According to how each one of the telemetry variables has been stored (data link, onboard log, user log and fast log) it has to be downloaded in a different way.
Data link
The information obtained directly from the Data Link is saved at the “appdata” folder of the operative system. This data is the telemetry sent by the air autopilot to Veronte Pipe, so it is stored in the computer that has the software installed. The exact path (in version 4.X) to obtain it is:
C:\Users\<Username>\AppData\Roaming\VerontePipe\<Veronte Pipe version>\session
In the folder that appears in this route, there are several folders each one corresponding to one operation. To identify the desired one check the date on the folder name. In order to play a tour of a flight in a different computer, just copy the folder to the same route in the other computer and the information will appear in the post flight menu as was explained in the previous section.
It is also possible to download the information of the Data Link for post-processing purposes. Right-clicking on the green bar of the desired flight will open a menu where it is possible to download that information in:
CSV file – This file uses “;” for data separation and “,” for decimal indication.
KLM file – It can be opened using Google Earth and allows to check the aircraft route in 3D.
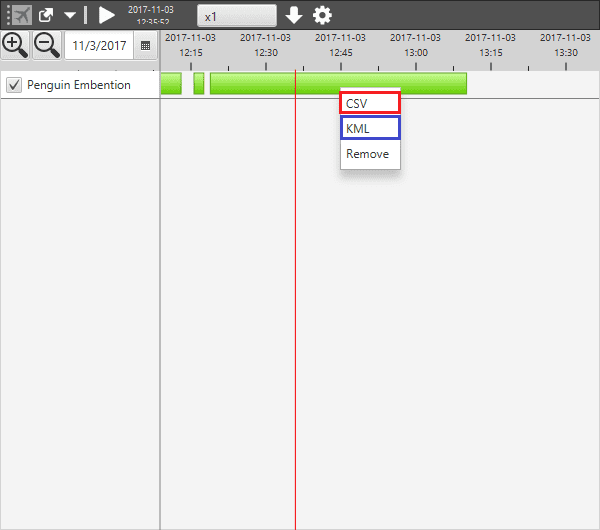
Post-flight data export
When downloading a CSV file, Pipe provides the user with an option to automatically name the photos taken during a photogrammetry mission.
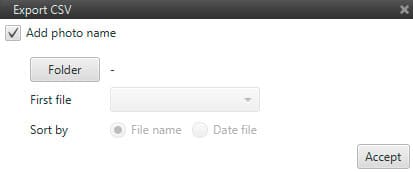
Export CSV
The button Folder allows the selection of the folder that contains the photos taken during the mission. Then, in First file will appear all the files of that folder and the user has to select the file that corresponds to the first photo. Finally, Pipe permits to sort the photo files by name or date.
LOG
The data of the other three type of logs is stored in the SD Card of the air autopilot, so it has to be downloaded to the computer in order to obtain it. To do this, it’s sufficient to open Postflight bar and click on the down-directed arrow, then select the Veronte unit for data downloading and refresh the page in order to choose the flight files to be download (checking the flight date and time).
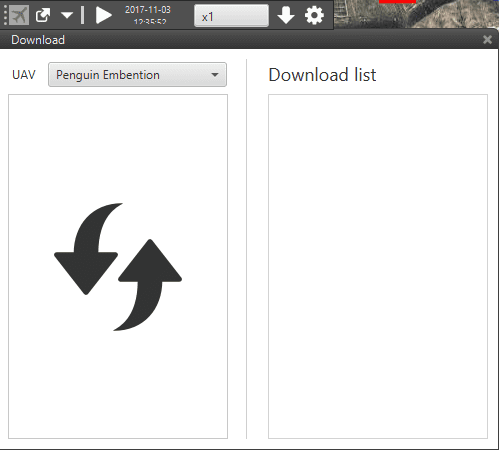
Data Export
The bar STR corresponds with the information of the Onboard Log and EVT is for the User Log. Once the file has been downloaded, the bar will turn green and right-clicking over it (SRT or EVT) will allow the user to download a CSV file with that information.
The following two images show a .CSV and a .KML files opened respectively with Microsoft Excel and Google Earth.
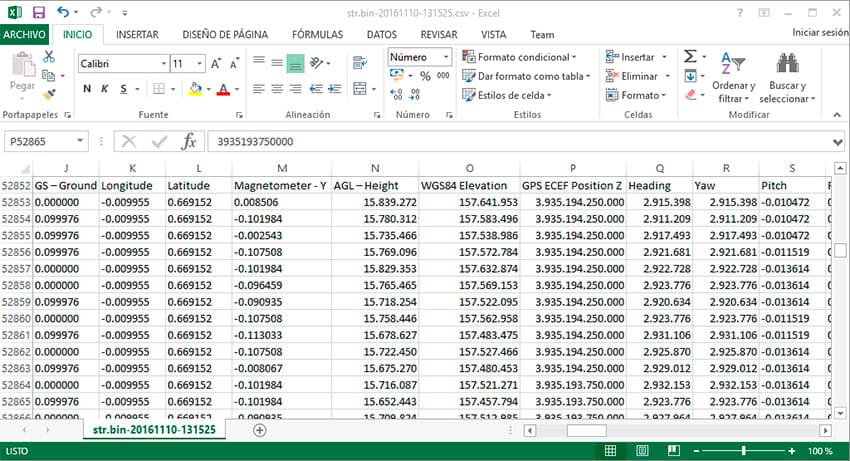
Post flight in Microsoft Excel (.csv)
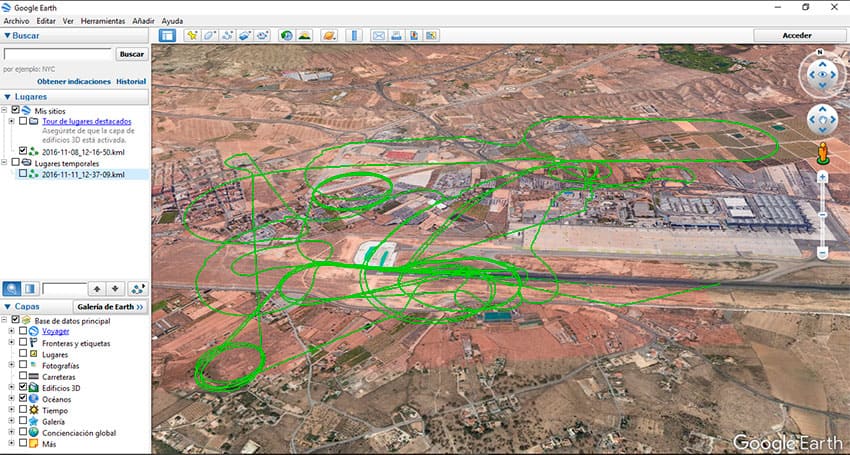
Post flight in Google Earth (.kml)