Autotune
The Autotune allows finding the PID controller gains automatically. During the process, the PID controller is replaced with a relay function and the controller parameters are then determined from the period and the amplitude of the oscillation of the system by using FFTs.
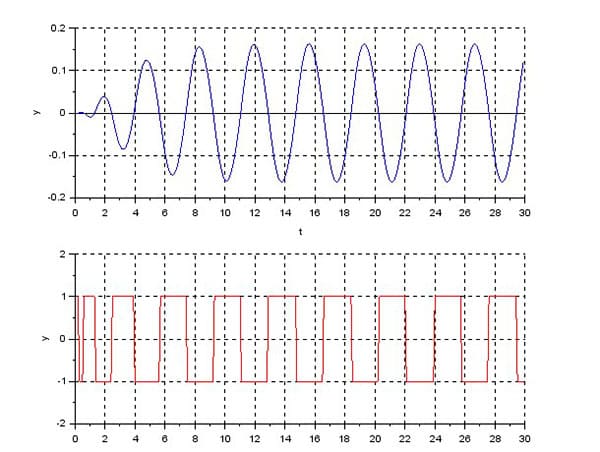
Autotune output (blue) and input (red)
Modes Configuration
To be able to use the autotuning tool, the Autotune Mode has to be selected in the Modes menu for the control output which must be autotuned. In the following image, for example, for the rolling control is set the Autotune mode.

Autotune mode
Workspace Configuration
In the Workspace panel, it is possible to select the Autotune Tool.
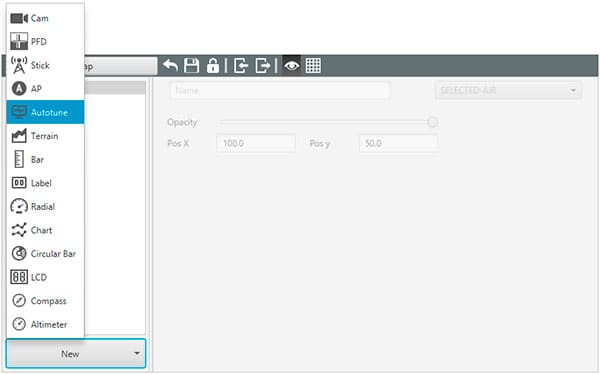
Autotune tool in the Workspace
When the window is opened, it is possible to select the loop for the autotuning. If some control loop does not have a PID controller configured, it appears with transparency and it can not be autotuned (red).
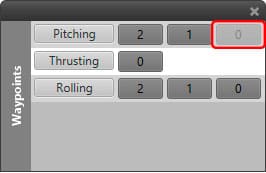
Autotune loop selecting
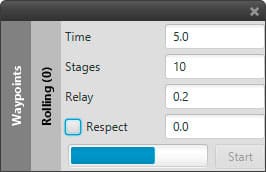
When the loop is selected, the window changes and some parameters are showed and they can be edited:
Time: It is the period of time in which the Autotune is performed [s].
Stages: The number of stages of the Fast Fourier Transform (a value between 5 and 10 is allowed).
Relay: This is the amplitude of the Relay function (R). The value has to be chosen in according with the proportional gain in the PID of the autotuned variable.
Respect: A mean value of the variable has to be selected. If the respect is select, the autotune will start from the last value of the variable. If not, the value can be edited by the user and the Autotune Relay function will start from this value and it will go from -R to R.
When all parameters are set, it is possible to click on Start and the autotuning process will begin and the blue bar will move until the end of the process. The left bar of the window allows to check the flight Phase and the selected loop.
Autotune process
If the process is performed successfully, a new window will show up showing the PID gains found in the Autotune process and the output wave amplitude and period. From this window, it is possible to save the new values in the configuration or cancel them.
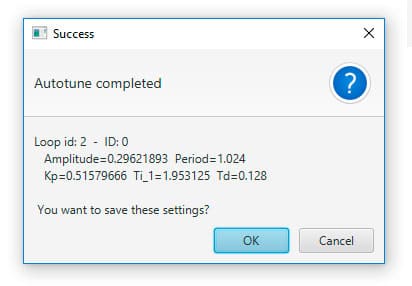
Autotune completed
Warning
Always be sure the gain values are in the correct range. A bad value, if saved in the configuration, could cause a control loss of the platform.
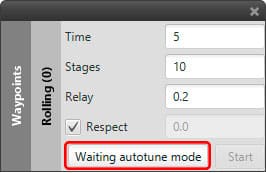
Process error
When the Autotune is started, it is possible to see a message in the blue bar: “Waiting for autotune mode“. In this case, the autotune mode for the selected control is not correctly set. The user must change it in the control panel.