VCP
1. Introduction
VCP is the abbreviation for Veronte Communication Protocol. This Protocol allows the user communicate with veronte-based systems.
As we said before, VCP is the protocol used by Veronte-based systems. This protocol allows products to send information and receive commands from the user. This exchange of information can be done using Veronte applications (1x PDI Builder, Veronte Link, CEX PDI Builder, etc.). Nonetheless, it can be used by an own developed application as shown in the following image:
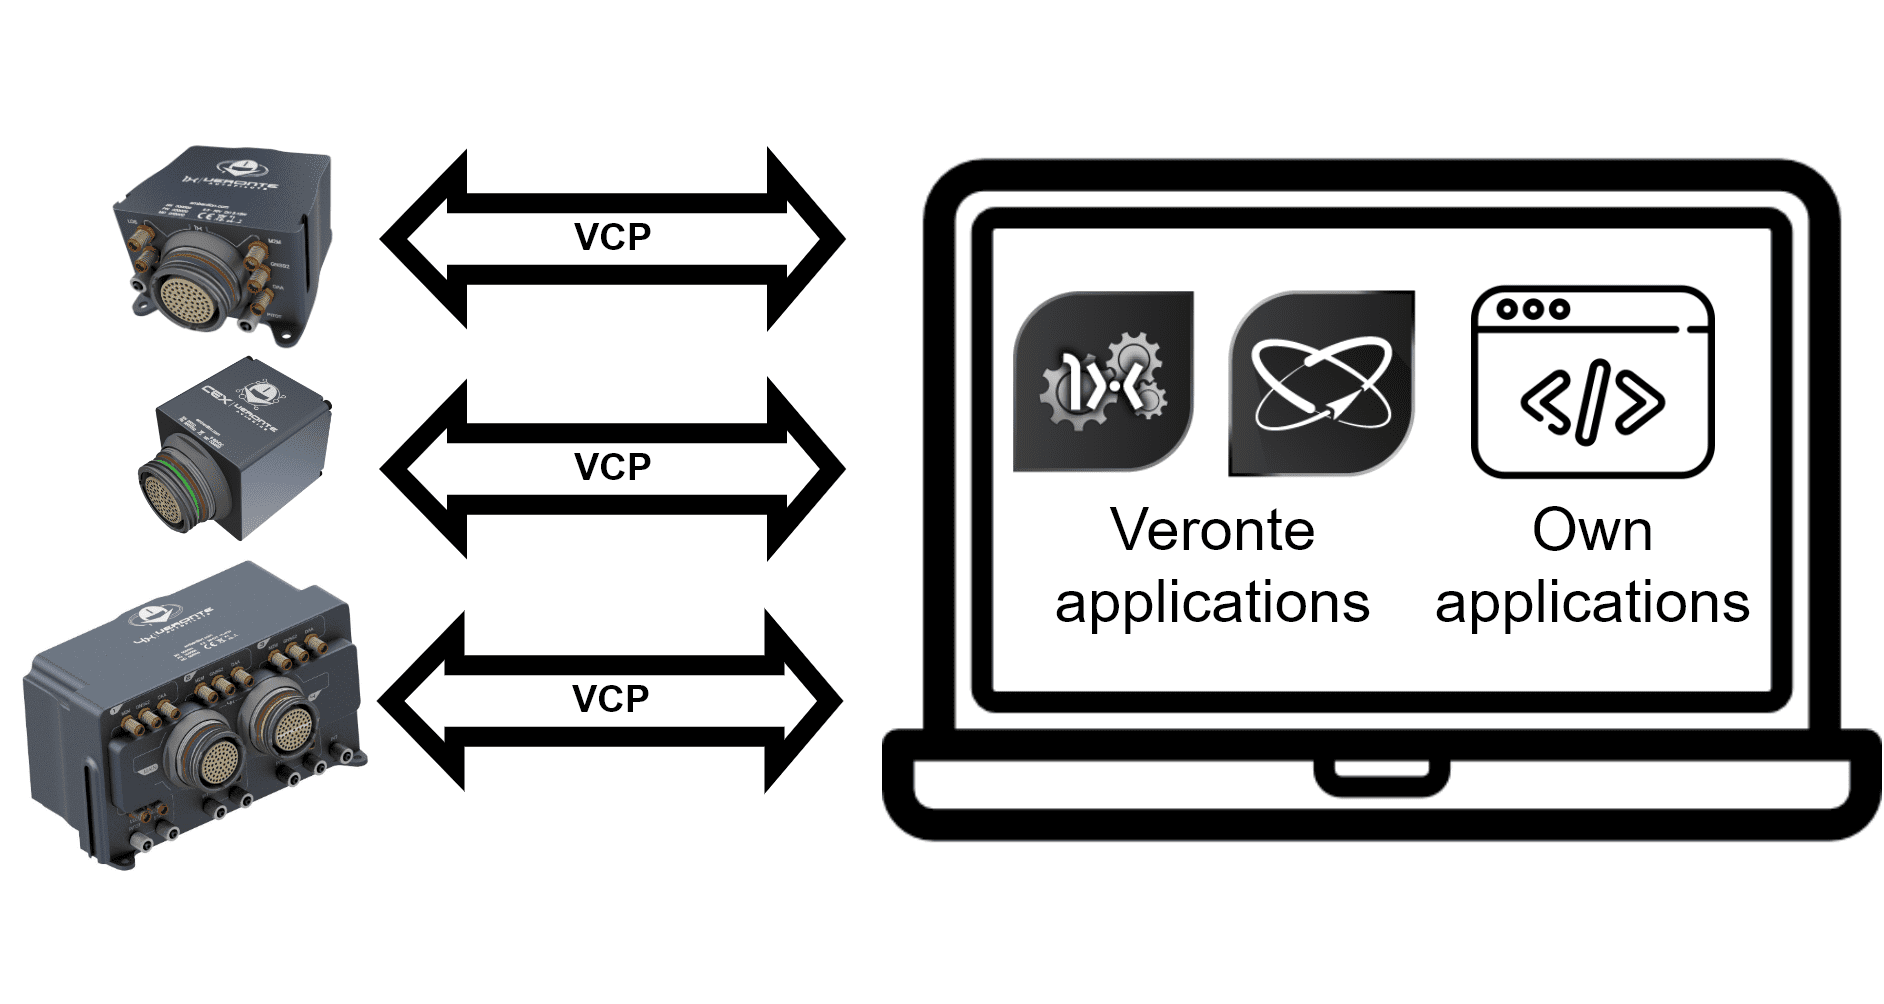
In addition, we call VCP to the library provided by Embention, which makes easier the process to develop an external operation tool.
2. Requirements
To test the VCP library and understand how to use it, we have built some easy examples. But, first of all, the following devices are required to work with VCP:
VCP library
A computer with:
Windows 10
VCP library
Visual Studio 2015
A Veronte-based system
The harness for the Veronte device (to connect it with a computer)
3. Connection with computer
Veronte devices can be connected to a computer with Windows via USB.
The following image shows an example of connection:
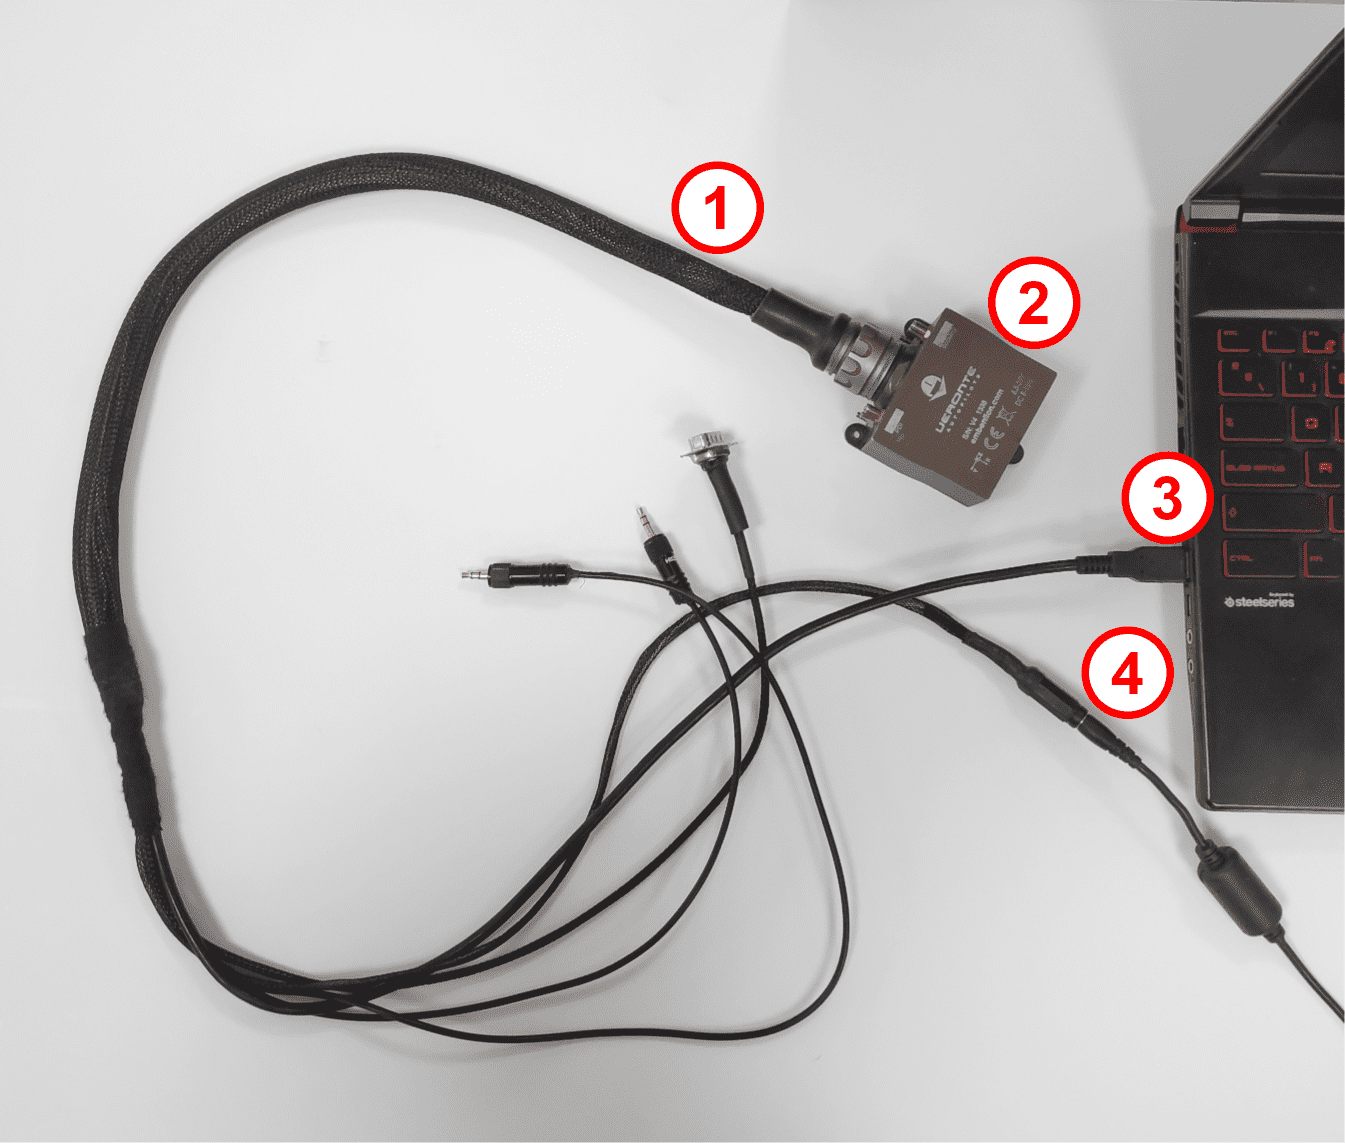
Where:
Veronte Harness.
Veronte Autopilot.
USB connected to PC.
Power supply.
Note
Make sure Veronte device is not in maintenance mode.
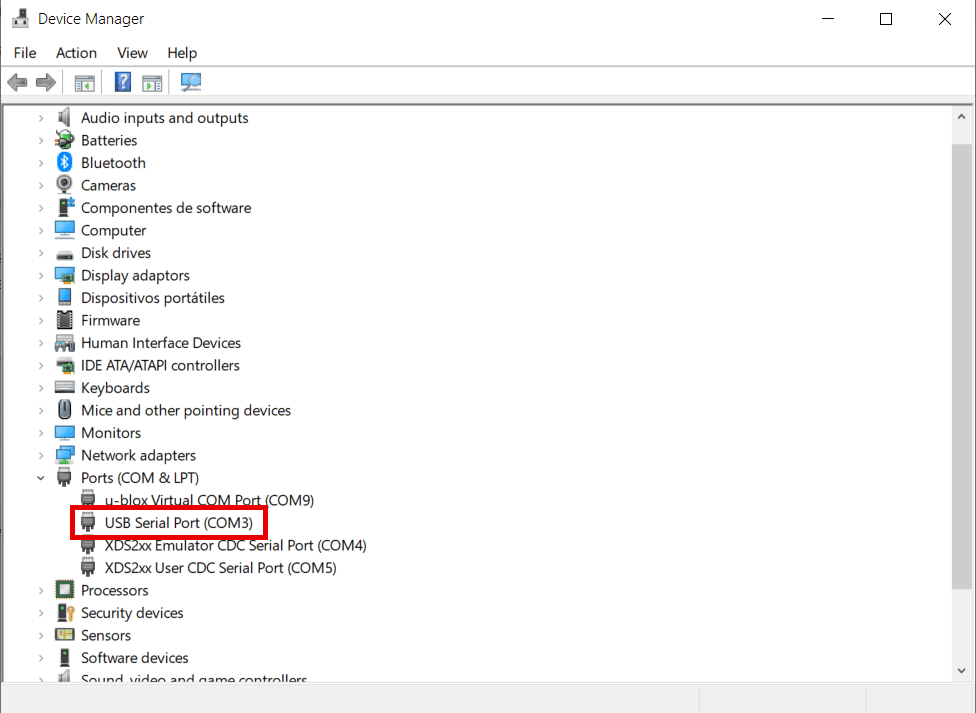
The PC will assign a COM port to the device, which can be checked on the Windows Device Manager as follows:
Now, the setup is ready to launch examples.
4. Message structure
The structure of the messages between different elements within a Veronte-based system is as follows:
Field: |
0xBA |
UAV Org |
UAV Dest |
Encr Flag |
IRX |
Arg |
Len |
CRC |
Data |
CRC |
Bytes: |
1 |
2 |
2 |
1-bit |
7-bit |
1 |
1 |
1 |
0-255 |
2 |
Important
In VCP, the maximum packet size is 266 bytes. Consider this to ensure proper communication.
0xBA:header of the message, used to identify an incoming communication as a Veronte message.UAV Org:ID address of origin.UAV Dest:ID address of destination.Encr Flag:encryption flag, registers whether the message is encrypted (with 1) or not (with 0).IRX:command type, it can be:0x00: Telemetry messages.
0x0F: Stick interface.
0x22: Communication Statistics.
0x29: Configuration Commands.
0x2C: Simulated Navigation.
0x2E: Simulated Sensor.
0x05: Configuration Files.
Arg:argument used by the command.Len:length, number of data bytes to be transmitted.CRC:Cyclic Redundancy Check, used to check whether data has been corrupted.Data:data to be transmitted.
5. Examples
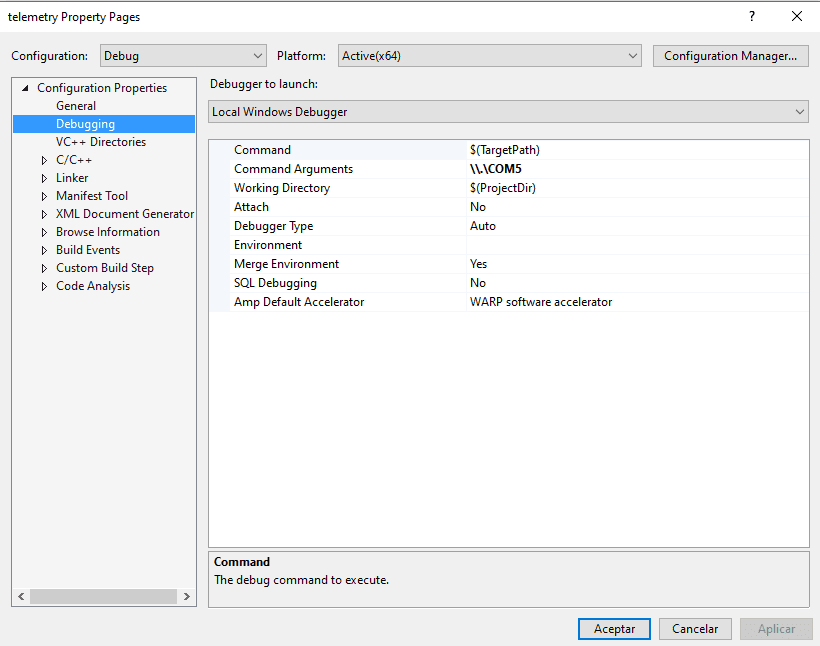
To start programming any VCP example or application, specify the assigned COM in the employed IDE. In Visual Studio, the COM port is specified as a project argument following the next steps:
Right click on project \(\rightarrow\) Properties.
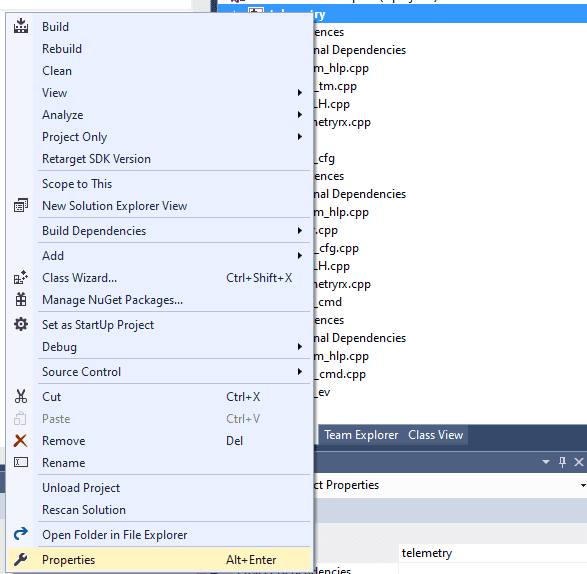
Configuration properties \(\rightarrow\) Debugging \(\rightarrow\) Command Arguments.
5.1. Common Code
5.1.1. Serial Port
This example gets the serial COM port used by a Veronte device and initializes it.
//Serial port instance
Serial& serial = Serial::get_instance();
//Get default port
const char* port = Serial::get_default_port();
//Checks whether the user has specified a COM port
if (argc == 2)
{
   //Get port as argument
   port = argv[1];
}
//Inits serial port
serial.init(port);
5.1.2. Discovery step
In this step the the discovery IRX is added in the command manager, to discover the address ID of Veronte connected to the PC.
Base::Commgr commgr(myaddr);                    //Command manager instance
Media::Discovery discovery(commgr);             //Discovery instance
commgr.add_irx(Base::discovery_id, discovery);  //IRX addition to Command Manager
After this, it is possible to discover the device and its ID:
discovery.discover();                      //Discover action

while (!discovery.get_status().received)   //Wait until the device has been discovered
{
        VCP::send_receive(serial, commgr); //Updating serial bus
        discovery.discover();
}
Uint16 ver_addr = discovery.get_status().addr.id; //ver_addr is the Veronte Address ID.
This ver_addr will be used by many examples as destination address.
5.2. File Configuration
With the device ID, it is possible to change its configuration, for example, in this case the routes configurable used by the UAV will be updated. (This example only shows one point update, go to main_cfg.cpp file to check all code).
Feature references creation:
Geo::Ftropf fop;    //Operation features instance
Base::Feature f0;   //Feature reference instance
Tllh v0;            //64-bit longitude, latitude and WGS84 height position

// Initialize values - lon, lat, height
v0 = { { -0.01001664582567 , 0.66831910249822 }, 150 };

f0.set_abs(v0);       //Sets the coordinates of a waypoint from its absolute coordinates
fop.opg[0] = f0;      //Initialize the list of operation generic features

fop.opg.set_enabled(0, true);     //Enables the abstract array
Route creation:
// Route declaration
Base::Patchset_route route;
// Create point number 0 associated
route.route.set(static_cast<Troute::Pnt_index>(0), Fid::opg_000);
// Enable point 0
route.route.set_enabled(static_cast<Troute::Pnt_index>(0), true);
// Associate a patch to the point 0, and there is no next patch (-1)
route.route.set(static_cast<Troute::Pch_index>(0),
            static_cast<Troute::Pnt_index>(0),
            static_cast<Troute::Pch_index>(-1));
// Enable patch
route.route.set_enabled(static_cast<Troute::Pch_index>(0), true);
File Configuration IRX and Config Manager IRX instances, and their addition to the Command Manager:
//File manager instance
Media::Filecom filecom(commgr, myaddr, discovery.get_status().addr, 5.0F);
//Configuration manager instance
Base::Cfgmgr cfgmgr(commgr, myaddr, discovery.get_status().addr, 5.0F);
// IRX addition to Command Manager. This action allows to listen messages
// which IRX is Base::filecom_id and Base::config_id, associated to file
// management and configuration management respectively
commgr.add_irx(Base::filecom_id, filecom);
commgr.add_irx(Base::config_id, cfgmgr);
Uploading routes configurable:
//Random identification number of the file transaction
Uint64 uuid_file = rand();
//File configuration sending and saving configuration
//67 will be interpreted by Veronte as a route change request
if (filecom.upload(route, 67, uuid_file) && cfgmgr.save(uuid_file, 67))
{
   bool sending_file = true;
   while (sending_file)
   {
      VCP::send_receive(serial, commgr);    //Serial bus refresh

      if (!filecom.step() && filecom.is_successful())
      {
        //True when the whole file messages transactions have finished
        sending_file = cfgmgr.step();
      }
   }
}
Uploading feature references configurable:
//79 will be interpreted by Veronte as a feature references change request
if (filecom.upload(fop, 79, uuid_file) && cfgmgr.save(uuid_file, 79))
{
   bool sending_file = true;
   while (sending_file)
   {
      VCP::send_receive(serial, commgr);

      if (!filecom.step() && filecom.is_successful())
      {
          sending_file = cfgmgr.step();
      }
   }
}
Finally, change to phase 0 to test this command using the command manager instanced in Discovery step.
build_phasecmd(cfgmgr, 0);   //Builds change phase command
bool sending_cmd = true;
while (sending_cmd)
{
   VCP::send_receive(serial, commgr);
   sending_cmd = cfgmgr.step();
}
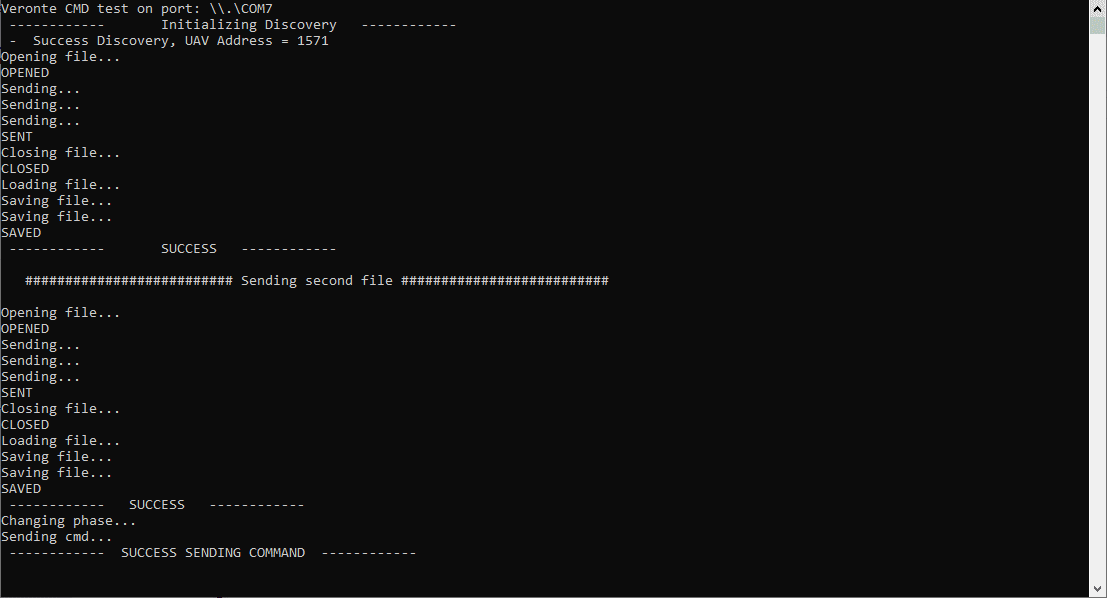
5.2.1. Command Prompt
File configuration output:
5.3. Telemetry
Telemetry is sent by default by Veronte devices, this means it is not necessary to create a particular packet to send. However, it is essential to add the IRX to command manager as in filecom example, but in this case the telemetry IRX will be added:
// Command manager where add irx (This allows to manage received messages)
Base::Commgr commgr(source_address);
// Telemetry IRX instance
Telemetryrx irx1(0, source_address);
// Add telemetry irx (when a telemetry irx arrives will be routed to
// on_rx function of Telemetry class)
commgr.add_irx(Base::telemetry_id, irx1);
while(true)
{
        // Update serial bus to check if packets are arriving
        VCP::receive_step(serial, commgr);
}
// Close serial interface
serial.close();
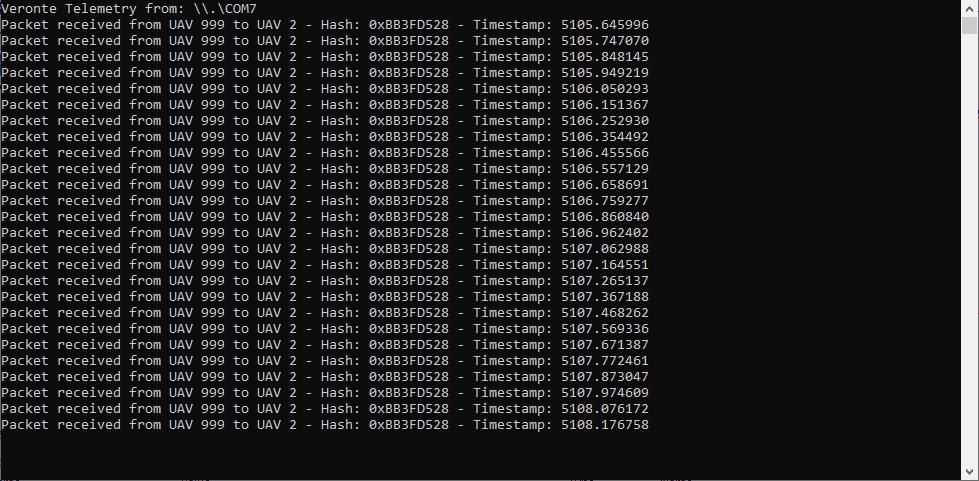
Launching this example will show the following message in the command prompt:
Packet received from UAV XX to UAV XX - Hash: XX - Timestamp: XX
or
Packet ignored from UAV XX to UAV XX - Hash: XX - Timestamp: XX
depending on address destination field of telemetry packet received.
5.3.1. Command Prompt
Telemetry output:
- Version
UM.307.6.8
- Date
2024-02-15