Configuration
Every time MEX is employed on a different geographic region, the magnetometer should be calibrated, since the magnetic field changes at each region. In addition, it should be calibrated the first time it is used.
To calibrate the magnetometer, follow the steps:
1. Connect MEX to a computer
To stablish that connection, use the Veronte Link application acording to its user manual.
2. Create tunnel communication
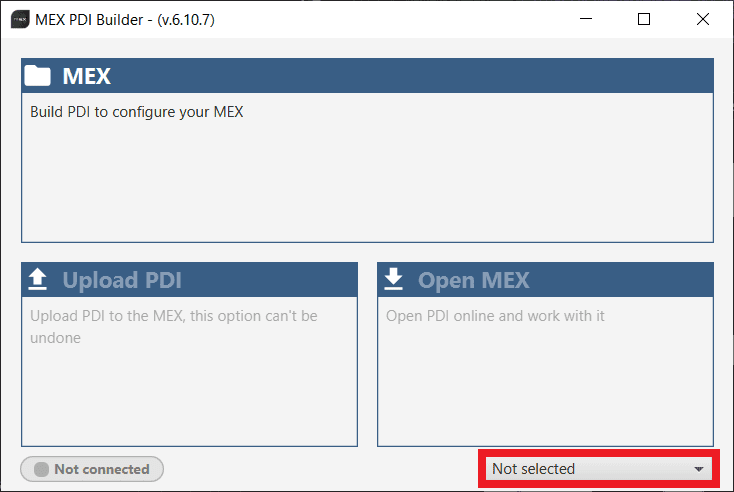
Open MEX PDI Builder and select the connected MEX on the marked button.
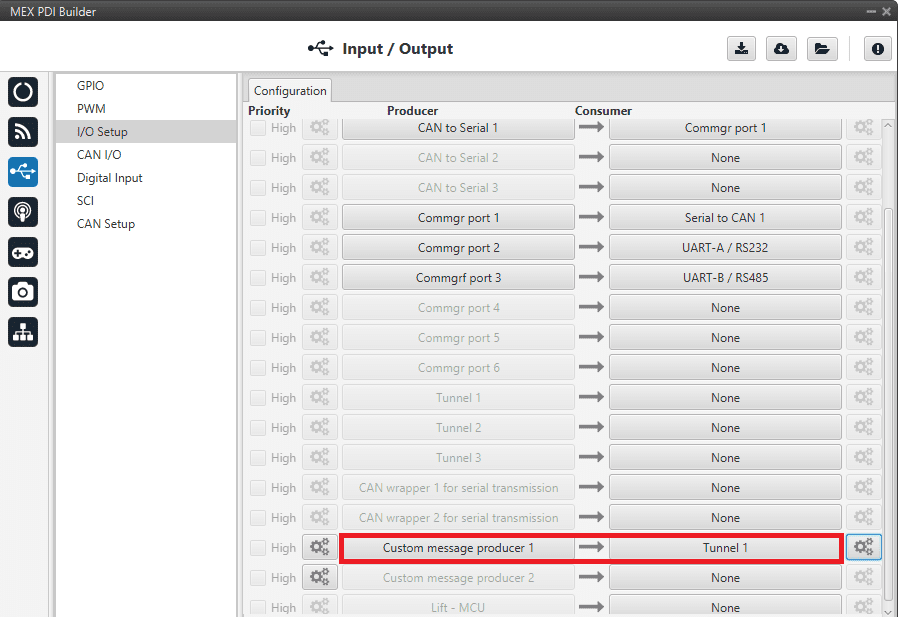
Click on Open MEX \(\Rightarrow\)  \(\Rightarrow\) I/O Setup, then connect a custom message producer with a tunnel consumer.
Click on  of the producer and then on
  to add a message.

Note
Click on  to edit any message or variable.
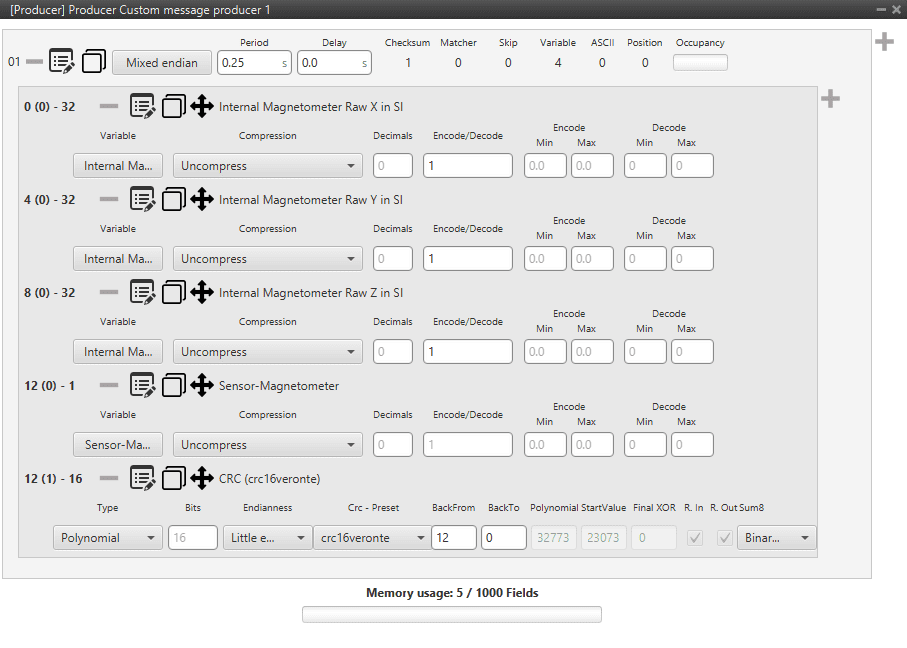
This message must be configurated as follows:
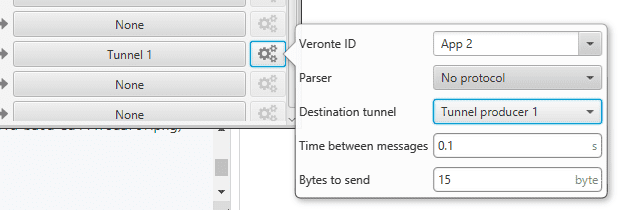
The tunnel requires the following configuration:
Finally click on  to send the configuration to MEX.
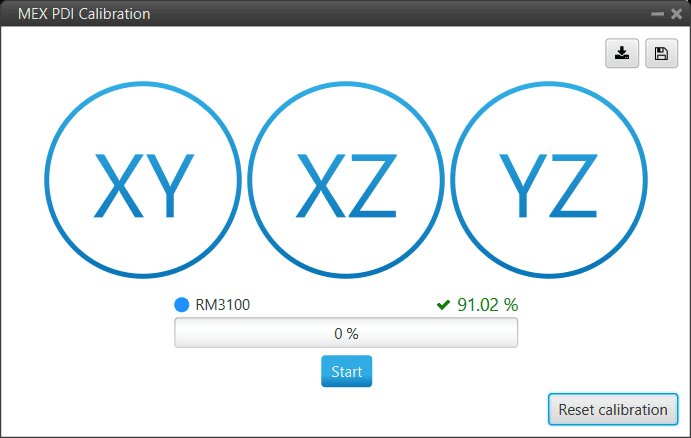
3. Calibrate magnetometer
Open MEX PDI Calibration and select the connected MEX on the marked button.
The following windows will appear, click on OK in both windows to activate the maintenance mode and restart the device.

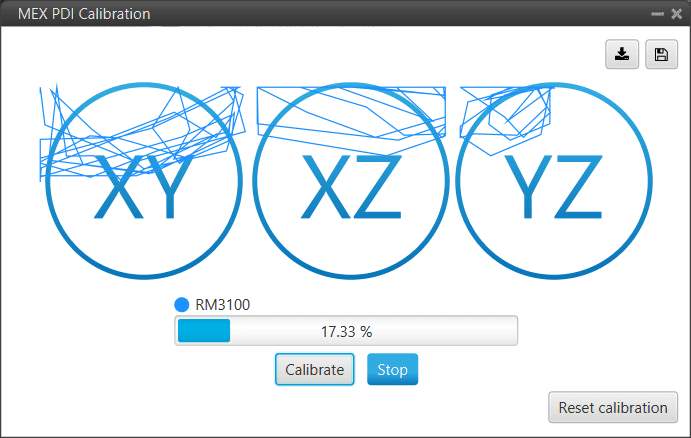
Click on Start to start the calibration process.
Immediately, start rotating the MEX around each axis.
Rotation around each axis
The progress bar will increase according to the number of samples measured and the samples will be drawn on each circle (one circle for each rotation plane). It is important to have approximately the same number of samples for each rotation axis. So rotate the MEX around one different axis each 33% (one rotation from 0 to 33%, another different from 33 to 66 and the last remaining from 66 to 100%).
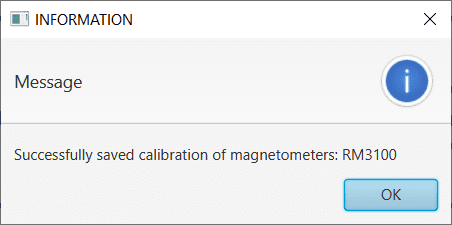
When the calibration process is finished the following window will pop up.
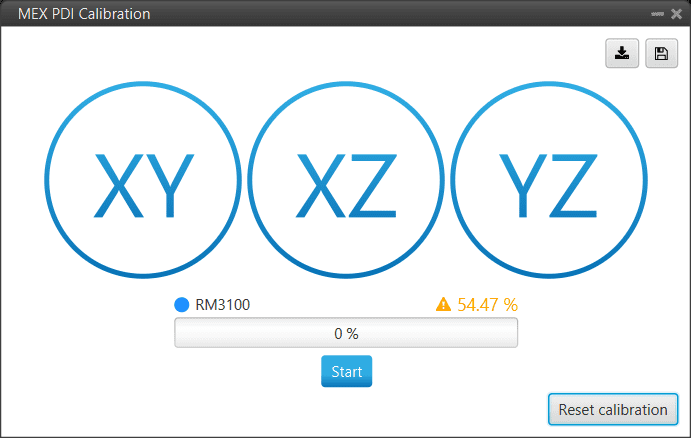
Then, a colored percentage will indicate the calibration measurements quality:
Red: repeating calibration is recommended.
Orange: acceptable.
Green: optimal.
Acceptable calibration example
Optimal calibration example
If the calibration is good enough, click on to save the configuration in MEX.  Saves the configuration files in the computer.
Warning
MEX will not be calibrated until is clicked.
On the other hand, if the calibration is not satisfying, click on Reset Calibration to calibrate again.
Note
Reset Calibration will delete the current calibration in the connected MEX.