Operation
Once the installation is finished, open 1x PDI Tuning and select the unit.
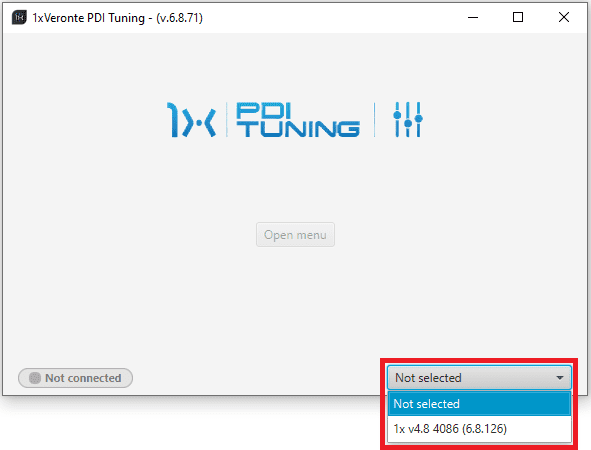
Select device
Warning
If no unit is connected, e.g. when working offline, it is not possible to access the menus of the 1x PDI Tuning software.
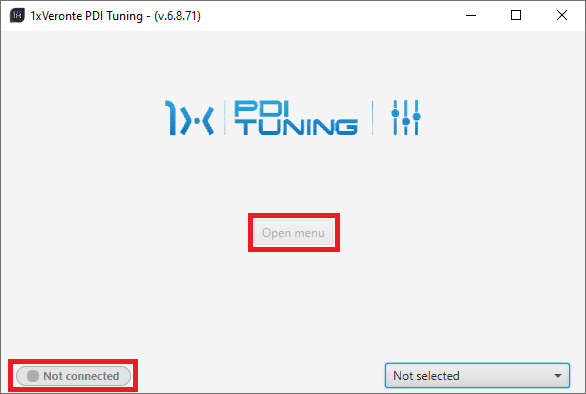
1x PDI Tuning - Device not connected
If it is correctly connected, it should appear in Normal mode as shown in the following figure.
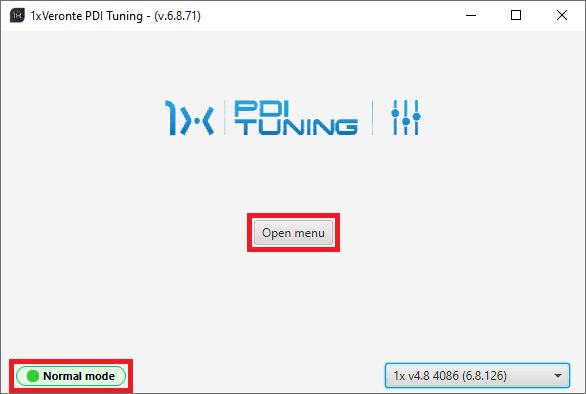
1x PDI Tuning
Note
1x unit can also appear as: Maintenance mode, Maintenance mode (loaded with errors) or Normal mode - Disconnected.
Maintenance mode (loaded with errors) appears when something is wrong in the configuration.
The user can now access the software by clicking on ‘Open menu’. Then, the following window will be displayed:
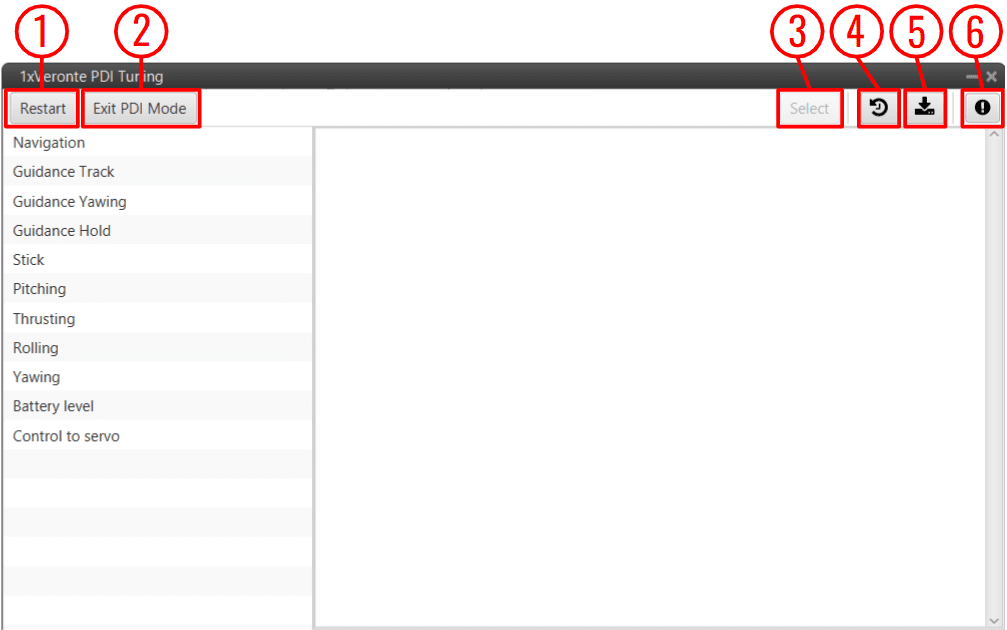
Initial menu
Restart device button: This resets Veronte Autopilot 1x.
To prevent the user from inadvertently restarting the autopilot, the following confirmation message appears:
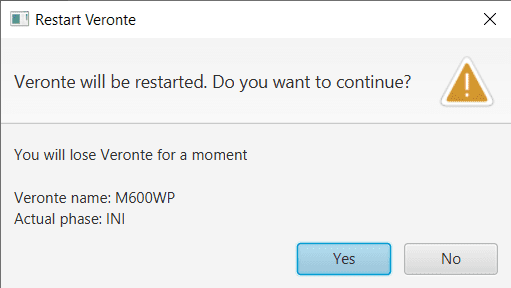
Restart confirmation message
Change PDI mode button: Users can exit/enter in PDI mode by simply clicking this button. Please note that to change mode it is also necessary to reset 1x autopilot.
To prevent the user from inadvertently exiting/entering in PDI mode and consequently resetting the autopilot, the following confirmation message is displayed:
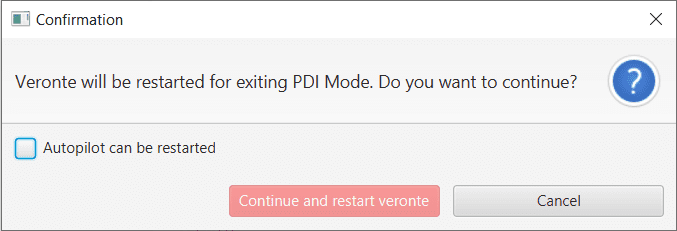
Exit PDI mode confirmation message
For more information on PDI mode, please refer to its explanation in the Veronte section of the 1x PDI Builder user manual.
Select button: After choosing the PID block to be ‘tunned’, click here to adjust its gains.
The tuning procedure is detailed in the Tuning section.
Note
If no PID block has been chosen, this button remains disabled.
Access command history button: This displays a pannel where users can consult a history of the gains that have been commanded during the tuning procedure.

History panel
To make it easier and quicker for the user to identify each record, the history has 3 columns.
Each column gives the following information:
Timestamp: Indicates the day and the time the change was made.
Id: This is the indentifier of the block.
Block: The type of the PDI block, it can be PID Static or Tsched PID.
Command Type: The type of command sent to the 1x autopilot, it can be PID or Autotune. For more information on these 2 command options, see Tuning section.
To access the gains commanded in the register, just double click on the register or select it and then click on the
 icon.
icon.Export configuration button: By clicking on it, the current configuration (PDI files including the production folder) saved in Veronte Autopilot 1x will be stored in the selected folder.

Exported configuration - PDI files
For more information on the folders containing the PDI files, see the initial menu of the Configuration section of the 1x PDI Builder user manual.
Feedback button: Users can report a problem they have encountered by creating an issue in their own ‘Joint Collaboration Framework’. The ‘Download’ button downloads a zipped folder with the current 1x configuration and more information needed for Embention to resolve the issue. It is advisable to attach this folder when creating the issue.
Note
The user’s ‘Joint Collaboration Framework’ is simply a own Github repository for each customer.
To use the Joint Collaboration Framework read its user manual.
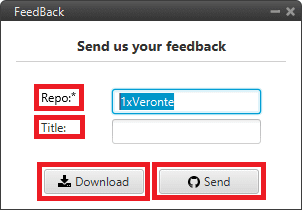
Feedback