Magnetometer
Magnetometer calibration should be performed once Veronte Autopilot 1x has been installed on the platform, so that the magnetic field during operation is similar to that measured during calibration.
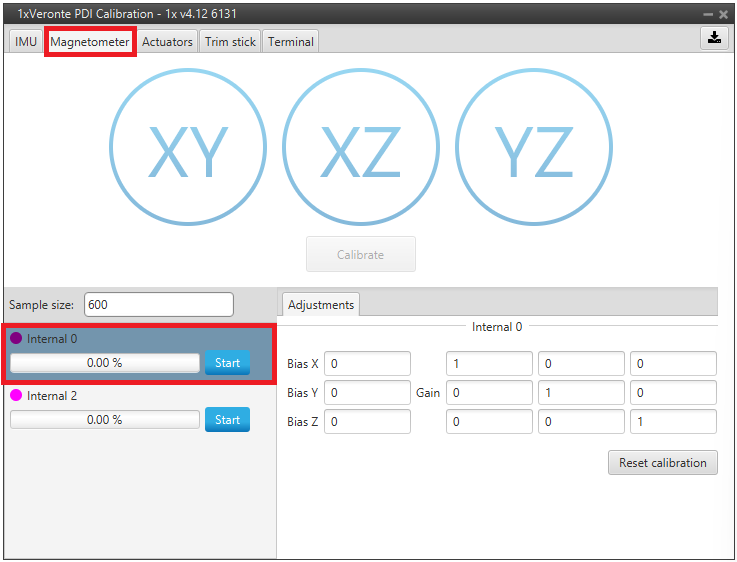
Note
The magnetometers listed in this menu depend on the configuration of the autopilot. If no valid magnetometers are configured, this menu will be disabled, as shown in the image below.
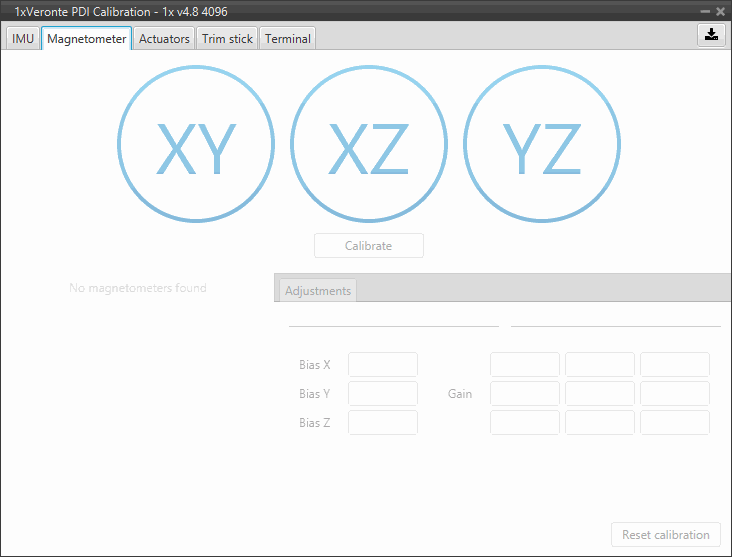
For more information, please consult Magnetometer - Sensor block section of the 1x PDI Builder manual.
Magnetic field strength
Before starting the calibration, the user can define the magnetic field strength of the current location, which is used as reference during the calibration process. Two modes are available:
- Manual: The user introduces the magnetic field strength value manually.
- Automatic: The magnetic field strength is obtained from the magnetic field model stored in the SD card of the autopilot, according to the current position of the aircraft.
Important
To use the Automatic mode, the following requirements must be fulfilled:
- Autopilot 1x must have GNSS fix, so that the system knows its position on Earth.
- Autopilot 1x must have a 128 GB SD card installed, as it stores the magnetic field model. Since firmware version 6.12, all Autopilot 1x units are delivered with this SD card installed as standard, so this requirement is always fulfilled.
- A valid magnetic field value must be available for the current position.
If any of these requirements is not met, the user must select the Manual mode and introduce the magnetic field strength value.
Calibration procedure
To start the calibration, press the Start button of the magnetometer sensor to be calibrated, so that the system can capture the data from the magnetometer.
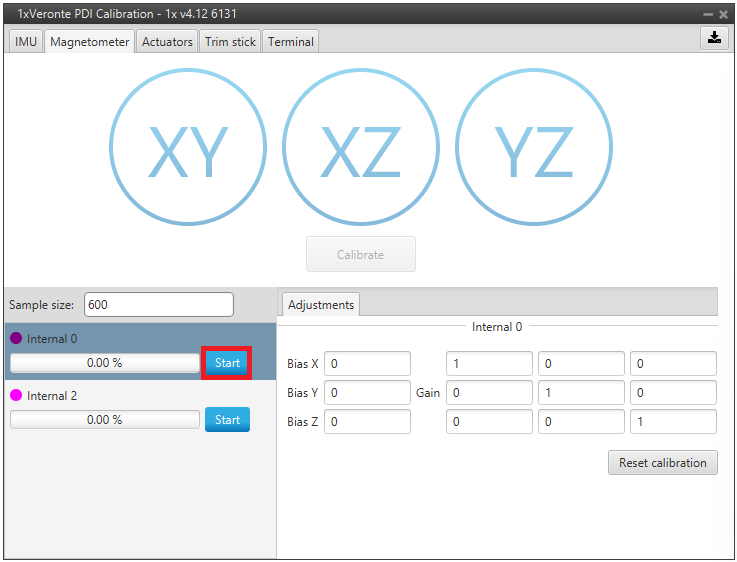
- Sample size: The total number of samples required to ensure a statistically accurate calibration.
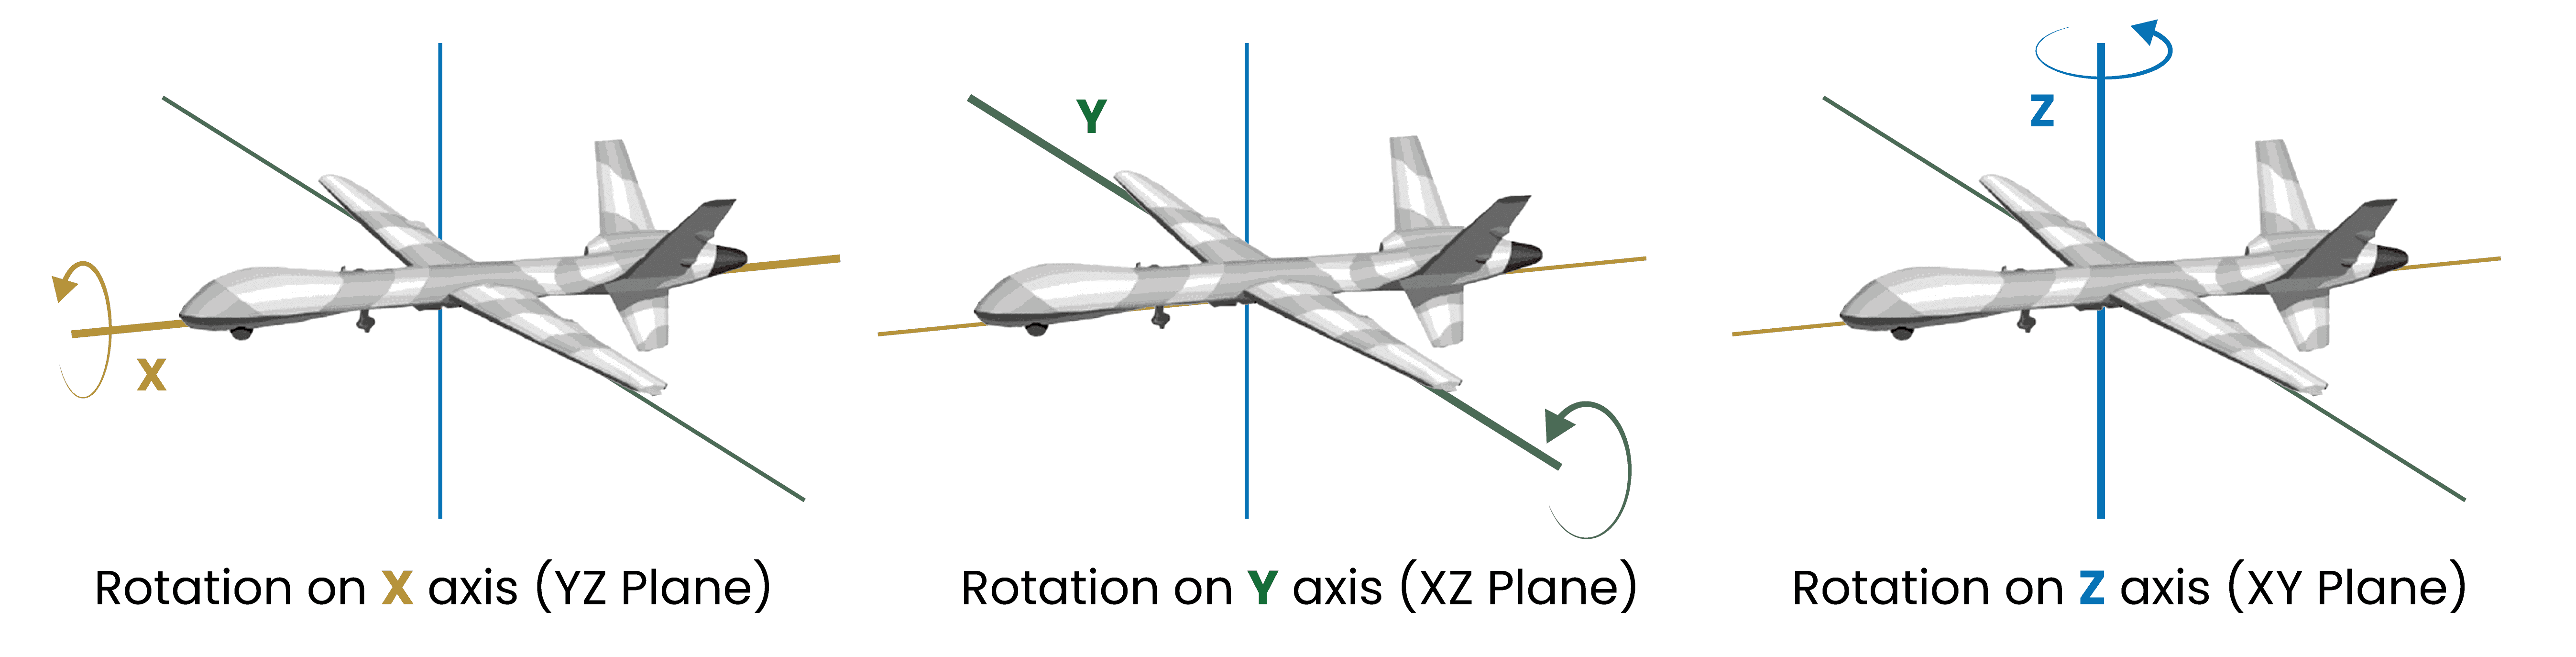
During calibration, the system must be rotated around all 3 axes, X, Y and Z, in order to capture sufficient data. It is important to have approximately the same number of samples for each axis of rotation, so rotate it around a different axis every 33% approximately.
The calibration procedure should be performed as follows:
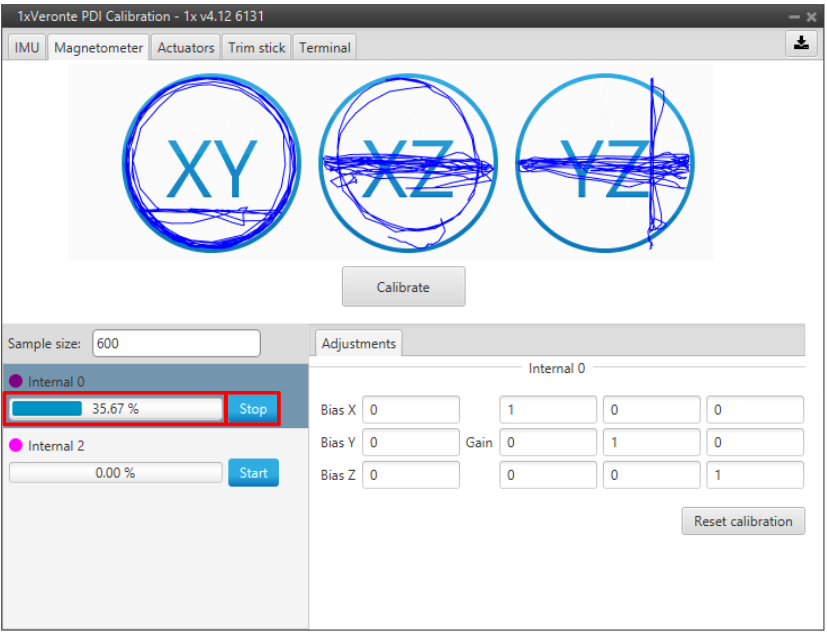
- Rotate the platform around the Z-axis (XY plane) until the progress bar reaches approximately 33%.
- Repeat the same process for the Y-axis (XZ plane) until the progress bar reaches approximately 66%.
- Finish the calibration by repeating this process for the X-axis (YZ plane) until 100% is reached.
Note
The order in which the user rotates the platform about each of the axes does not affect the calibration, this is just an example of how to do it. So the user can first rotate on the Y-axis, then on the X-axis and finally on the Z-axis.
The progress bar will increase according to the number of samples measured, and these samples will be drawn in each circle (one circle for each plane of rotation):
Note
If the user wishes to interrupt the calibration, simply click on the 'Stop' button.
Once 3 circles have been drawn on the screen and the progress bar reaches the 100%, the calibration process is complete. The following image shows an example of the calibration:
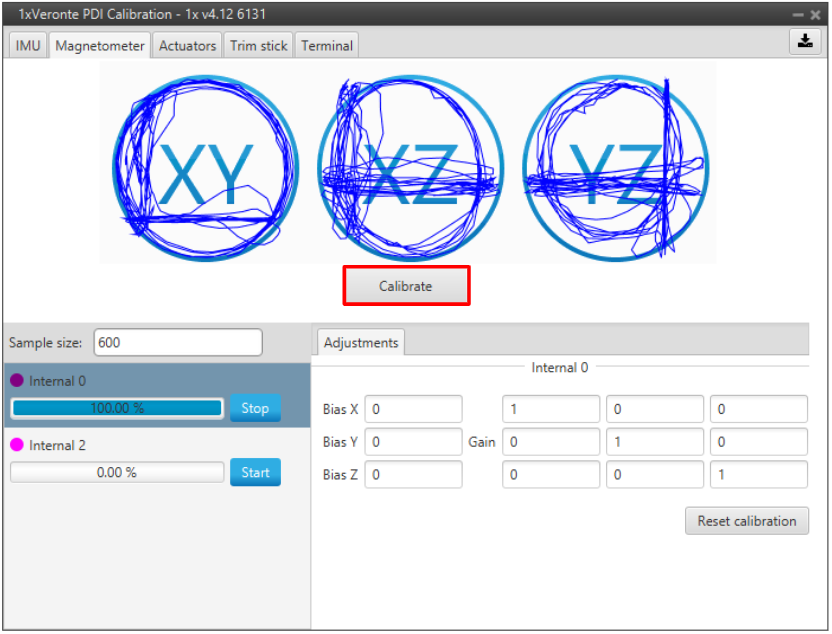
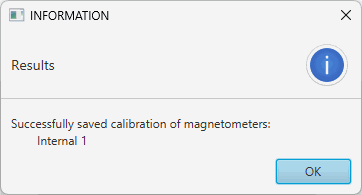
Once the calibration progress bar is completed, press the 'Calibrate' button to save the calibration in Autopilot 1x. If the calibration process has been successful, this window will pop up:
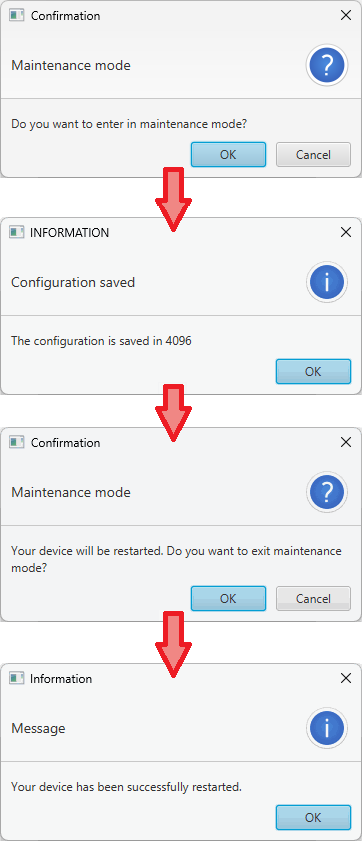
Then, since the autopilot needs to restart, the following confirmation messages will need to be accepted by the user:
Finally, at the end of the calibration process, this interface informs the user about:
-
The quality of the calibration measurements by means of a colored percentage:
- Red (0-39%): Repeating calibration is recommended.
- Orange (40-79%): Acceptable.
- Green (80-100%): Optimal.
-
The calibration results, Bias X/Y/Z and Gains measurements, displayed in the Adjustments tab:
- Bias vector (b0, b1, b2): Compensates for the Hard-Iron distortion (constant magnetic offsets).
- Gains matrix (a00 to a22): Compensates for the Soft-Iron distortion (magnetic field warping and scaling errors).
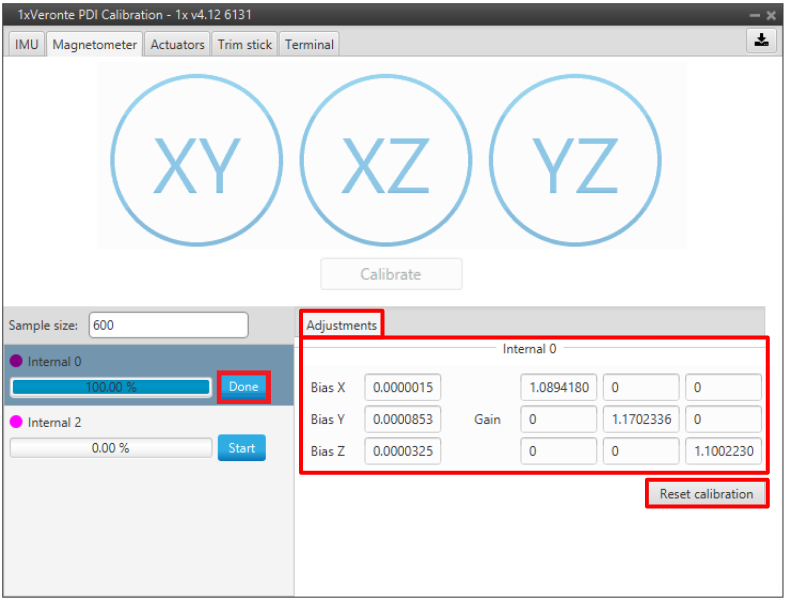
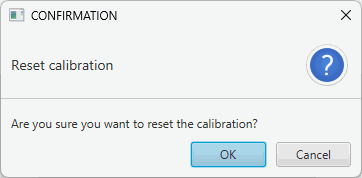
If the calibration is good enough, click 'Done'. Otherwise, if the calibration is not satisfying, click 'Reset calibration' to delete the current calibration on the connected Autopilot 1x. The user must confirm this operation in the following panel:
North orientation calibration
Once the soft-iron calibration has been performed by rotating the platform around the 3 axes, the user can additionally calibrate where the north is, i.e. the heading reference of the magnetometer.
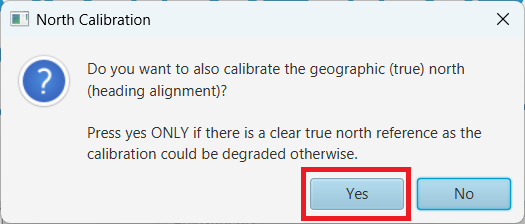
Note
This option is only available when the Automatic mode has been selected as magnetic field strength source.
To perform this calibration:
- Place the platform still in a known yaw orientation.
- Introduce that yaw value in the interface.
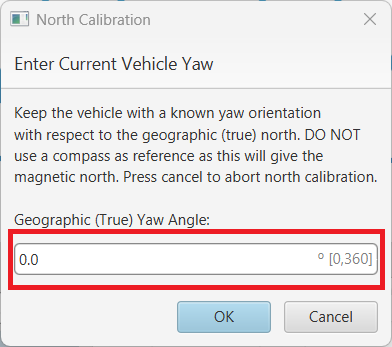
- Confirm the operation so that the north orientation is stored in Autopilot 1x.
Important
The north orientation calibration only makes sense when Autopilot 1x is already installed in its final mounting orientation within the aircraft, as this calibration relies on the known orientation of the autopilot with respect to the aircraft.
Therefore, if the autopilot is mounted again in a different orientation, this calibration must be repeated.
Errors which may occur during the calibration process
- If the 'Calibrate' button is pressed before the progress bar is completed, there may not be enough samples for the calibration to be conducted.
- If the variability of the collected samples is too low, it may not be possible to perform the calibration due to the lack of information.
-
The resulting rotation matrix rank may be deficient due to several reasons:
- Lack of samples
- Measurement errors
- Lack of representativeness
- Lack of diversity in samples
-
Invalid measurements may interfere with the calibration process.
- The scale factor used to adjust the measurements is too high in relation to the expected value.
Important
When one of these errors occur, the calibration process must be repeated. If the results of the calibration are still not satisfactory, please refer to the Magnetometer wrong calibration - Troubleshooting section of the present manual.
© 2026 Embention. All rights reserved.