Automations
Automations are actions that are carried out when a combination of events happen, i.e when the events are accomplished the action is done. An example of what an automation could be a change of phase when reaching a certain altitude and speed, moving a servo when a button is clicked and many other possible combinations.
In this section all the possible events and action will be explained in detail, so the user can combine them to create the automations that best suit their needs.
The following figure shows the layout of the automations menu, with a column for the events and another for the actions linked to these events.
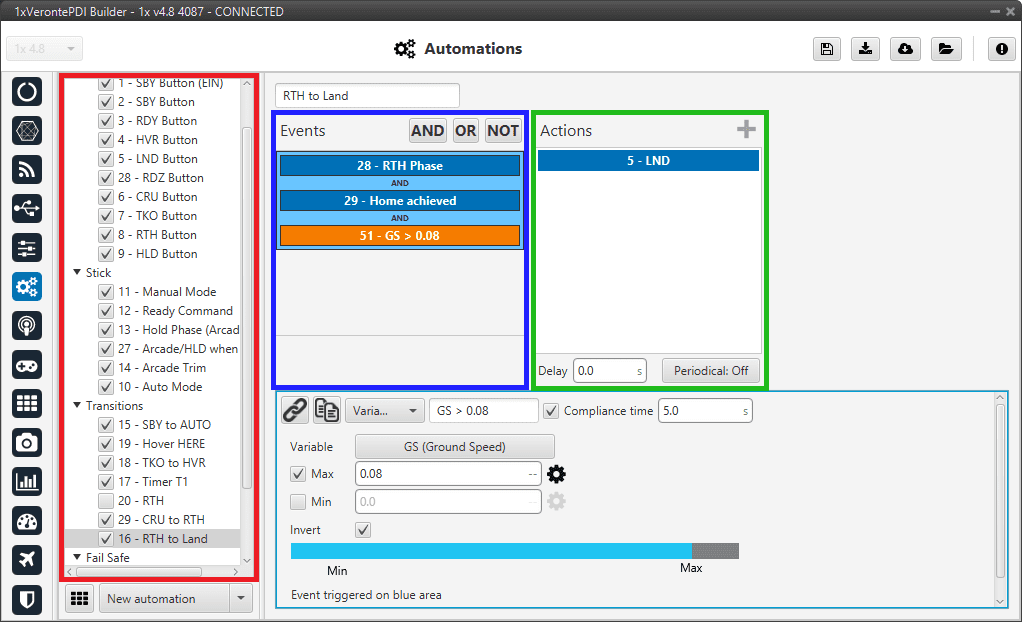
All the automations that have been created (red) are a combination of events (blue) and actions (green). All actions will be performed on event or an event combination triggering.
There are some parameters that can be configured in the events and actions menu and which are applicable independently of the type of event/action configured.
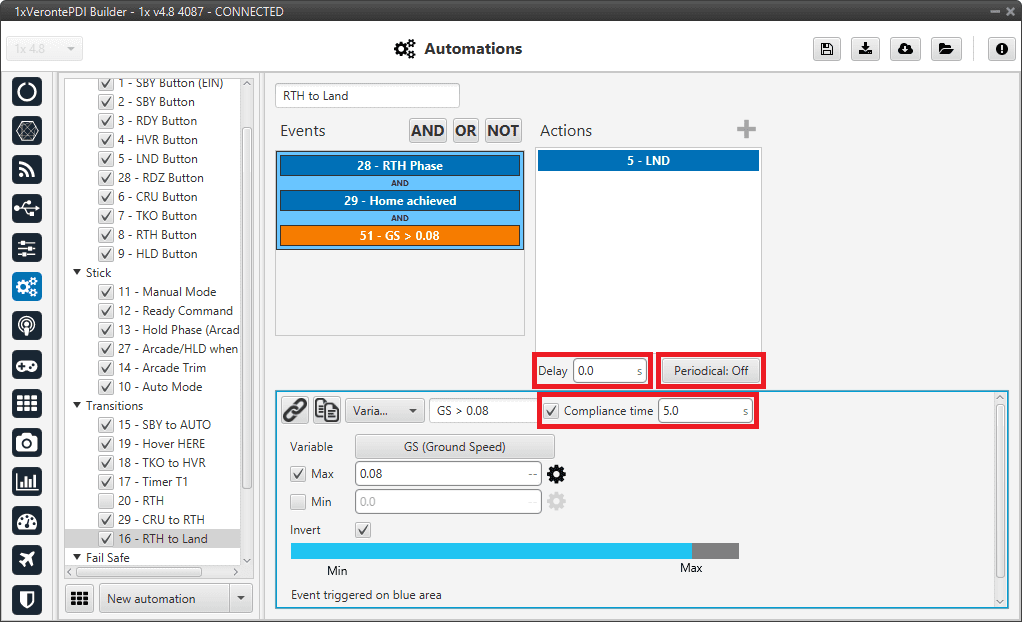
- Compliance time: It is a value related to the automations. It indicates how much time the event has to be accomplished in order to trigger the action.
- Delay: It is the time between the triggering of the event and the beginning of the action.
-
Periodical: If enabled, it allows to configure actions to take place periodically during the time that the events are active.
- Period: Manually enter the desired periodicity for this action.
-
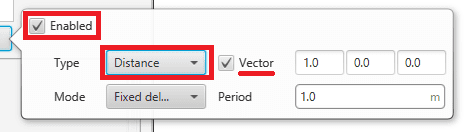
Type: The action can be configured to take place each certain:
-
Distance: When using distance, the option Vector allows to measure that distance along a direction specified by that vector.
Periodical distance configuration -
Time

Periodical time configuration
-
-
Mode: The two Modes available for both time and distance are fixed delay and fixed period. In order to explain the difference between them, the following figure is presented as an aid to the user.

Periodical modes Let's consider that the system evaluates the automations each second (black line), and the automation that contains the periodical option is configured to be executed every 1.5 seconds (red line). In that case, the first action will be triggered at the second 1.5 but will be evaluated at second 2. The second time that the action is evaluated will depend on the mode, if it is selected:
- Fixed delay, the evaluation of the action will be done 1.5 seconds after it was evaluated the first time, so that will be at second 3.5.
- Fixed period, the action will be evaluated 1.5 seconds after the first triggering (not evaluation) so that would be at the second 3.
In the real praxis, the evaluation time for the automation is much lower than 1 second so the difference between the modes is much smaller.
New automation
Warning
It is important to know that there is a limit of 500 events, 120 actions and 100 automations.
To create a new automation press New Automation and a new window will be displayed. First, users must add an event by selecting a previous one (if it exists) or creating new one.
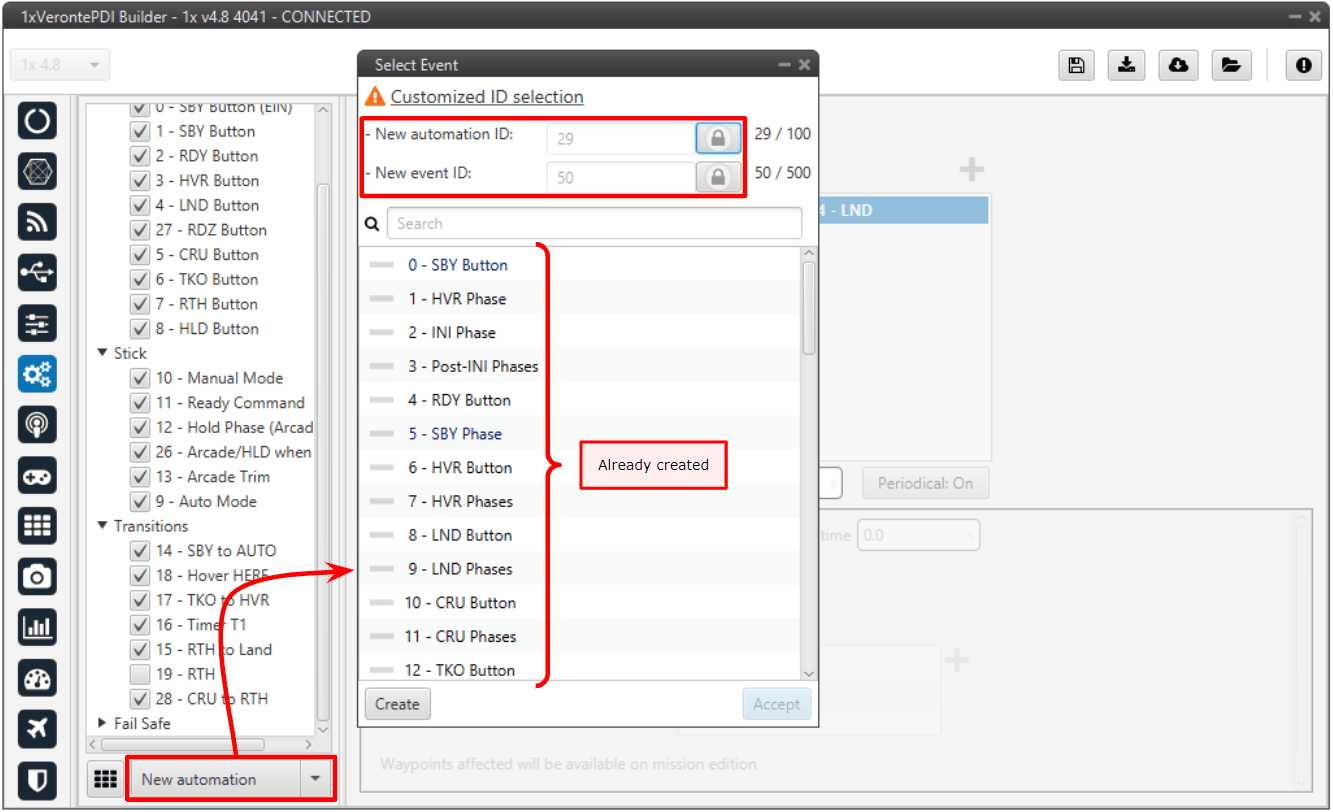
- To add an event already created, select the desired event and click Accept.
-
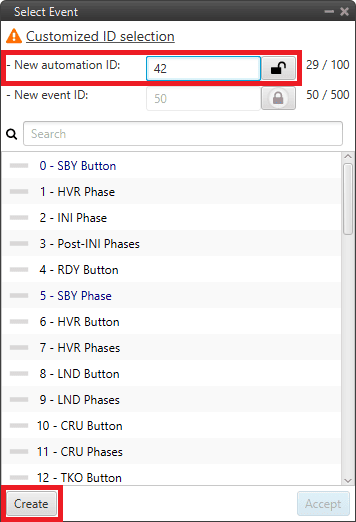
By default, when a new automation is created, it is assigned with the consecutive ID.
However, if the user wants to create a new automation with a specific ID, the New automation ID option can be "unlocked" by holding down
 until the process is fully completed (during the unlocking process this icon
  is "painted").
Once unlocked (when it appears as
is "painted").
Once unlocked (when it appears as  ), the user can assign the desired ID to the new automation.
Finally, click Create and the new automation will be added to the list of automations.
Caution
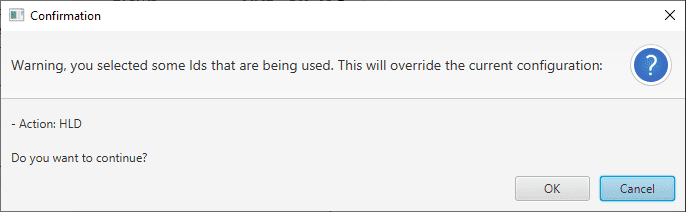
When the user enters an ID that is already assigned to an automation, the following confirmation message will appear:
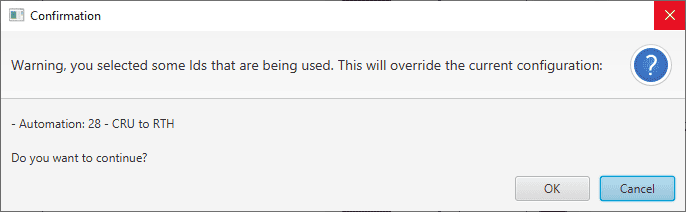
Then, if the user presses 'OK', the existing automation will be removed and a new automation with the entered ID will be added.
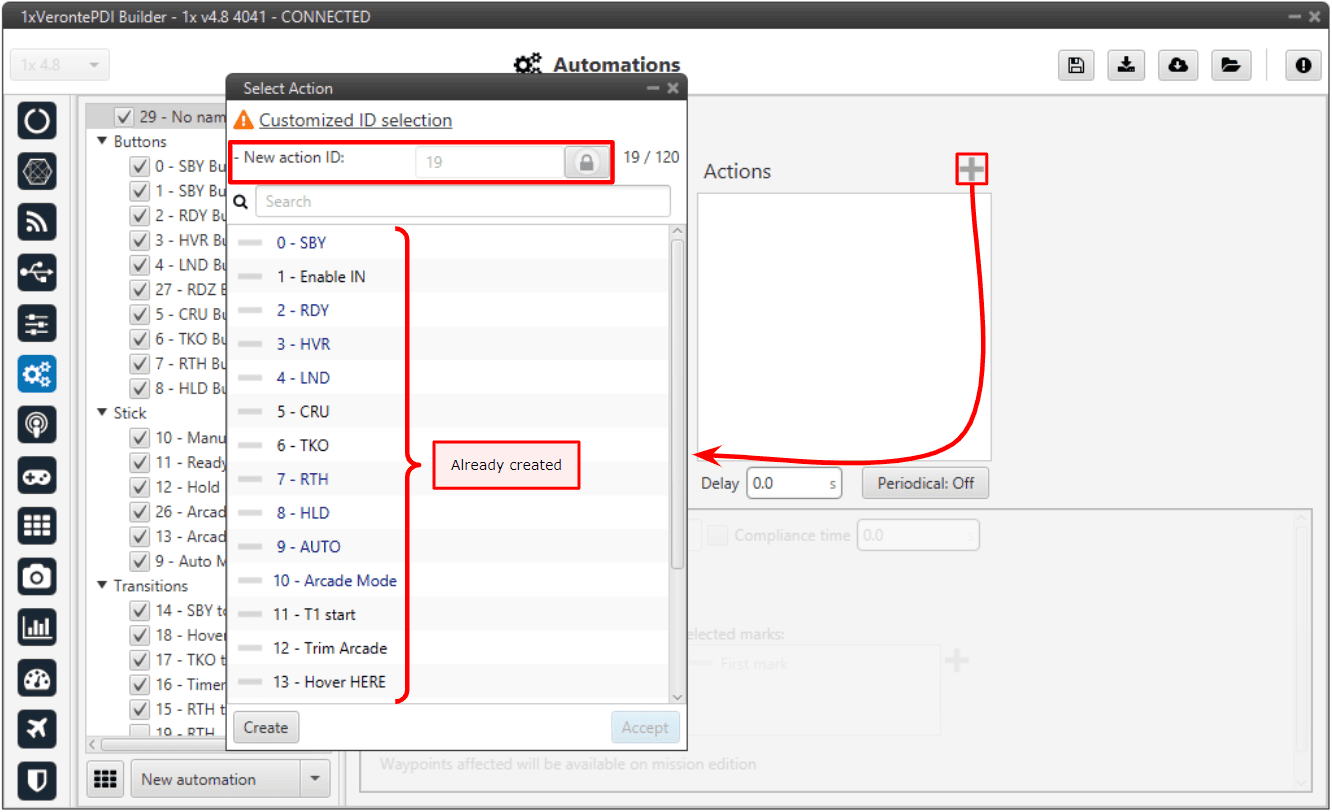
To add an action to the automation, press the ![]() icon and a new window will appear.
Here, users can choose to either select a previous action (if it exists) or Create a new one.
icon and a new window will appear.
Here, users can choose to either select a previous action (if it exists) or Create a new one.
- To add an action already created, select the desired event and click Accept.
-
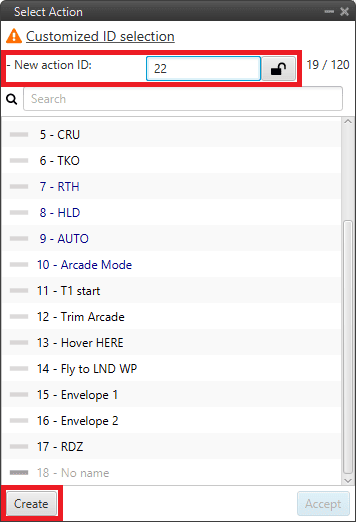
By default, when a new action is created, it is assigned with the consecutive ID.
However, if the user wants to create a new action with a specific ID, the New action ID option can be "unlocked" by holding down
until the process is fully completed (during the unlocking process this icon is "painted").
Once unlocked (when it appears as ), the user can assign the desired ID to the new action.Finally, click Create and the new action will be added.
Caution
When the user enters an ID that is already assigned to an action, the following confirmation message will appear:
Then, if the user presses 'OK', the existing action will be removed and a new action with the entered ID will be added.
When an automation is created, the following options are available:
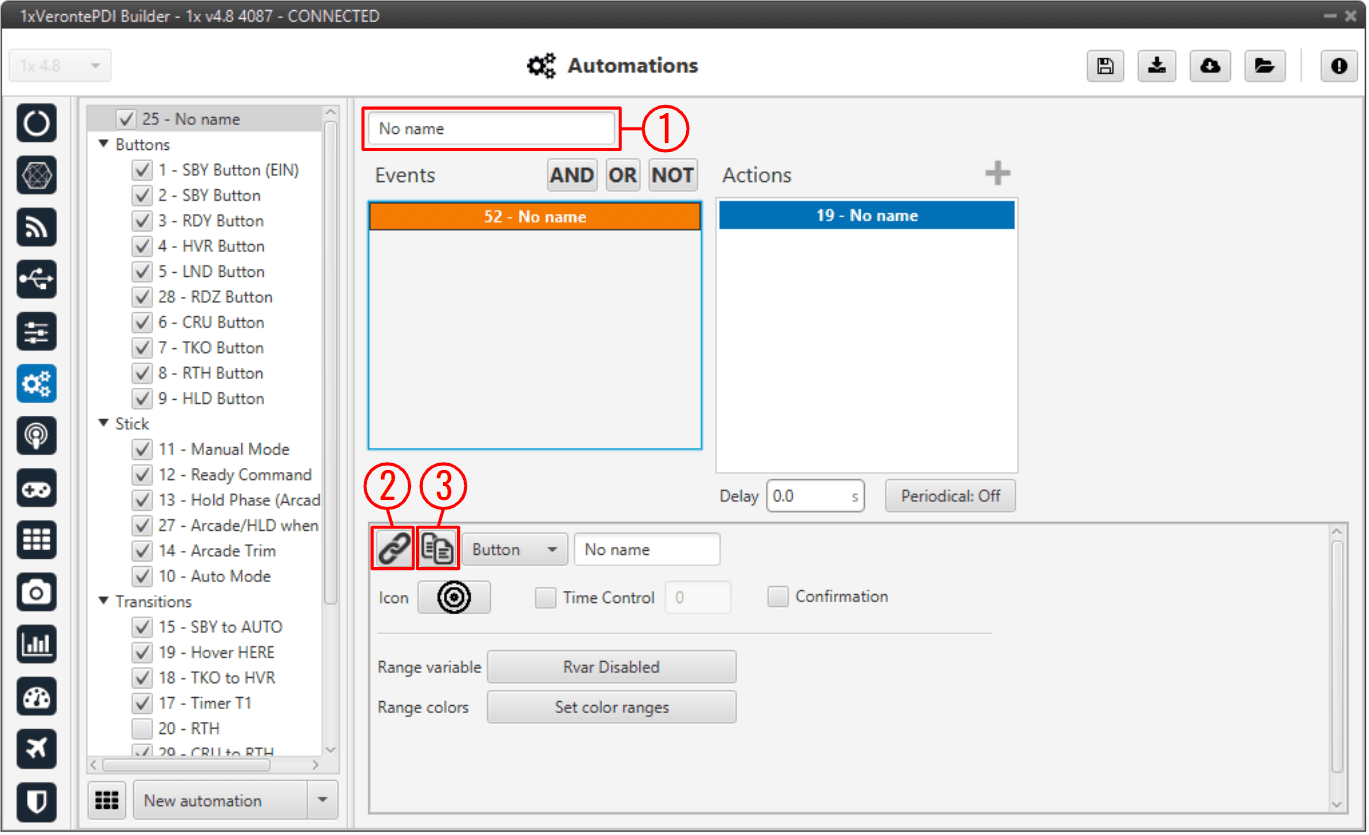
- The user can rename the automation with the name of their choice.
-
Use existing button
 : Select an action or event from the available in the system.
When modifying an action or event it will be modified in all automations where it is in use.
: Select an action or event from the available in the system.
When modifying an action or event it will be modified in all automations where it is in use. -
Clone button
 : Clone an existing action or event creating a new one with same parameters configured on the start point.
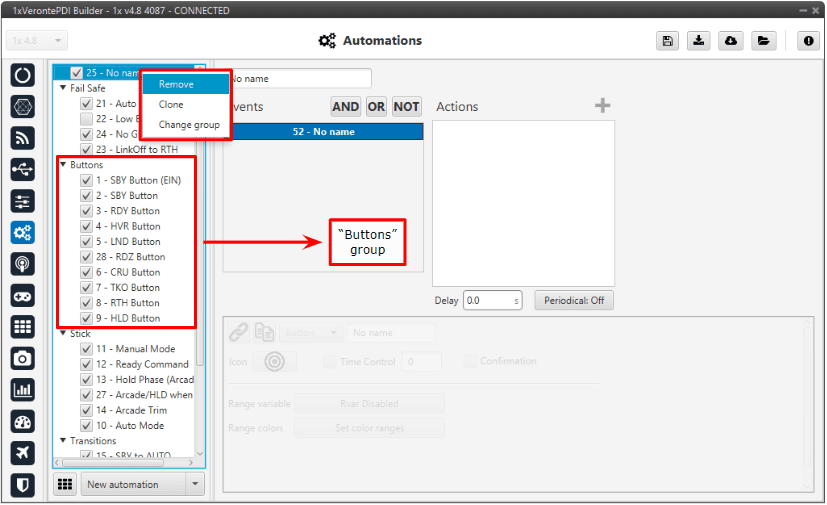
By right clicking on an automation it is possible to remove it, clone it or change it of group. When a group is created, the rest of automations that the user wants to add to the group can be done by drag and drop.
Warning
When creating a clone of one automation, changes made in the event panel will be applied to the other one and vice versa, while the actions can be different in each automation.
Other options
In the figure below, the user can see 2 additional options:
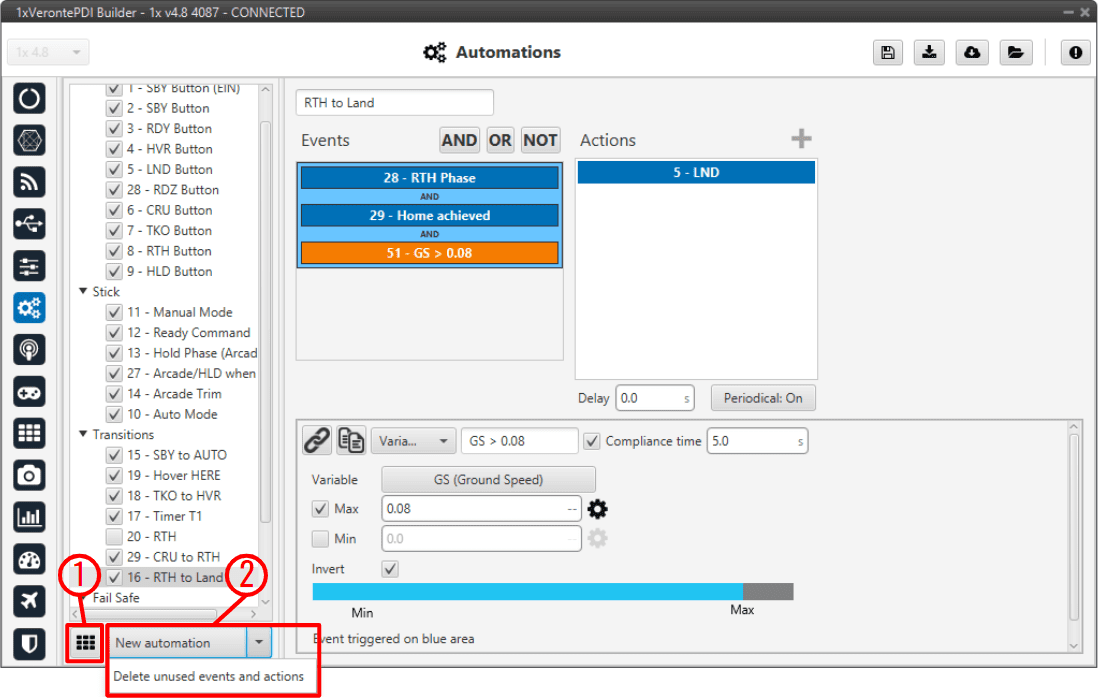
-
By clicking here, a phase transitions table will appear:
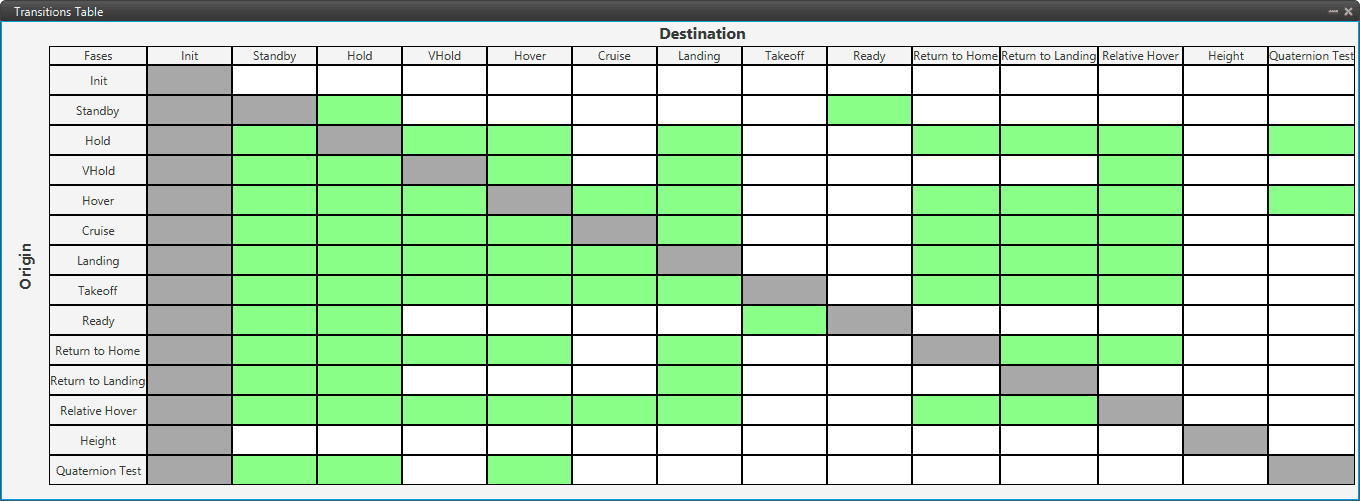
Automations menu - Phase transitions table In this table, the transitions between each phase can be visualized.
In addition, by clicking on a cell, users can see which automation (and the events) makes the transition between the two phases possible.
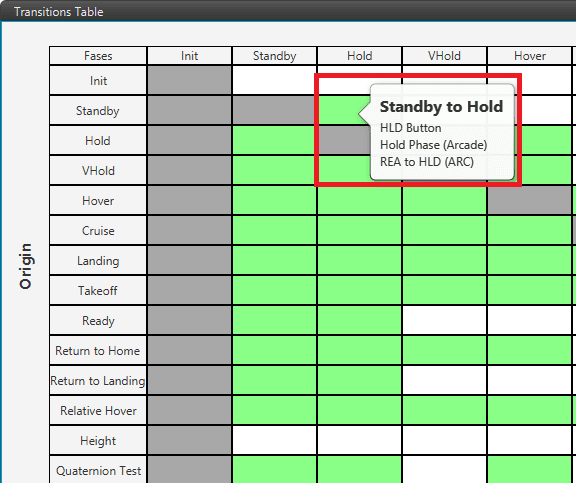
Automations menu - Automation example of phase transitions table -
Delete unused events and actions: This option deletes those created events or actions that are not in use in any automation.
© 2026 Embention. All rights reserved.